
Sailboat Propane System Safety: Lockers, Tests
Propane is a brilliant galley fuel right up until it isn’t. On a sailboat, liquefied petroleum gas (LPG) behaves in ways that punish sloppy locker builds, “close enough” fittings, and the kind of electrical shortcuts that seem fine—until a bilge pump switch clicks at the wrong moment.
This article translates ABYC A-1 and ISO 10239 intent into things you can actually inspect with a flashlight, a mirror, and a bit of skepticism. The safety model is simple: prevent leaks, detect leaks early, isolate the fuel fast, and verify system integrity with a real pressure test—not just your nose.

Photo by Kristel Hayes on Unsplash
Propane Hazards Aboard: Why LPG Rules Are Different
Propane vapor is heavier than air, with a relative vapor density around 1.5 (air = 1.0). That matters on a sailboat because leaked gas doesn’t politely rise and ventilate; it pools in low lockers, limber holes, and the bilge, then migrates with heel and airflow. I’ve watched a “minor” galley leak show up as a detector alarm in a forward cabin because the boat’s interior pathways were basically a propane subway system.
The ignition envelope is also unforgiving. Propane’s flammability range in air is roughly 2.1% (LEL) to 9.5% (UEL) by volume, meaning a surprisingly small concentration can light off. Inside that window, you don’t need a dramatic flame source; DC switches and relays, bilge pumps, fridge thermostats, stove igniters, and even static discharge can provide enough spark energy. The scary part is that many of those sources live exactly where propane tends to collect: low, enclosed spaces.
That physics is why locker rules are strict about being vapor-tight to the boat’s interior and drained overboard from the lowest point. If the locker leaks into the hull, you’ve built a bilge-filling gas reservoir that waits for a switch to click. ABYC A-1 and ISO 10239 aren’t trying to make your life difficult; they’re trying to keep leaked LPG out of the one place you absolutely don’t want it.
Finally, keep pressures straight. Your appliances run at about 11 inches water column (11 in. w.c.), which is roughly 0.40 psi after regulation. Cylinder-side pressure is much higher and varies with temperature, so don’t improvise with household parts and hope the regulator sorts it out. The safety scope here is four-part: prevention (locker and plumbing), detection (sniffer), isolation (manual valve + solenoid), and verification (bubble + manometer tests).
Locker Rules (ABYC A-1 / ISO 10239): Vapor-Tight and Drained
What “vapor-tight to the interior” means in real boats
“Vapor-tight” sounds theoretical until you start finding real boats where the propane locker shares a wire chase with the lazarette, or has a raw plywood seam that was “sealed” with a bead of tired caulk. Under ABYC A-1 and ISO 10239, the locker boundaries—top, sides, and bottom—need to be isolated from the interior so any leak stays contained. That means no unsealed penetrations, no shared voids, and no lid that can lift and leak gas into the cockpit locker.
In practice, I inspect three things first: lid fit, seams, and penetrations. The lid should close against a gasket or sealing surface that actually compresses, not just “sort of touches” on one corner. Any line leaving the locker should go through a proper gas-tight fitting/gland; sealant alone is not a structural vapor barrier, and it tends to crack the first time someone yanks a hose. If you can see daylight into the boat’s interior from the locker with a flashlight, you already know the answer.

Photo by Karla Car on Unsplash
Overboard drain routing: proving it goes to daylight
A correct LPG locker drain starts at the lowest point of the locker and runs continuously downhill to a dedicated overboard discharge. Common practice is a drain hose around 3/4 in to 1 in ID, though exact sizing depends on the standard and manufacturer guidance. The key feature isn’t diameter bravado—it’s that the drain can’t trap gas and can’t dump into the boat.
Verification is a hands-and-eyes job. Trace the hose visually (mirror helps), follow it past bulkheads, and confirm it exits to daylight overboard, not into a cockpit void, transom cavity, or another locker that eventually leaks to the bilge. Also consider seamanship: confirm the discharge remains above waterline at expected heel angles, because a drain that goes underwater on starboard tack is a different kind of problem. If you’re planning a passage, a quick route-and-duration plan using plan your route using a sea distance calculator helps you think realistically about heel, weather windows, and how often the galley will be used.

Photo by Evan Smogor on Unsplash
Cylinder securing, penetrations, and corrosion control
Cylinders must be upright and secured so they can’t chafe through fittings or snap a valve in a knockdown. I like robust straps with chafe protection at contact points, not a single bungee that looks confident until it doesn’t. Penetrations should be limited: one gas outlet fitting, maybe solenoid wiring through a sealed gland, and that’s about it.
Regulators and solenoids should be mounted where they’re protected from damage and salt spray, and oriented per the manufacturer’s vent instructions. Salt corrosion doesn’t care about your schedule; it shows up right when you’re tired and hungry. If your locker is in the stern, consider how often following seas soak that area, then decide whether component placement and shielding are truly “marine,” not just “installed on a marine vessel.”
Regulators, Gauges, and Hose vs Copper: Choosing Marine Parts
Two-stage regulation and test ports at 11 in. w.c.
Most sailboat propane systems use a two-stage regulator to deliver stable appliance pressure around 11 in. w.c. (≈0.40 psi). Stability matters because burners and flame-failure devices behave badly when pressure wanders, and DIY regulator swaps often introduce intermittent problems that look like “bad stove luck.” Use a regulator intended for marine LPG service, mounted to minimize spray exposure and impact damage.
If you want a system you can actually maintain, include a proper test port so you can connect a manometer without inventing new failure points. A basic test port kit runs about $15–$60, and it pays for itself the first time you don’t have to loosen fittings to test. “I crack a fitting and listen” is not a test method; it’s a hobby.

Photo by Markos Mant on Unsplash
Distribution materials: copper tubing, short hose sections, and fittings
Long rubber hose runs through the boat are one of the most common DIY failures. Hose permeates, chafes, gets cooked near ovens, and hides joints where you can’t inspect them. Best practice under ABYC-style installations is metallic tubing runs—commonly 3/8 in OD annealed copper (verify sizing against appliance load and run length)—with minimal hose length at appliance connection points.
For connections, think double-flare fittings with proper support and strain relief. Avoid casual mixing of fitting standards, and be wary of compression fittings in LPG service unless specifically approved for the application. Also, if you ever see worm-gear hose clamps on pressurized LPG connections, treat that as a red flag—not a “maybe it’s fine” situation.
Fitting geometry: double flare, strain relief, and gimbal movement
The galley is where motion meets heat, and that’s where poor geometry breaks systems. Your stove gimbal should swing through its full travel without pulling on a hose, kinking copper, or loading a fitting sideways. Check this with the boat heeled on the dock if you can, or at least simulate it with the gimbal stops removed briefly and controlled by hand.
Support copper tubing so vibration doesn’t work-harden it into fatigue cracks. Pass bulkheads with grommets or proper chafe guards, and clamp runs so they don’t fret against fiberglass edges. If your system requires moving parts, use short, approved flexible connections where intended—then keep them short enough that you can inspect them without becoming a contortionist.
Solenoid Shutoff Strategy: Location, Wiring, and Failure Modes
Where the solenoid belongs and how it integrates with manual shutoffs
A marine propane solenoid valve is typically normally-closed, meaning it shuts when power is removed. Its job is to limit leak duration and give you a remote “stop the gas now” option when something smells wrong or a pan fire starts. Under ABYC A-1 intent, you still keep a manual cylinder valve as the primary shutoff; the solenoid is an additional control, not a replacement for seamanship.
Placement is straightforward: as close to the cylinder/regulator as practical, usually inside the locker, protected from physical damage and corrosion. If it’s installed outside the locker, you must be very sure you haven’t created a leak source in an uncontained space. Also remember that solenoids and connections live a hard life in salt air; corrosion at terminals is a common failure mode.

Photo by Ian Keefe on Unsplash
ABYC E-11 wiring: fuse/breaker, conductors, and switching logic
Most solenoids are 12 VDC and draw roughly 0.3–1.0 A when energized, depending on coil design. That sounds small until you run thin wire 25 feet to a galley switch and wonder why the valve chatters at low voltage. Under ABYC E-11 principles, size conductors for voltage drop and protect the circuit with appropriate overcurrent protection—commonly 2–5 A for the solenoid circuit, depending on device requirements and wire length.
Use a labeled breaker, a proper control switch (often in the galley and/or nav station), and clean wiring routes with chafe protection. In spaces where LPG could collect, favor ignition-protected practices and avoid creating spark sources in the wrong compartments. If your detector system can interlock with the solenoid, confirm the logic: alarm should trigger audible warning and—if configured—de-energize the valve.
Normal operations workflow underway and at anchor
A safe workflow is boring, which is the point. Open the cylinder valve only when you intend to cook, energize the solenoid, light the burner, and confirm flame stability. When you’re done: shut off burners, shut off solenoid, and close the cylinder valve—especially overnight or when leaving the boat.
Write that sequence on a label near the stove. Humans forget things, particularly when seas are up and coffee is needed yesterday. If you plan cooking cycles for a passage, pair your cooking schedule with realistic trip duration; check the nautical miles for your planned route is handy for estimating days underway, which translates directly to how often your LPG system will be active and therefore how often you should be checking it.
Tip (captain’s reality check): If the solenoid is your only shutoff habit, you’re one stuck valve away from a bad day. Close the cylinder when you’re not cooking.
Leak Testing Done Right: Bubble, Sniff, and Manometer Drop Tests
Bubble testing: what it finds—and what it can miss
Bubble solution is good at finding leaks at accessible joints because it shows you exactly where gas is escaping. It’s quick, cheap, and you should do it after any service, fitting change, or suspicious smell. Use a purpose-made leak detection solution or a mild soap-water mix, and apply it to flare joints, valve connections, and accessible manifolds while the system is pressurized at appliance pressure.
But bubble testing has blind spots. It can miss leaks at valve stem packing, inside regulator bodies, at regulator vents/diaphragms, or anywhere you simply can’t reach. It also won’t tell you if the system holds pressure over time, which is how you catch slow leaks that only show up after the boat heats up in the afternoon.
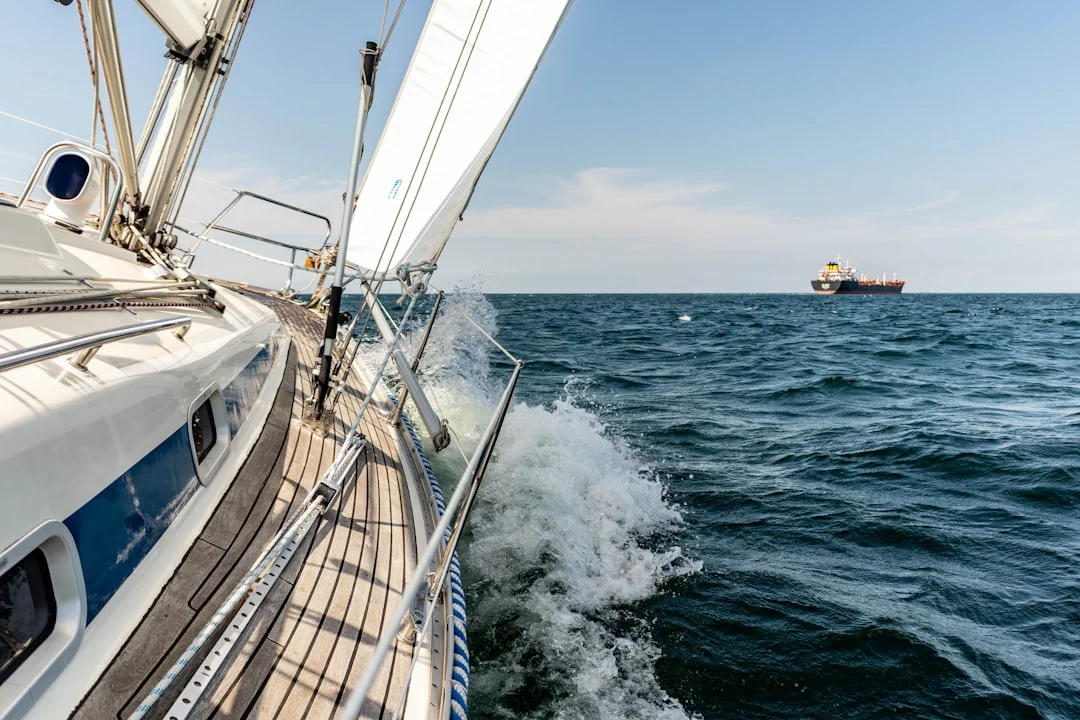
Photo by Michael Held on Unsplash
Manometer pressure-drop test at 11 in. w.c. (step-by-step)
The manometer test is the workhorse for verifying system integrity at 11 in. w.c. A basic U-tube manometer costs roughly $25–$250, and it’s one of the few tools that replaces guesswork with numbers. Here’s a practical, repeatable method you can log:
- Ensure all burners are off; close appliance shutoff valves if installed.
- Open cylinder valve, energize solenoid, and pressurize system to 11 in. w.c. via the regulator.
- Allow stabilization for a minute or two; temperature and regulator behavior can cause initial drift.
- Shut the cylinder valve (and/or de-energize solenoid) to isolate supply.
- Observe the manometer for 3–10 minutes for a quick check (common field practice); hold longer if troubleshooting.
A practical pass/fail rule for owners is simple: after stabilization, any measurable pressure drop indicates a leak that must be located. Don’t negotiate with the numbers. Your manometer doesn’t care about your weekend plans.
Interpreting pressure decay: isolating appliance valves vs line leaks
Fast drop usually means a significant leak or an open valve somewhere. Slow drop can be a tiny flare leak, a tired valve seat, or an appliance valve that doesn’t seal perfectly. To isolate, repeat the test with appliance shutoff valves closed; if it holds, your leak is downstream in the appliance or its connector, not in the locker-to-galley line.
Be mindful of false readings. Temperature changes can shift pressure slightly, especially if you test in direct sun, and some regulators “settle” after isolation. That’s why the stabilization step matters, and why documenting time, temperature, and readings helps you compare tests across seasons. If you’re outfitting for a longer trip, use your planned route duration—again, Breezada’s sea distance calculator is useful here—to decide whether you need a quick pre-departure test routine or a deeper annual inspection cadence.
LPG Detectors (“Sniffers”): Sensor Placement, Setpoints, and Upkeep
Marine LPG detectors are early-warning devices, not magical absolution for a bad locker. Many units alarm at roughly 20% of LEL (product-dependent), which means they’re designed to alert you well before propane reaches the 2.1% LEL ignition threshold. In a good system, that buys you time to shut down, ventilate, and investigate before the boat becomes a science experiment.
Placement matters more than people think. Mount the sensor low in the cabin near sole level, because propane settles, but don’t mount it down in the bilge where water and grime kill sensors. Typical installations put a sensor near the galley and, on boats with separated bilge spaces or enclosed compartments, add a second sensor where gas could migrate. Expect to spend $120–$350 for a detector/control kit, plus $35–$90 for replacement sensor elements on models that use them.
False alarms are common and usually explainable. Aerosols, solvents, some cleaners, and even certain cooking fumes can trigger combustible gas sensors, and voltage noise or poor grounding can cause intermittent behavior. Missed alarms happen too—usually from sensor aging, poor airflow pathways, or owners who silence nuisance alarms until the unit becomes decorative.
Maintenance is simple but must be scheduled. Test the alarm function regularly per the manufacturer’s instructions, keep the sensor area clean and dry, and replace sensor elements at the specified interval. Also verify system logic: if your detector is wired to shut off the solenoid, confirm that an alarm actually de-energizes the valve and sounds a proper audible warning.
Common Installation Mistakes: An ABYC-Style Inspection Checklist
Locker and drain errors that route gas into the boat
Start at the cylinder and work outward. If the locker isn’t vapor-tight to the interior, nothing else you do is a “system”—it’s a collection of parts with optimism holding them together. Check lid seal compression, seam integrity, and every penetration for a proper gas-tight gland or fitting.
Drain mistakes are the big one. Verify the drain originates at the locker’s lowest point, runs continuously downhill, and discharges overboard to daylight—not into a cockpit locker void, transom cavity, or lazarette that shares pathways to the bilge. If you can’t trace it visually, you don’t know where it goes. Confirm the discharge remains above waterline at likely heel angles, because a submerged drain invites water back into the locker and corrosion into your fittings.
Plumbing and fitting mistakes that create hidden leaks
Follow the line: regulator, solenoid, shutoff, tubing run, appliance connection. Look for green corrosion at brass/copper joints, chafe points, unsupported tubing, and “repairs” that involve tape where tape has no business being. PTFE tape on flare seats is a classic; flare fittings seal on the flare, not on the threads, and tape can actually prevent proper metal-to-metal sealing.
Avoid mixed standards and mystery adapters. Copper should be properly flared (often double flare), tightened correctly (not “gorilla tight”), and supported so it doesn’t vibrate. If you see long lengths of rubber hose running through lockers and behind joinery, treat it as suspect until proven otherwise, especially if it passes near heat sources or sharp edges.
Galley appliance installation errors: heat, motion, and access
Stoves move, boats heel, and people grab whatever’s handy when they stumble—often the stove. Check gimbal travel so it swings freely without pulling on the hose or stressing a copper tail. Make sure the appliance shutoff valve is accessible without unloading the entire pantry, because emergencies rarely occur when the area is tidy.
If the stove has flame-failure devices, confirm they work as intended, and don’t bypass them because they’re “annoying.” Annoying safety gear is often the last thing between a small flare-up and a real incident. And if you can’t inspect key joints without dismantling cabinetry, plan changes; inaccessible systems don’t get maintained, and unmaintained propane systems eventually get exciting.
Here’s a practical ABYC-style checklist you can run in 20–30 minutes:
- Locker vapor-tightness: lid gasket, seams, penetrations sealed with proper glands
- Drain: lowest point, continuous downhill, exits overboard, not into any void
- Cylinder: upright, strapped, chafe protected, valve accessible
- Regulator/solenoid: marine-rated, protected from spray, wiring through sealed gland
- Plumbing: mostly copper tubing, short approved flex at appliance, supported and chafe-protected
- Fittings: flare-type joints, no worm-gear clamps on pressurized LPG, no tape on flare seats
- Galley: gimbal clearance, hose strain relief, shutoff accessibility
- Testing: bubble test after work, manometer hold with no measurable drop
Decision rule: if you find a locker drain that doesn’t go overboard, or a locker that’s clearly not sealed from the interior, stop using the system until corrected. That’s not drama; that’s seamanship.
Upgrade Planning: Costs, Capacity, and Cruising Use Cases
Budget tiers: minimum safe vs cruising-ready vs refit-level
Propane upgrades are easiest when you treat them like risk reduction rather than gadget shopping. Minimum safe usually means fixing the locker integrity and drain, adding a proper solenoid, and installing a detector you’ll actually maintain. Cruising-ready adds a test port/manometer routine, better line support, labeling, and often a partial re-tube where old hose runs were “temporarily” installed sometime around the last century.
Costs vary widely based on access and how much of the boat must be dismantled to route copper properly. As a planning baseline, these ranges are realistic for common parts and services:
| Item | Typical cost (USD) | Notes |
|---|---|---|
| Marine propane solenoid valve (12 VDC, normally closed) | $60–$180 | Coil draw often 0.3–1.0 A |
| Marine two-stage regulator | $35–$120 | Set for 11 in. w.c. |
| Test port / gauge kit | $15–$60 | Makes repeat testing repeatable |
| U-tube or digital manometer (0–20 in. w.c.) | $25–$250 | U-tube is simple and accurate |
| LPG detector/control kit | $120–$350 | Many alarm near ~20% LEL |
| Professional inspection / leak test service | $150–$450 | Money well spent on older boats |
| Full re-plumb (materials + labor) | $600–$2,500 | Access drives labor, not parts |
Fuel planning: cylinder sizes, burn rates, and spares
Cruising decisions include capacity, not just compliance. Common cylinders are 10 lb (~2.4 gal), 20 lb (~4.7 gal), and 30 lb (~7.1 gal). Propane contains about 91,500 BTU/gal, so a 20 lb cylinder holds roughly 430,000 BTU of energy.
Typical marine burners run around 7,000–10,000 BTU/hr each, and ovens often 10,000–16,000 BTU/hr. If you run two burners at 8,000 BTU/hr each (about 16,000 BTU/hr total), a full 20 lb cylinder gives about 26–27 hours of burn time (430,000 / 16,000 ≈ 26.9), before reserves and real-world losses. That’s plenty for weekend sailing, but it gets tight on longer legs if you cook often.
For passage planning, estimate LPG days by combining passage duration with your cooking routine. If you’re using Breezada’s sea distance calculator to estimate nautical miles and time underway, you can translate that into meals cooked aboard, which translates into realistic cylinder and spare strategy. Document everything: a simple schematic, labels at valves and breakers, a parts list, and a dated manometer test log; the future you (or the next owner) will be less annoyed.
Frequently Asked Questions
For an 11 in. w.c. sailboat propane system, how do you connect a U-tube manometer to a test port and what stabilization steps prevent false pressure-drop readings?
Connect the manometer to a dedicated low-pressure test port downstream of the regulator where it reads 11 in. w.c. appliance pressure, not cylinder-side pressure. Pressurize the system with the cylinder open and solenoid energized, then wait 1–2 minutes for the regulator and temperature to stabilize before isolating the supply by closing the cylinder valve (and/or switching off the solenoid). After stabilization and isolation, any measurable drop over a 3–10 minute quick-check interval is reason to find and fix a leak.
What voltage-drop limit and breaker/fuse sizing approach should be used for a 12 VDC marine propane solenoid drawing 0.3–1.0 A under ABYC E-11 practices (long run to galley switch)?
Under ABYC E-11 concepts, treat the solenoid as a continuous-duty load when energized and size wire to keep voltage drop low enough that the valve won’t chatter or fail to open reliably on a 12 VDC system. Most installations protect the circuit with a 2–5 A fuse or breaker (per device requirements and conductor ampacity), placed to protect the wiring run. If your solenoid is at the stern and the control is at the galley, upsizing the conductor is often cheaper than troubleshooting intermittent undervoltage behavior later.
How do you verify an LPG locker drain truly discharges overboard at all expected heel angles, and what installation routing errors commonly dump propane into a cockpit void instead?
Trace the drain hose from the locker’s lowest point to its thru-hull discharge, visually if possible, using a mirror or borescope if access is poor. Confirm the outlet is to daylight overboard, and consider heel by checking whether the discharge remains above waterline at the angles you realistically sail (not just tied to the dock). Common errors include routing the drain into a cockpit locker void, transom cavity, or lazarette that has pathways into the bilge, and creating sags that trap liquid/water and block gas flow.
When bubble testing flare fittings, what leak paths can be missed (valve stem packing, regulator vent/diaphragm, appliance manifold) and how should troubleshooting proceed?
Bubble testing can miss leaks at valve stems, inside regulator bodies, at regulator vents/diaphragms, and within appliance manifolds where solution can’t be applied or observed. If a manometer test shows a pressure drop but bubbles don’t reveal it, isolate sections by closing appliance shutoffs (or disconnecting downstream loads safely) and retesting to determine whether the leak is in the distribution line or the appliance. Treat any regulator vent suspicion as a replace-and-retest scenario; regulators are not the place for heroic rebuilding experiments aboard.
Where should an LPG detector sensor be mounted relative to the cabin sole and bilge, and how do cleaners/aerosols and sensor aging affect alarms near a ~20% LEL setpoint?
Mount the sensor near sole level where propane would collect first, but not down in the bilge where water, oil, and corrosion can destroy it. Many detectors alarm around ~20% LEL (unit-dependent), so aerosols, solvents, and certain cleaners can cause nuisance alarms, while sensor aging can reduce sensitivity and create missed alarms. Follow the manufacturer’s replacement interval, test the alarm regularly, and verify the alarm output and any solenoid shutoff logic actually work as installed.
Action list to take today: inspect the locker and confirm it’s vapor-tight, trace the drain to daylight overboard, add a test port if you don’t have one, run a documented 11 in. w.c. manometer hold test, and replace detector sensors on schedule. If you find a non-overboard drain or a locker that leaks to the interior, stop using the system until it’s corrected—your boat has enough ways to surprise you already.
About the Author
Related Articles
How to Stop a Boat From Rocking at Anchor Overnight
Learn how to stop a boat from rocking at anchor overnight with scope, snubbers, riding sails, and better alarm settings—sleep better tonight.
By Breezada Team

Bahamian Moor Guide: Tandem Anchors & Snubbers
Learn bahamian moor setup, tandem anchoring, and proper snubbers for crowded anchorages. Get step-by-step tips—read and rig it right.
By Breezada Team
Best Radar Reflector for Sailboat: Active vs Passive
Compare active vs passive radar reflectors for sailboats, mounting tips, and real-world results. Choose the best radar reflector—read now.
By Breezada Team

Sail Trim for Beginners: Main + Jib Cruising Guide
Learn sail trim for beginners with simple main + jib settings, telltales, twist, traveler & vang. Get quick wind-based trims—read now.
By Breezada Team