
Best Dinghy Setup for Cruising Sailboats (RIB vs Inflatable, Outboards, Davits, and Real Load Math)
A cruising dinghy isn’t an accessory. It’s your daily driver, your grocery truck, your escape pod, and—on a bad day—the only thing between you and a long swim with a backpack full of regret.
The best dinghy for a cruising sailboat is almost never chosen by brand loyalty or a dockside argument. It’s chosen by math and habits: who rides in it, how far you commute, what your stern can lift, and how much UV you’re willing to fight. Treat it as an integrated system—dinghy + outboard + fuel + lifting + storage + security—and you’ll spend more time ashore having fun, and less time fixing leaks with a headlamp.

Photo by Ludomił Sawicki on Unsplash
Choosing the Best Dinghy Size for a Cruising Sailboat
Most cruising rigs end up in the 9–11 ft (2.7–3.4 m) dinghy range because that’s where capacity, handling, and storage stop arguing quite so loudly. A 10 ft (3.0 m) dinghy is the frequent “do-most-things” size: big enough for two adults and real cargo, small enough that davits and decks can still tolerate it. If you’ve ever tried balancing a week of groceries on your lap in an 8-footer, you already know why this size cluster exists.
Length, beam, and tube diameter: why 10 ft is the sweet spot
Length buys you two things: waterline for better tracking and room to keep weight centered. On a typical 10 ft inflatable/RIB, you can seat 2–3 adults without turning the bow into a submarine. Tube diameter matters just as much; ~16–18 in (40–46 cm) tubes keep roll-ups light, while ~18–20 in (46–51 cm) tubes on many RIBs add buoyancy and a noticeably drier ride in chop.
Beam and internal floor width decide whether the dinghy feels stable at rest or like a floating yoga mat. Bigger tubes reduce interior space, but increase reserve buoyancy when you stand to lift an anchor or wrestle a cooler. For cruising, I’d rather have slightly less floor width and more tube volume than the other way around.
Capacity plates vs real cruising loads (people + water + groceries)
Capacity labels are helpful, but they’re not your trim limit. A realistic all-up scenario looks like this: two adults at 170 lb each (340 lb), one child or guest at 90 lb (430 lb total), plus 2 jerry cans at 40 lb each (510 lb), plus groceries/gear at 40–60 lb (550–570 lb). Now add a 6 hp outboard at ~55–60 lb (605–630 lb), and you’re already flirting with the kind of “capacity” that turns into wet feet and lousy steering.
Your sanity improves when you estimate load every time you shop for a dinghy. Add up (people weight) + (engine) + (fuel) + (gear) and then ask one more question: where will that weight sit? A dinghy can be “within capacity” and still handle poorly if the stern squats and the bow slaps.
Chambers, freeboard, and “dry ride” design cues
Cruising inflatables typically have 3–5 chambers, and I prefer 4–5 for redundancy. Valves fail, seams can let go, and punctures are rarely polite enough to happen next to the dock. With more chambers, a single failure is usually an inconvenience instead of a crisis, and that matters when you’re a mile from the boat in a building breeze.
Look for practical “dry ride” cues: higher bow sheer, generous tube diameter forward, and enough freeboard that chop doesn’t constantly board you. A slightly more rockered bow and good spray rails on a RIB hull can reduce pounding and keep your gear drier. You won’t eliminate spray, but you can avoid the kind that soaks your phone through a “waterproof” case.
Practical tip: If you can only do one test before buying, load the dinghy with 400–500 lb (180–225 kg) and run it into short chop. If everyone stays reasonably dry and the bow doesn’t hunt, you’re close.

Photo by Jay Alexander on Unsplash
Inflatable vs RIB for Cruising: Performance and Weight
Choosing between a roll-up inflatable and a RIB is mostly choosing where you want to pay—upfront weight, storage complexity, or daily performance. Roll-ups win on portability and simplicity; RIBs win on tracking, handling in chop, and carrying loads without feeling like a pool toy. For cruising, the “best RIB dinghy for a sailboat” is often the one your stern can lift safely and your crew can handle without injuries.
Roll-up floors (slat/air/aluminum panel) vs rigid hull behavior
A 10 ft roll-up slat-floor typically weighs ~55–85 lb (25–39 kg) hull-only, which is why they remain popular for smaller boats and foredeck stowage. Air-deck floors add comfort and packability, but they’re less rigid under power and can feel squirrelly with 6–10 hp. Aluminum panel floors are tough and track better, but they’re heavier and more annoying to assemble when it’s raining sideways.
RIBs behave differently because the hull is rigid and shaped. Typical 10 ft aluminum RIB hull-only weight runs ~95–135 lb (43–61 kg), while fiberglass RIBs often land ~115–160 lb (52–73 kg). That extra mass buys you momentum through chop and less flex under throttle, which directly affects how early the dinghy will climb onto plane.
Chop, tracking, and beaching: what changes offshore and in trade winds
In steady trade-wind chop, a roll-up can pound and wander, especially when loaded aft with an outboard and fuel. A RIB’s keel and hull form track straighter, which matters when you’re punching across a harbor at 12–18 knots and trying not to get blown sideways into a mooring field. Even at displacement speeds, the rigid hull tends to “go where you point it” with less oar correction.
Beaching is the other side of the coin. Roll-ups are forgiving on sand and coral rubble if you’re careful, while fiberglass RIB gelcoat can chip and aluminum RIB bottoms can grind if you drag them like a cooler. The best cruising practice is simple: kill the engine early, tilt up, hop out in knee-deep water, and pull by the painter—your skeg will thank you.
Repairability and failure modes: seams, floors, corrosion, gelcoat
Roll-ups fail in predictable ways: floor wear, transom flex, and seam/adhesive issues as they age. Aluminum RIBs can develop corrosion problems if dissimilar metals aren’t isolated and if salt stays trapped under fittings; inspect fasteners and consider proper isolation washers. Fiberglass RIBs can crack gelcoat from hard beaching or davit knocks, and those cracks love to become future blisters if ignored.
There’s also “hidden weight,” which sneaks up on davit math and human backs. Count the oars, pump, floorboards, fuel tank, small anchor, painter/bridle, chafe gear, and even the inevitable bag of random shackles. It’s easy to add 20–40 lb (9–18 kg) without noticing until you’re trying to hoist it at dusk.
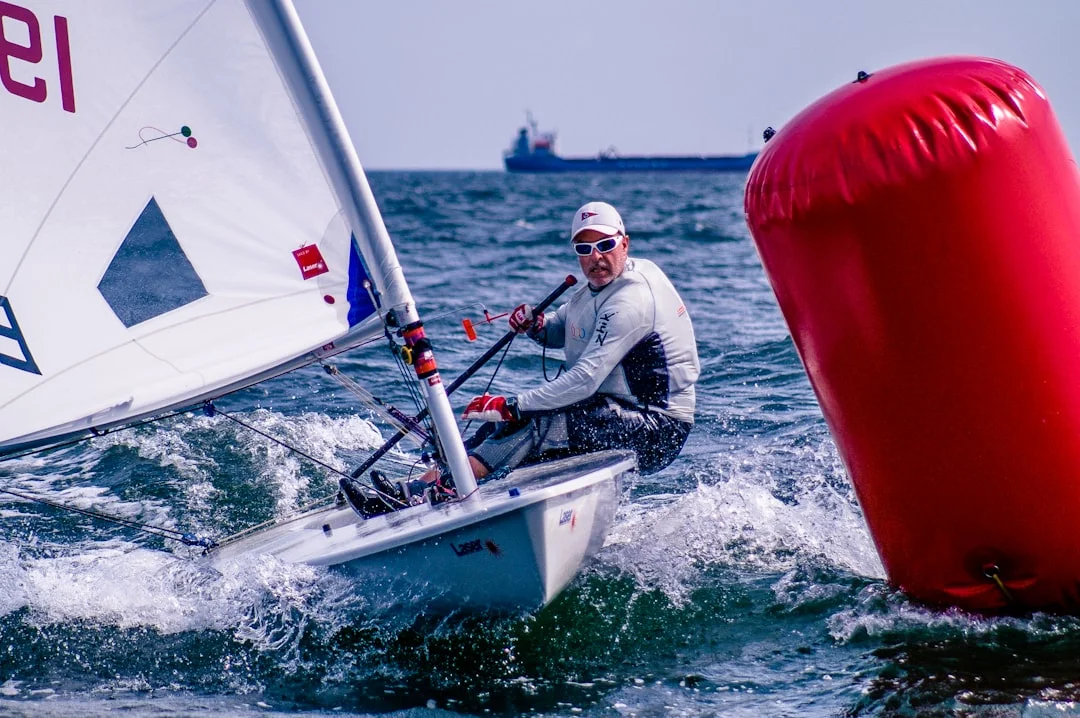
Photo by Ludomił Sawicki on Unsplash
PVC vs Hypalon/CSM Tubes: UV, Repairs, and Costs
Tube material is where cruising reality shows up. PVC can be a smart value, especially in temperate climates and shorter ownership cycles. Hypalon/CSM costs more because it generally tolerates heat, UV, and long-term bonding better—exactly the things that punish dinghies left inflated in the tropics.
When you’re comparing options, look for ISO 6185 compliance in the manufacturer’s documentation. It’s not a magic shield, but it signals the boat was built and tested to a known inflatable standard rather than marketing poetry.
Fabric weight, heat tolerance, and UV reality in the tropics
Typical PVC tube fabric is ~850–1100 g/m², while Hypalon/CSM is often ~1100–1670 g/m² depending on the model line. Fabric weight isn’t the whole story, but it’s a useful hint about abrasion resistance and puncture tolerance. In the real world, tropical sun and high deck temperatures are what shorten tube life fastest, especially when the dinghy lives on davits.
If you cruise where mid-day tube temps feel like a griddle, PVC’s adhesive and coatings can age quicker. Covers, shading, and rinsing help, but they don’t change the physics. If you’ll spend multiple seasons between 20°N and 20°S, tube material becomes less about bargain hunting and more about reducing downtime.
Adhesives, re-gluing, valve replacement, and patch strategy
Field repairs are where Hypalon/CSM tends to be more forgiving, particularly when you can’t control humidity and temperature. Cure conditions matter: many adhesives want stable temps and dry air, which is a tall order during rainy season. A smart cruiser carries two patch systems (a proper two-part adhesive and an emergency peel-and-stick) and practices on scrap before trusting it offshore.
Valve replacement is common on aging dinghies, and it’s usually a manageable job if you can access the backer and have the right wrench. Plan on inspecting seams and valves every 3–6 months in hard sun, and address slow leaks early before you start over-inflating and stressing the fabric.
Lifecycle cost and resale: when premium tubes pay back
PVC dinghies can be excellent for 3–8 years depending on UV exposure and care, while Hypalon/CSM often stretches longer in harsh climates with proper maintenance. The resale market tends to reward Hypalon/CSM, especially in tropical cruising hubs where buyers have seen too many sun-cooked PVC tubes. If you expect long ownership and heavy UV, the premium can come back through fewer repairs and a better sale price.
Budget honestly: if a $2,500 PVC roll-up needs major re-gluing or replacement sooner than expected, it wasn’t “cheap,” it was just paid in installments. Conversely, if you cruise summers in New England and store indoors, a good PVC boat can be the most rational choice on the dock.
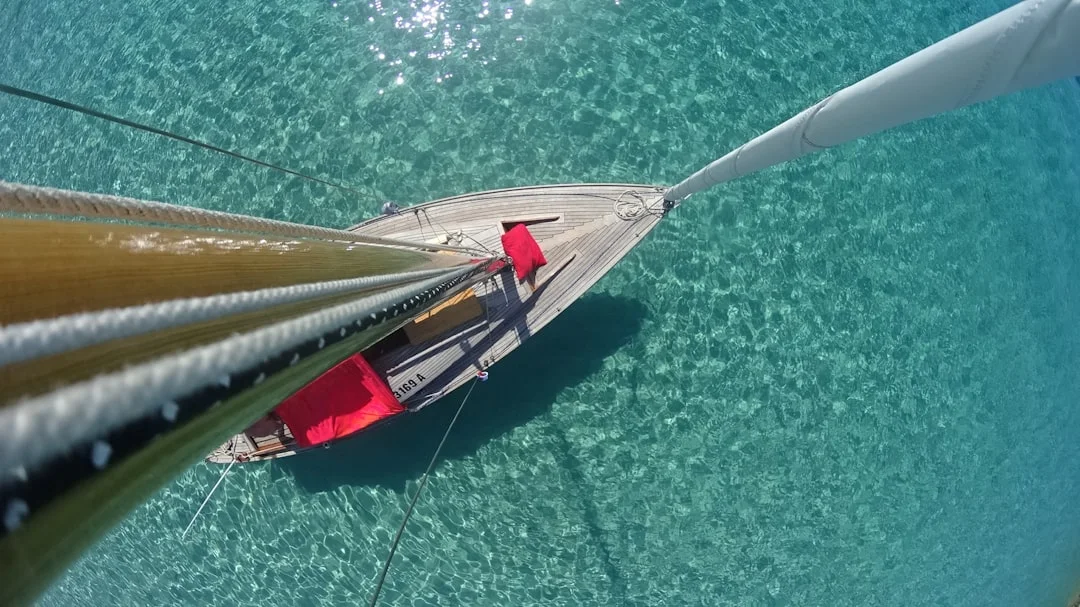
Photo by Franz Schmitt on Unsplash
Outboard Selection: HP, Shaft Length, Gas vs Electric
Outboards are where dinghy setups either become effortless—or a weekly workout. Horsepower matters, but weight and handling matter more on a cruising sailboat. If you can’t safely move the engine from rail mount to dinghy in a swell, you don’t own an outboard; you own a future back injury.
ABYC guidance is worth following here, especially when you start wiring chargers or storing fuel. For electrical installations and overcurrent protection, ABYC E-11 is the baseline language; for lithium charging and battery systems, look to ABYC A-31 and TE-13. For gasoline handling and portable tank practices, ABYC H-24 is the reference point.
Horsepower matching by mission (displacement vs planing)
For minimalist tender duty in protected water, 2.3–3.5 hp can be enough, and it’s hard to beat for simplicity. A 6 hp four-stroke is the common all-around choice because it can push against moderate current and still be portable at ~55–60 lb (25–27 kg). If you want consistent planing with two adults plus gear in a 10–11 ft RIB, 8–10 hp is often the realistic range, but hull design and total load decide the outcome.
Planing isn’t a bragging right; it’s a safety tool when weather builds and you need to shorten exposure time. If your anchorage routinely involves 1.5–3.0 nmi runs to town, underpowered means longer wet rides and more fuel burned at high throttle. Use a tool to calculate the distance between ports to measure those real dinghy commutes, not the optimistic guesses we all tell ourselves at anchor.
Weight, ergonomics, and the “can you move it safely?” test
Outboard weights are brutally honest. Typical 3.5–4 hp four-strokes run ~38–45 lb (17–20 kg), which many sailors can handle one-handed with care. A 6 hp at ~55–60 lb is manageable for many, but it’s the tipping point where awkward angles and wet decks start causing mistakes.
A 9.9 hp can be ~80–110 lb (36–50 kg), and now you’re in “two hands, clear plan, no drama” territory. If you’re singlehanding, consider whether you can lift that motor from a stern rail mount to the dinghy without twisting, reaching, or rushing. If the answer is “maybe,” pick a lighter motor and accept slower speeds, or invest in a proper hoist geometry.
Short vs long shaft: measuring transom height and cavitation clues
Most dinghy transoms are set up for short shaft (15 in / 381 mm), but many RIBs specify long shaft (20 in / 508 mm). Don’t guess—measure. Mount the outboard and check where the cavitation plate sits relative to the bottom of the hull; you generally want it roughly level with, or slightly below, the hull bottom when the boat is at rest.
Wrong shaft length shows up fast in chop. Too short and you’ll ventilate: RPM climbs, thrust drops, and you go nowhere while sounding busy. Too long and you’ll drag gear in the water, reduce efficiency, and make reverse handling worse around docks.
Electric outboards: charging, battery safety, and range planning
Electric outboards can be great for quiet, short runs, but cruisers must plan charging like grown-ups. A 1–3 kW electric package (roughly “3–6 hp class” depending on prop and system) often costs $2,500–$7,500 with battery, and battery weight can rival a small gas motor. Range drops hard in chop, headwinds, and with overloaded dinghies, so check the nautical miles for your planned route and plan a conservative reserve.
Installation matters: use marine-grade conductors, proper overcurrent protection near the source, and secure connections protected from spray per ABYC E-11 principles. If you’re integrating lithium packs and charging points on deck, ABYC TE-13 and A-31 concepts—BMS behavior, fault protection, and thermal considerations—are not optional reading. The ocean is patient; it waits for the first loose terminal.

Photo by Michael Henry on Unsplash
Davits for Sailboat Dinghies: Ratings, Layout, and Install
Davits are wonderful until they’re not, and the difference is usually load math and installation quality. A davit rating is not a promise that your stern can handle that load in a quartering swell. Treat rated capacity as the beginning of the conversation, not the end.
Before buying anything, weigh your system. Hull-only weights are misleading because the stern lifts the whole mess: dinghy + outboard + fuel + gear + water in the bilge you forgot to drain.
Load math: static weight vs dynamic loads in chop
Here’s a realistic working-load example: dinghy 120–160 lb + outboard 55–110 lb + fuel/gear 20–60 lb = ~200–330 lb hanging from the davits. Now add dynamic loads from chop, swing, and sudden stops during a hoist, and you see why many cruisers pick 300–500 lb rated davits even when their static sum is lower. You’re buying margin for bad timing and tired hands.
Your tackle should match the load and be comfortable enough that you don’t rush. 3/8 in (10 mm) double-braid is common for davit tackles, while heavier setups may move to 7/16–1/2 in (11–13 mm) for better grip and reduced line bite. Confirm the WLL of blocks, shackles, padeyes, and the davit head itself—one weak link wins the argument.
Stern-architecture conflicts (windvane, solar arch, ladder, backstay)
Stern layout kills more davit dreams than price ever will. Windvane self-steering gear, a backstay split, a sugar-scoop ladder, and a solar arch can all compete for the same three feet of real estate. The dinghy must lift vertically, clear the transom, and land without smashing a vane or blocking the boarding ladder.
Think about where the dinghy will sit in reverse, too. Some boats end up with the dinghy high enough that it blocks cockpit sightlines, interferes with the backstay, or shades solar panels—great for tube longevity, not great for energy budgets. If you’re unsure, mock it up with a cardboard template or a borrowed dinghy before drilling holes in your stern.
Reinforcement, fasteners, backing plates, and sealing strategy
Davit mounts should be through-bolted with 316 stainless fasteners and real backing plates, not washers that look like they came from a hardware-store bin. Backing plates often run 1/8–1/4 in (3–6 mm) aluminum or 1/4–1/2 in (6–12 mm) G10 depending on substrate and loads. If you’re mounting through cored fiberglass, isolate the core properly, seal the penetrations, and bed fittings correctly to avoid turning your stern into a sponge.
ABYC H-40 is a good credibility anchor here for strong points and attachment practice, even though davits aren’t literally anchoring gear. Inspect mounts and bedding at least every season, and after any knockdown or stern slam. Stainless doesn’t complain before it fails; it just lets go.
| Davit rating class | Typical real-world lift load | Common features | Typical installed-use case |
|---|---|---|---|
| 250–350 lb (113–159 kg) | ~180–280 lb working load | Simpler geometry, basic blocks, fewer adjustments | Light roll-up or small RIB, smaller outboard (3.5–6 hp) |
| 400–600 lb (181–272 kg) | ~250–330+ lb working load | More adjustability, stronger structure, integrated blocks, winch options | 10–11 ft RIB with 6–9.9 hp, heavier cruising loads, rougher anchorages |

Photo by Daniel Stenholm on Unsplash
Towing vs Davits vs Deck Stowage: Offshore Procedures
How you carry your dinghy offshore is less about preference and more about what fails least on your boat. Towing can be fine in sheltered water, but it becomes a gear-destroyer surprisingly fast when wind and sea align to make the dinghy surf. Davits are convenient until conditions load them dynamically, and foredeck stowage works until you need to see the headsail.
The correct answer changes with weather, distance, and fatigue. Make a procedure before you need it, because nobody invents good seamanship at 0200.
When towing works—and when it becomes a gear-destroyer
Towing works for short protected hops in flat water, especially when you can keep speed modest and watch chafe points. Problems start in following seas where the dinghy surfs down waves and tries to occupy the same space as your transom. Towline chafe, tow-eye damage, and flipped dinghies are the common outcomes, with “lost entirely” as the deluxe package.
A tow bridle helps distribute load to both tow eyes and reduces yaw. Typical bridles are 3/8 in (10 mm) polyester with chafe protection at fairleads, and painters are often similar diameter so they handle and cleat well. If you can’t rig chafe gear quickly, you’re not ready to tow outside protected water.
Heavy-weather transitions: from tow to stern tie to deck lash
In building conditions, your best move is usually to stop towing early. Bring the dinghy close on a short painter, then either stern-tie it alongside in flat water or get it on deck if offshore. Many crews use a weak link strategy—something that fails before your stern cleat or tow eyes do—but it must be engineered, not improvised with a half-rotten zip tie.
On passagemaking legs, the “least bad” approach is often deflate-and-stow or hard lash on the foredeck with multiple straps and chafe protection. Remember that UV, spray, and green water can beat tubes to death on deck, so protect the fabric and check lashings every watch. If you rely on davits offshore, add secondary retention lines, because wave slap turns a hanging dinghy into a wrecking ball.
Route planning and sea distance: why your dinghy commute matters
Your dinghy commute distance drives outboard sizing and fuel or battery planning more than most sailors admit. If your anchorage-to-dock run is 2.5 nmi each way, that’s 5.0 nmi for a single errand run, often into wind and chop. Use Breezada’s sea distance calculator to map typical routes in new cruising grounds, then translate distance into time and energy.
As a rough planning example, a 6–10 hp gas outboard at moderate throttle might burn ~0.5–1.2 gal/hr (1.9–4.5 L/hr). That’s not a promise; it’s a reminder that long commutes punish underpowered setups and sloppy planning. Electric setups need the same honesty—battery reserve disappears quickly when you’re pushing into 20 knots of breeze.
Rigging, Fuel, Security, and Safety for Cruising Use
Most dinghy problems aren’t “design flaws.” They’re rigging flaws, fuel-handling shortcuts, and security routines that depend on luck. Rig the tender like it matters, because it does—especially when you’re tired, wet, and trying to get back aboard with a bag of parts that absolutely cannot get soaked.
Standards help keep you out of trouble without turning your boat into a paperwork exercise. ISO 6185 is the inflatable reference, ISO 12217 is useful context for stability and buoyancy assumptions, and USCG 33 CFR 175 covers carriage requirements like PFDs and sound devices where applicable. For systems on the mothership, ABYC H-24/H-33 (fuel principles) and ABYC E-11 (electrical) keep installations sane.
Bridle geometry, lifting points, and chafe-proof rigging
A proper tow bridle uses two legs to the dinghy tow eyes with a central ring, keeping pull centered and reducing yaw. Use 3/8 in (10 mm) polyester for low stretch and good chafe resistance, and add chafe gear where it passes fairleads, stern quarters, and dinghy tow eyes. Heat buildup is your early warning: if a line feels warm after towing, you’re already spending lifespan.
Your chafe checklist should include tow eyes, fairleads, stern quarters, davit tackle leads, and transom corners. Add chafe protection before it looks necessary, because by the time it looks necessary, fibers are already gone. Keep painters managed and cleated cleanly; a painter wrapped around a prop is a fast way to test your vocabulary.
Gasoline stowage and handling on the mothership (ABYC-aligned)
Portable tanks are convenient, but gasoline belongs in ventilated, ignition-protected storage—not inside a cabin locker next to spare rags and a battery charger. ABYC H-24 is the mindset: minimize vapor accumulation, keep fuel lines sound, avoid ignition sources, and use proper fittings. A common 3.0–6.6 gal (12–25 L) tank is a sensible range for cruising, but remember that fuel weight adds up fast when it’s sitting aft.
When transferring fuel, do it in daylight, on deck, with absorbent pads ready. Keep the tank secured in the dinghy so it can’t slide and pull a fuel line loose when you hit wake. Most “mystery fuel smells” are self-inflicted and happen on calm days when nobody is paying attention.
Locks, tracking, and theft-resistant daily routines
Dinghy theft is usually opportunistic, and the best defense is friction. Use an outboard lock and a separate painter lock, and don’t leave the dinghy floating on a long painter overnight in busy anchorages. If you have davits, lifting the dinghy at night is one of the simplest and most effective deterrents.
Add a tracking tag (AirTag-style or a marine GPS tracker) in a hidden, waterproof spot, and record serial numbers. The most effective security system is boring consistency: lock it every time, even for “just five minutes.” Thieves love “just five minutes.”
Lighting, sound signals, and carriage requirements by jurisdiction
Rules vary, but as a general USCG reminder under 33 CFR 175, you’ll often need appropriate PFDs, and you may need a sound device and lights depending on operation and local enforcement. If your dinghy runs at night, install a proper all-round white light or carry a reliable LED, and keep it where you can reach it instantly. A headlamp is not a navigation plan, even if it feels like one.
For stability assumptions and manufacturer testing language, ISO 12217 and ISO 6185 are useful references when comparing boats that claim similar capacities. Don’t treat paperwork as gospel, but do treat it as a clue that the builder at least knew what test regime existed.
| Component | Typical price tier (USD) | Notes for cruisers |
|---|---|---|
| 9–10 ft PVC roll-up inflatable (slat/air floor) | $900–$2,500 | Lightest storage burden; more compromise in chop and tracking |
| 9–11 ft Hypalon/CSM roll-up inflatable | $2,500–$5,500 | Better UV/heat tolerance; higher resale in tropical regions |
| 10–11 ft aluminum-hull RIB (PVC tubes) | $2,800–$6,500 | Great durability on beaches; watch corrosion and fittings |
| 10–11 ft fiberglass RIB (PVC tubes) | $3,500–$8,500 | Best ride/finish; gelcoat needs care when beaching |
| 10–11 ft Hypalon/CSM RIB (aluminum or fiberglass hull) | $6,000–$12,500 | “Buy once” territory if you live in UV and run hard |
| 2.3–3.5 hp portable outboard (gas, 4-stroke) | $900–$1,500 | Light and simple; limited against current/wind |
| 6 hp portable outboard (gas, 4-stroke) | $1,600–$2,600 | Common sweet spot for cruising couples |
| 9.9 hp outboard (gas, 4-stroke) | $2,600–$4,200 | More planing margin; weight becomes a handling issue |
| Electric outboard 1–3 kW with battery | $2,500–$7,500 | Quiet; range and charging must be planned carefully |
| Basic manual davits (pair) rated ~250–350 lb | $1,800–$4,500 | Works for lighter systems; less margin for dynamic loads |
| Premium davits (pair) rated ~400–600 lb | $4,500–$9,500 | Better adjustability; supports heavier cruising loads |
| Electric/hydraulic davit winch add-on (hardware) | $800–$3,000 | Helps with heavy motors; wiring must follow ABYC E-11 practices |
| Installation labor (reinforcement, sealing, alignment) | $1,500–$6,000 | Where good yards earn their money—don’t cheap out here |
| Dinghy chafe gear, towing bridle, hardware kit | $150–$600 | Small cost, big reliability improvement |
Conclusion: Build the Dinghy Setup as One System (Not a Dockside Impulse Buy)
The best dinghy for a cruising sailboat is the one that matches your real loads and your real storage—then survives your real abuse. Start with size and tube volume that can carry your people plus cargo without awful trim, then pick hull type and tube material for your climate and repair reality. After that, size the outboard and davits from measured weights, not guesses or dock talk.
Buying order matters because each choice constrains the next. Here’s the order that keeps you out of trouble: dinghy > engine > lifting/storage > rigging/security. If you’re planning routes and commutes in unfamiliar anchorages, use Breezada’s sea distance calculator to quantify runs and build honest fuel or charging margins.
Before you drill, wire, or redesign fuel storage, verify what applies in your region and follow the intent of ISO/ABYC/USCG guidance. Standards won’t make you bulletproof, but they’ll keep you from repeating mistakes the industry already paid for.
Frequently Asked Questions
For a 10–11 ft RIB, how do you estimate the planing threshold using all-up load (crew + fuel + gear) and decide whether 6 hp is sufficient versus 8–10 hp?
Start by adding all-up weight: crew (say 340 lb for two adults) + outboard (55–60 lb for 6 hp, or 80–110 lb for 9.9 hp) + fuel/gear (20–60 lb) and you’re commonly at 415–460 lb before you count the dinghy’s own payload distribution effects. A 6 hp often planes a lightly loaded 10–11 ft RIB with the right hull and prop, but consistent planing with heavier loads usually pushes you toward 8–10 hp, especially in chop and headwinds. If your commute is long (measure it with Breezada’s sea distance calculator), the safety and comfort margin from extra power can matter more than top speed.
How do you measure dinghy transom height to confirm short (15 in) vs long (20 in) shaft, and what cavitation/ventilation symptoms indicate the wrong shaft length in chop?
Measure from the inside top of the transom mounting surface straight down to the bottom of the hull line at the centerline; many dinghies match 15 in (381 mm) short shaft, while some RIBs want 20 in (508 mm) long shaft. When mounted, check that the cavitation plate is roughly level with the hull bottom (or slightly below) at rest. Too-short shafts often ventilate in chop: RPM rises, thrust drops, and you lose bite in turns or waves; too-long shafts drag and feel inefficient, with worse reverse handling and more stern squat.
What davit rating margin is appropriate once you account for dynamic loads (shock, swing, leverage), and how do you compute a realistic working lift load from dinghy + outboard + gear?
Compute working lift load by summing dinghy (often 120–160 lb for a 10 ft RIB) + outboard (55–110 lb) + fuel/gear (20–60 lb) for roughly 200–330 lb hanging weight. Then add margin for dynamic effects—shock loads from chop, swing during hoists, and leverage if the dinghy hangs far aft—so many cruisers sensibly choose 300–500 lb rated davits. Rating alone isn’t enough; confirm the WLL of every block, shackle, line, and padeye in the load path.
What line diameter, construction (polyester vs nylon), and chafe gear placement is best for a 3/8 in tow bridle on a 9–11 ft dinghy, and where should you expect heat/chafe failures first?
A 3/8 in (10 mm) polyester bridle is common because it’s low-stretch, handles well, and resists chafe better than nylon in steady towing. Place chafe gear at dinghy tow eyes, at stern fairleads, and anywhere the bridle contacts gelcoat or hardware under load. Expect the first heat/chafe failures at stern quarters/fairleads and at the dinghy tow-eye lashing points, especially if the painter length allows the dinghy to yaw or surf.
For electric outboards, what charging circuit protections (ABYC E-11 style overcurrent protection, conductor sizing, and isolation) should you plan when integrating lithium battery packs and deck charging points?
Plan the charging circuit like any other critical DC system: marine-grade conductors sized for the charger current and run length, proper terminations, and overcurrent protection placed close to the source per ABYC E-11 intent. Provide isolation/disconnect capability so the system can be safely de-energized for maintenance, and route wiring to avoid chafe and water intrusion at deck points. If you’re integrating lithium packs, follow ABYC TE-13 and A-31 concepts—BMS behavior, fault containment, and charger compatibility—because the failure modes are different from lead-acid and less forgiving of sloppy installs.
About the Author
Related Articles

Float Plan Template: What to Include & Update
Use this float plan template with examples, check-ins, and shore contact tips. Copy the form and update it before every trip—stay SAR-ready.
By Breezada Team

Used Sailboat Survey Checklist: Sea Trial Red Flags
Use this used sailboat survey checklist to spot sea trial red flags, estimate survey costs, and negotiate smarter. Download the checklist now.
By Breezada Team

Sailing in a Squall: Radar, Reefing, AIS & Lightning
Learn sailing in a squall line: radar & AIS tactics, smart reefing triggers, and lightning risk reduction. Get the squall drill checklist now.
By Breezada Team

Marine Fire Extinguisher Requirements & Engine-Room Safety
Meet marine fire extinguisher requirements and protect your engine room. Learn USCG/ABYC guidance, sizing, placement, and checklists—read now.
By Breezada Team