Composting Toilet Sailboat: Manual vs Electric vs Composting
Marine Head Options: Manual, Electric, Composting
Marine head decisions don’t fail on brochures. They fail at 0200 when the bowl won’t clear, the tank vent burps funk into the cabin, and somebody “helpfully” flushed a paper towel. This article focuses on the composting toilet sailboat question, but compares all the practical marine head options—manual, electric macerator, and urine‑diverting composting—through the lenses that actually matter: compliance, installation, utilities, and smell control.
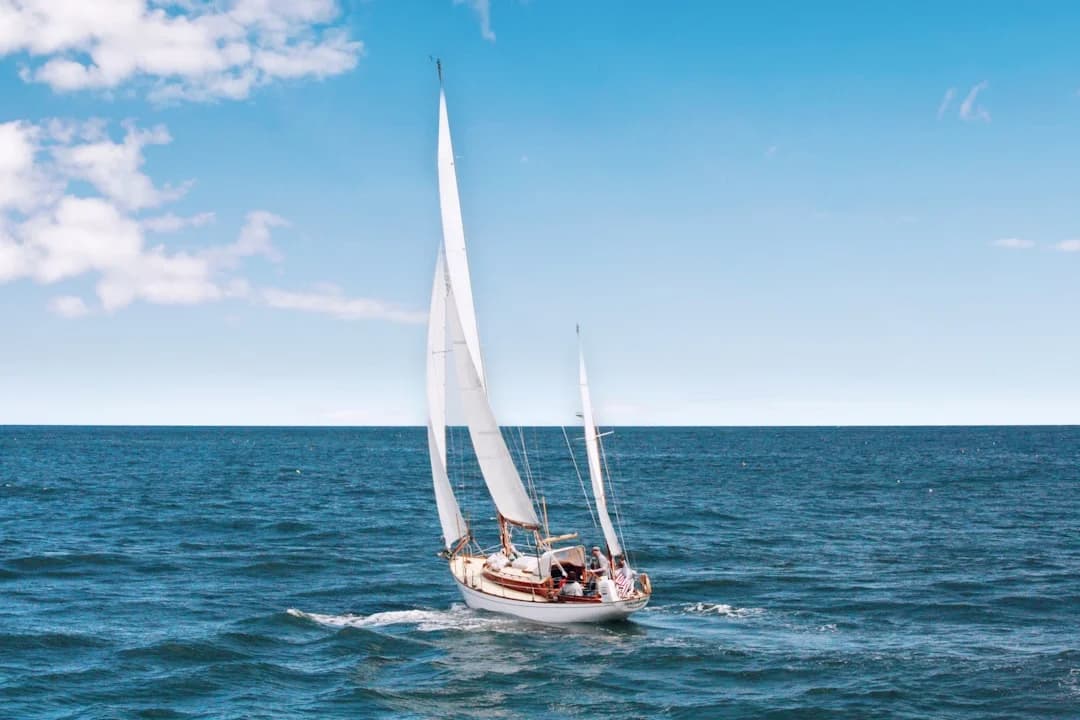
Photo by Jeremy Bishop on Unsplash
Manual vs Electric vs Composting: What Really Changes
System architecture: seawater flush, freshwater flush, or dry
A manual pump head is a hand-driven piston pump that brings in flush water (often seawater through an intake seacock) and pushes discharge through 1.5 in (38 mm) sanitation hose. An electric macerator toilet for boats does the same basic job with a motor and macerator, typically drawing 15–30 A at 12 V for 5–15 seconds per flush. A composting toilet sailboat setup is usually urine‑diverting and “dry,” meaning there’s no flush water, and odor control depends on constant ventilation rather than rinsing.
Seawater flush is simple—one seacock, one hose, one pump—but it invites scale and marine growth that later smells like low tide in July. Freshwater flush avoids most seawater stink and reduces calcium buildup, but adds complexity: solenoids/check valves, more fittings, and another way to spring a leak. Dry heads remove water from the equation, but replace it with a workflow and the need for reliable airflow.
How waste is stored/handled: Type III tank vs container
Most sailboats in the real world operate like Type III MSD boats: toilet to holding tank, then pump-out through a 1.5 in (38 mm) deck fitting. Some boats have a Y‑valve to route to overboard discharge where legal, still using the same 1.5 in hose diameter for discharge. Composting toilets sidestep blackwater plumbing by putting urine in a removable bottle (often 2.0–2.6 gal / 7.5–10 L) and solids into a bin (often 4–6.5 gal / 15–25 L).
That “container instead of tank” shift is the big philosophical change. You trade hoses, valves, and pump-outs for routine emptying and good habits. If your crew can’t follow procedures, the best composting unit in the world becomes a very expensive biology experiment.
Practical implications: space, access, and user habits
On sailboats, the limiting factor isn’t the toilet—it’s access for hose runs, vent routing, and service. A typical discharge run is 6–20 ft of 1.5 in sanitation hose, and every extra elbow fitting is a clog risk and a future odor source. Vent lines are commonly 0.75–1.0 in (19–25 mm), while many factory tanks are stuck with 5/8–3/4 in (16–19 mm) vents that struggle to breathe.
Manual and electric heads tolerate a wider range of user behavior, but they punish bad flushing discipline by clogging, backflowing, or stinking. Composting systems are the opposite: they’re mechanically simple, but they demand compliance with “what goes in” and “keep liquids out of the solids.” And no—on most cruising boats, it’s not instant garden compost; it’s dehydration plus ventilation, with shore disposal planning.
Tip from the bilge: Across all head types, the biggest smell-control lever is ventilation and eliminating stagnation/permeation, not perfumes, blue juice, or wishful thinking.
Photo by Cristian Soceanu on Unsplash
Rules & Compliance: USCG MSD Types, NDZ, Y-Valves
33 CFR 159 basics: Type I/II/III and what most sailboats have
If you have an installed toilet, you’re in USCG 33 CFR 159 territory. Type I and II are treatment devices (more common on larger powerboats), while Type III is a holding tank system—what most cruising sailboats effectively have. In practical terms: retention onboard, pump-out at shore facilities, and controlled discharge only where permitted.
Even if you never use overboard discharge, the plumbing still needs to be installed safely. Think serviceable seacocks (ABYC H-27), properly routed sanitation hose (1.5 in / 38 mm discharge), and venting that actually functions instead of making the tank an anaerobic swamp.
No Discharge Zones (NDZ) and securing overboard discharge
No Discharge Zones are where people get sloppy and get fined, usually because the Y‑valve is “technically closed” but not secured. USCG rules and guidance (commonly referenced under 33 CFR 159.7 and 159.53) expect overboard discharge to be secured in restricted waters. In the real world that means a padlock, a wire tie, or removing the handle—something that shows intent and prevents casual “oops.”
“Reachable” matters. If the Y‑valve handle is right under the sink and flips with one hand, enforcement officers won’t be impressed by your philosophical commitment to compliance. Secure it, label it, and make the seacock accessible enough that you can close it quickly without dislocating a shoulder.
How composting toilets fit (and what to document)
A composting toilet sailboat installation can simplify MSD compliance by removing blackwater discharge plumbing entirely, but it doesn’t exempt you from local rules about disposal. Urine and solids still need responsible shoreside handling, and some jurisdictions treat any installed toilet as something that must meet retention expectations. Keep manuals, installation notes, and a clear explanation of how waste is contained and disposed—especially if you cruise across regions with different interpretations.
For readers outside the U.S., ISO 8099 is a useful benchmark for retention system design and installation quality. It’s not bedtime reading, but it’s a solid technical reference when you’re evaluating venting, pump-out arrangements, and anti-siphon measures. ABYC A-1 is the North American best-practice backbone for sanitation installations, and it’s worth leaning on when a yard says “we’ve always done it this way.”
Photo by Max dincuff on Unsplash
Costs Compared: Upfront, Install, and 5-Year Ownership
What you pay for the toilet vs what you pay to make it work
Most buyers fixate on the sticker price and then act surprised when the install quote is larger than the head itself. A manual toilet might cost $150–$450, but if you’re replacing 12–18 ft of permeated 1.5 in sanitation hose at $8–$20/ft, plus a $40–$120 vented loop, you’re suddenly shopping in a different aisle. Electric units run $500–$1,800, and high-end freshwater-flush models can hit $1,200–$3,000+ before a single wire is pulled.
Composting units typically land around $900–$2,200, and they often reduce plumbing parts cost because you’re removing tanks, Y‑valves, and discharge runs. But don’t pretend it’s “free to install”—you still need a vent route, a fan wire, and a clear path to remove containers without turning the head into a game of Twister.
Installation labor realities: access, hose routing, and rework
Marine labor is expensive because boats are built like ship-in-a-bottle puzzles. At $120–$200/hr and 6–16 hours typical ($720–$3,200), labor is the heavyweight in marine head installation cost. Tight compartments force extra hose joints, and every joint is another place to leak, clog, or smell.
If you’re converting systems, budget for rework: plugging old through-hulls, rerouting vents, servicing intake seacocks, and replacing “temporary” hoses that have become permanent through neglect. A new toilet connected to old permeated hose is like installing new curtains in a house fire.
Recurring costs: pump-outs, rebuild kits, media, power/water
Holding tanks bring pump-out fees ($0–$40 each) plus occasional rebuild kits, joker valves, and treatments. Composting brings bulking medium costs ($20–$80/season) and the occasional fan replacement, plus the human cost of emptying the urine bottle on schedule. Electric heads also cost you in power: the motor draw is short but high, and low voltage causes weak maceration and clogs.
Below is the realistic money view—equipment plus what it takes to run it for five years, assuming typical hose runs (6–20 ft) and normal use.
| System | Toilet unit (USD) | Typical install parts (USD) | Labor (6–16 hrs @ $120–$200/hr) | 5-year recurring costs (typical) |
|---|---|---|---|---|
| Manual pump head | $150–$450 | $150–$900 (hose $8–$20/ft, vented loop $40–$120, clamps/fittings) | $720–$3,200 | Pump-outs $0–$40 each; joker valves every 1–2 yrs; occasional rebuild kit |
| Electric macerator head | $500–$1,800 (up to $3,000+ premium) | $200–$1,200 (hose, loops, wiring, breaker/fuse, possibly tank/macerator $200–$450) | $720–$3,200 | Pump-outs; more frequent parts wear if abused; higher electrical demand |
| Composting (urine-diverting) | $900–$2,200 | $100–$500 (vent ducting, wiring, fasteners, optional deck vent) | $480–$2,400 (often less plumbing time) | Media $20–$80/season; fan draw 1.4–4.1 Ah/day; periodic fan replacement |
Photo by Levi Teichrib on Unsplash
Odor & Smell Control: Root Causes and Fixes That Work
Diagnose by source: permeation, stagnation, or backflow
Boat toilet smell control is easier when you stop treating “odor” as one problem. In practice it’s usually one (or more) of three: permeated sanitation hose, stagnant/anaerobic tank conditions, or backflow/leakage at valves. Each has a different signature and a different fix, and the cheapest “deodorizer” rarely addresses any of them.
Permeation is the classic: the head works fine, but the locker around the hose stinks. Do the warm rag test—wipe a heated damp cloth along the hose, then smell the rag. If it smells like the holding tank, your hose is done, even if it looks perfect from the outside.
Venting done right: line size, routing, and filters
Venting is the unsung hero of every holding tank system. Many boats leave the factory with a 5/8–3/4 in (16–19 mm) tank vent, and a lot of owners make it worse by adding low spots and kinks that trap liquid. A vent line that can’t breathe creates anaerobic sludge, which creates sulfur smells that no blue chemical will fix.
If you can, use a vent line closer to 0.75–1.0 in (19–25 mm) ID with a continuous rise and minimal bends. Keep the run short, avoid dips that collect effluent, and make sure the vent thru-hull isn’t painted shut every spring. Vent filters ($40–$120) can help in tight marinas, but they can also mask a real venting problem and then clog, which makes the tank smell worse.
Toilet-specific fixes: joker valves, scale, and dry separation
Backflow odor often comes from a joker valve that’s no longer doing its job. In heavy use, joker valve replacement every 1–2 years isn’t unusual, and the symptom is straightforward: the bowl won’t stay clean, you get seepage back into the bowl, and the head space starts smelling “toilet-adjacent” even when the tank is empty. If pumping feels weak and wet, you may need a full pump rebuild rather than just the valve.
Seawater-flush systems have their own smell trick: scale and marine growth in the intake and discharge plumbing. A periodic descale routine helps, but avoid harsh chemicals that eat seals and shorten pump life. Enzyme cleaners are friendlier to rubber parts and tank biology, and they won’t turn your hoses into a science fair volcano.
For composting toilets, odor is almost always a wet-solids problem. The fan must run continuously—typical draw is 0.06–0.17 A at 12 V—and urine must stay in the urine path, not the solids bin. Use dry carbon cover and keep the solids medium fluffy; once it goes wet and compacted, it stops breathing and starts advertising itself.
Tip from the nav table: If you’re chasing smells, start with (1) hose permeation, then (2) vent routing/size, then (3) joker valve seepage. That order fixes the most stink per dollar.
Photo by Anne Nygård on Unsplash
Performance & Utilities: Water Use, Power Draw, Noise, Comfort
Water budget: seawater vs freshwater vs dry
Manual heads can be surprisingly frugal if the crew isn’t trying to power-wash the bowl. With conservative pumping, expect roughly 0.5–1.0 US qt (0.5–1.0 L) per flush, though habits matter more than the pump design. Electric heads typically use more water because rinse cycles are timed, not felt, ranging around 0.3–0.8 US gal (1.1–3.0 L) per flush depending on programming and bowl rinse pattern.
Water use drives holding tank fill rate, which drives pump-out cadence, which drives your cruising radius in NDZ-heavy areas. If you’re planning routes, sanity-check your pump-out stops using a tool to calculate the distance between ports so you’re not guessing whether the next facility is a comfortable hop or an inconvenient forced march.
Composting heads use essentially no flush water, which is great for freshwater budgets and tank fill anxiety. The trade is that you now manage urine and solids separately, and you need a disposal plan ashore that matches your cruising area.
Energy budget: Ah/flush vs always-on fan draw
Electric heads hit the batteries hard but briefly: 15–30 A at 12 V for 5–15 seconds, roughly 0.02–0.12 Ah per flush. Multiply that by real life—say 12–20 flushes/day for a couple aboard—and you might burn 0.3–2.4 Ah/day, plus losses from voltage drop and long run times when the system struggles. Low voltage is where electric heads get cranky, and a cranky macerator is an expensive noise generator.
Composting toilets flip the script. The fan draw is tiny—0.06–0.17 A—but it runs 24/7, totaling 1.4–4.1 Ah/day at 12 V. That’s usually solar-manageable, but it’s not “zero,” and it must be reliable if you care about cabin air quality.
User experience offshore: heel angle, clogs, and reliability
Comfort is more than brand—it’s bowl shape, seat height, and how forgiving the system is when the boat is heeled at 20–30° and someone has questionable aim. Manual heads are simple and fixable at sea with spares; electric heads are convenient until they aren’t, and then you’re troubleshooting voltage, breakers, and macerator jams. Composting heads avoid clogs almost entirely, but they require the crew to follow the rules every time, including in rough weather.
Noise matters at night. Electric macerators are loud enough to wake the dead and annoy the living, while manual pumping is quieter but not subtle in a thin fiberglass hull. Composting fans can hum, but good mounting and wiring keeps it civilized, and vibration isolation helps with electric units too.
Photo by Margo Evardson on Unsplash
Tank & Container Sizing: Pump-Out Cadence and Route Planning
Holding tank sizing math (person-days) and realistic assumptions
Holding tank sizing is simple arithmetic that many sailors avoid like they avoid varnish. On 30–45 ft sailboats, tanks are often 15–30 US gal, and a practical planning assumption is 1.0–1.5 gal/person/day for mixed toilet plus rinse water use. That number moves based on whether you’re on seawater flush, freshwater flush, or a particularly enthusiastic pumper.
Example: a 20 gal tank supports about 20 person-days at 1.0 gal/person/day, or about 13 person-days at 1.5 gal/person/day. Add guests and that “two-week buffer” becomes “see you tomorrow at the pump-out dock.” If you’re trying to decide between more tank or a different system, these numbers tell the truth faster than opinions do.
Pump-out strategy: marina spacing, NDZ constraints, and backups
Pump-out planning is route planning, not an afterthought. In NDZ-heavy areas, you may have long stretches where overboard discharge is not an option even if your plumbing allows it. Use a sea distance tool to check nautical miles between pump-out stops to sanity-check legs between pump-out facilities, especially when weather or currents might force a longer day than planned.
Good pump-out success depends on hose geometry and access: short, smooth runs to the 1.5 in (38 mm) deck fitting, minimal low spots, and a vent that allows airflow during pump-out. A tank that can’t breathe during pump-out often won’t empty well, and that leftover sludge becomes your next odor problem.
Composting capacity: urine bottle vs solids bin planning
Composting systems are limited more by urine bottle logistics than solids. A typical urine bottle is 2.0–2.6 gal (7.5–10 L), and for two adults you may be emptying daily to every 2–3 days, depending on hydration and whether every drop gets diverted. The solids bin, often 4–6.5 gal (15–25 L), can last 2–4 weeks for two people when urine separation is consistent and bulking medium is used correctly.
The operational reality is this: you must have an easy, dignified path to remove and empty containers. If you have to unbolt the toilet or contort the bottle around cabinetry, the “simple system” becomes a daily irritation, and crew compliance drops fast.
Installation Engineering & Safety: Plumbing, Loops, Wiring
Plumbing layout: minimize hose length, avoid low spots, serviceability
Good sanitation installs look boring, which is the highest compliment I can give them. Keep 1.5 in (38 mm) discharge hose runs as short and straight as practical—typical boats end up with 6–20 ft, but you should fight for the low end. Use smooth-radius fittings, avoid unnecessary elbows, and make sure you can actually reach hose clamps without removing half the interior.
Double clamps are common practice below the waterline, but don’t use cheap hardware-store clamps that rust and slice hose. ABYC A-1 is the right mindset here: secure, inspectable, and serviceable beats clever. And per ABYC H-27, every seacock needs to be accessible and operable; if you can’t close it quickly, it’s not a safety system, it’s decor.
Anti-siphon and vented loops: where they go and why
Vented loops prevent siphoning that can flood the boat or backfill the bowl. On intake lines and certain discharge arrangements, the loop needs to be above the waterline at all angles of heel—commonly 6–8 in (150–200 mm) minimum, but some boats require more depending on heel and installation height. Install it too low and it becomes a false sense of security; install it where you can’t service it and it will clog at the worst time.
Orientation matters. The vent must be at the top, and the valve must be serviceable because salt crystals and gunk don’t care about your schedule. If you’re converting from seawater flush to freshwater flush, you may reduce scale issues, but you’re adding solenoids and check valves that need equal respect.
Electrical for electric heads and composting fans (ABYC/ISO)
Electric heads deserve proper wiring, not “whatever speaker wire was in the drawer.” ABYC E-11 (and ISO 10133 for DC systems abroad) emphasizes correct circuit protection, wire sizing, and voltage drop management. A macerator that sees low voltage draws more current, runs longer, and fails sooner, which is a cruel cycle that ends in a rebuild.
Run a dedicated fused circuit with robust terminations and proper crimping in a wet environment. Keep wire runs tidy, supported, and protected from chafe, and plan for the real load: 15–30 A momentary draw is enough to expose weak connections fast. Composting fans are small loads, but they’re continuous duty; fuse near the source, include drip loops, and assume the fan will run 24/7 for years.
Decision Matrix: Best Head by Boat, Crew, and Cruising Style
Weekend coastal vs liveaboard vs offshore passage profiles
The “best marine toilet for sailboat” is the one that matches your constraints, not your fantasies. If you spend weekends hopping marina to marina with easy pump-outs, a manual head or mid-range electric is fine. If you live aboard in a place with sparse pump-outs and big NDZ coverage, that’s where a composting toilet sailboat setup can genuinely reduce stress—provided your crew will use it correctly.
Offshore, simplicity counts. Manual heads are field-serviceable and don’t care about battery state, while electric heads add failure points and noise. Composting can work offshore too, but you need secure container handling, steady fan power, and a realistic plan for holding waste until shore.
Constraints checklist: batteries, water, space, and pump-out access
Before you buy anything, list what you actually have: daily battery budget, freshwater capacity, head compartment dimensions, and pump-out frequency along your normal routes. If your battery margins are tight, compare electric usage (0.02–0.12 Ah/flush) to compost fan draw (1.4–4.1 Ah/day) and be honest about solar and charging. For routes, check distances between pump-outs using a quick way to estimate voyage distance for timing and provisioning, because “I think there’s one up there” isn’t a plan.
Space matters differently for each system. Manual/electric need hose runs and service access; composting needs vertical clearance and a clean removal path for the 2.0–2.6 gal urine bottle. Your boat’s geometry will pick winners and losers faster than internet arguments.
| Cruising profile / constraint | Manual head | Electric head | Composting (urine-diverting) |
|---|---|---|---|
| Marina-heavy weekend sailing, easy pump-outs | Good fit – simple, cheap, tolerant | Good fit – comfort upgrade, higher install | Maybe – works, but daily habits feel like overkill |
| Liveaboard in NDZ-heavy area, pump-outs inconvenient | Okay – bigger tank helps, still pump-out dependent | Okay – convenience, but still pump-out dependent | Best fit – reduces blackwater plumbing; needs compliance |
| Offshore passages, limited power and repair options | Best fit – serviceable, no amps | Poorer fit – voltage sensitivity, spares needed | Good fit – no clogs, but needs 1.4–4.1 Ah/day fan power |
| Tight battery budget / small solar | Best fit – no electrical load | Risky – 15–30 A peak draw; voltage drop matters | Depends – fan is small but constant |
| Crew noncompliance risk (“what goes in”) | Better – more forgiving | Better – more forgiving until it clogs | Poor fit – wet bin problems and odors follow fast |
Frequently Asked Questions
For a 12 V electric macerator toilet drawing 15–30 A for 5–15 s, how do you size the dedicated circuit (fuse/breaker and wire gauge) to stay within ABYC E-11 voltage-drop limits on a 15–25 ft round-trip run?
ABYC E-11 expects you to control voltage drop (commonly ≤3% for critical loads and ≤10% for general loads; many installers treat sanitation gear conservatively because low voltage causes long run times). For a 15–25 ft round-trip run at 15–30 A, you typically end up in the 10 AWG to 8 AWG range depending on exact length, terminations, and whether the unit spikes above 30 A when loaded. Fuse/breaker sizing should follow the manufacturer’s stated current and wire protection rules, commonly 25–40 A for many 12 V heads, with the fuse located close to the source and the circuit dedicated.
In a Type III holding-tank system, what vent line diameter and routing changes (e.g., upsizing from 5/8 in to 3/4 in or larger, eliminating low spots) measurably reduce anaerobic odor without relying on chemical deodorizers?
Start by making the vent actually breathe: eliminate dips that trap liquid, shorten the run, and avoid kinks and sharp bends. Many boats have 5/8–3/4 in (16–19 mm) vents; upsizing toward 3/4 in or even 0.75–1.0 in (19–25 mm) where practical increases airflow and supports aerobic conditions that smell far less than anaerobic tanks. A clear vent thru-hull and a vent line with continuous rise will usually beat any chemical product, and it also helps pump-outs work more completely.
What are the most common failure modes of joker valves (seepage/backflow, hardening, deformation), and what symptoms indicate replacement vs a full pump rebuild on a manual head?
Joker valves fail by hardening, taking a “set” (deformation), or cracking, which allows seepage and backflow that puts odor right back into the bowl. Symptoms that point to joker valve replacement: the bowl won’t stay clear, you see slow return flow, and odor is strongest right at the toilet even when the tank is recently pumped. If pumping feels ineffective, the handle action feels mushy, or the pump won’t prime despite a new joker valve, you’re likely looking at worn pump seals/valves and a rebuild kit rather than just the discharge valve.
For a 20 gal holding tank on a 35–40 ft sailboat, how many days between pump-outs should you plan at 1.0 vs 1.5 gal/person/day, and how should that affect route planning through NDZ-heavy areas?
At 1.0 gal/person/day, a 20 gal tank gives roughly 20 person-days; for two people that’s about 10 days, and for four it’s about 5 days. At 1.5 gal/person/day, the same tank gives about 13 person-days; that’s roughly 6–7 days for two people and about 3 days for four. In NDZ-heavy areas, plan legs so pump-out access matches your worst-case consumption, and use Breezada’s sea distance calculator to verify distances between pump-out options when weather or currents might force longer hops.
With a urine-diverting composting head using a 2.0–2.6 gal urine bottle and a 4–6.5 gal solids bin, what crew size and usage pattern will push you into daily urine emptying, and what operational steps prevent “wet bin” odors?
Two adults can already hit daily emptying on a 2.0–2.6 gal bottle with high fluid intake, hot climates, or if the bottle is kept below full for spill safety; three to four adults will almost always push you to daily (or more frequent) emptying. Wet-bin odors come from urine getting into the solids, fan interruptions, or insufficient dry carbon cover—so keep the fan running (0.06–0.17 A at 12 V), verify urine diversion aim/position, add dry bulking medium, and keep liquids out of the solids chamber. If the bin goes wet, fix the cause first, then dry it out; otherwise you’ll be chasing smells forever.
About the Author
Related Articles
How to Fuel a Boat: Fuel Dock Etiquette & Safety
Learn how to fuel a boat safely with fuel dock etiquette, diesel vs gas tips, and spill prevention. Follow our step-by-step checklist before you pump.
By Breezada Team

Float Plan Template: What to Include & Update
Use this float plan template with examples, check-ins, and shore contact tips. Copy the form and update it before every trip—stay SAR-ready.
By Breezada Team
Used Sailboat Survey Checklist: Sea Trial Red Flags
Use this used sailboat survey checklist to spot sea trial red flags, estimate survey costs, and negotiate smarter. Download the checklist now.
By Breezada Team

Sailing in a Squall: Radar, Reefing, AIS & Lightning
Learn sailing in a squall line: radar & AIS tactics, smart reefing triggers, and lightning risk reduction. Get the squall drill checklist now.
By Breezada Team