
Sailboat Rigging Inspection: Checklist & Intervals
Rig failures rarely send you a polite calendar invite. They usually wait until it’s 0200, the sea state is up, and you’re far enough offshore that “just motor back” becomes a comedy sketch. A good sailboat rigging inspection routine is less about paranoia and more about stacking the odds in your favor with repeatable checks, measurements, and a paper trail.

Photo by Ian Keefe on Unsplash
Practical tip (the two-tier rule):
Do a 10‑minute go/no‑go scan before every sail, then schedule a monthly deep check with tools and notes. Save the “full confession” for mast-down every 2–3 years.
Standing vs. Running Rigging: Loads, Failure Modes, Risk
Standing rigging is the boat’s skeleton: shrouds, forestay/backstay, chainplates, mast tangs, terminals, turnbuckles. On most cruising monohulls, that’s 1×19 316 stainless wire, commonly 5/32–1/4 in (4.0–6.4 mm) on 30–40 ft boats, sized to design loads and righting moment. Performance boats may use rod rigging, which has different inspection criteria and usually demands specialist replacement.
Running rigging is the muscle and tendons: halyards, sheets, control lines, plus the friction hardware they live in—sheaves, clutches, jammers, winches, organizers. Running lines “fail” in ways that are often survivable: a halyard cover blows out, a sheet parts, or a clutch glazes a line into a hard plastic mess. It can still hurt someone, but it’s usually not a dismasting-by-lunchtime event.
The load story explains the difference. Standing rigging lives under constant pre-load with cyclic fatigue from every tack, puff, and wave. Stainless wire is especially charming because it can fail without much visible warning, often at swages and tangs, or in oxygen-starved crevices like chainplate deck penetrations and the mouths of swage fittings. Running rigging, by contrast, mostly dies from abrasion, heat, and UV, and it usually tells you first by getting ugly.
This is why inspection priorities track consequences. Standing rigging and attachments can fail catastrophically: dismasting, deck/core damage at chainplates, and serious crew injury from whipping wire. Running rigging problems typically degrade performance first, then reliability, then safety when people start improvising with bad lines. Treat them differently, but don’t ignore either.
The practical approach is two-tier: a quick scan before sailing for obvious “nope” items, then a deeper inspection on a cadence where you can measure thread engagement, note tension, and look for corrosion. If you can’t document what you saw last month, you’re not inspecting—you’re just worrying recreationally.
Inspection Schedule: Pre-Sail, Monthly, Annual, Mast-Down
10-minute pre-sail scan (go/no-go checks)
Before you cast off, do a fast loop with your eyes and hands. Look for missing cotter pins (often 1/16–3/32 in) at turnbuckles and clevis pins, new rust streaks at swages, and any “fishhooks” on wire strands. Check that turnbuckles haven’t backed off, and that toggles still articulate instead of sitting in a bind.
Don’t skip the mast base and partners. A cracked mast collar, new fretting dust, or a step that looks like it’s “growing” corrosion deserves attention before you load the rig. You’re not proving the rig is perfect—you’re confirming it’s not obviously trying to kill you today.
In-season monthly deep check (deck level)
Once a month during the season, plan 2–3 hours for a slower inspection with a headlamp, mirror, magnifier, and a notebook. Add calipers, a Loos gauge, and a phone for dated photos. Start a log: rig age (even if “unknown”), wire sizes, terminal type (swage vs mechanical), and baseline tensions.
Frequency should increase if you’re sailing in tropical UV, doing heavy-air work, racing, or you bought the boat with “the previous owner said it’s fine” as your only rig history. “Unknown history” is a trigger for a baseline rig survey—often the same thing an insurer will request before they write a policy. The USCG doesn’t prescribe sailboat rigging standards in 33 CFR 183, so surveys lean on industry practice and standards like ABYC H‑41.
Mast-down / unstep opportunities (every 2–3 years)
Any time the mast is out—storage, transport, rewiring, repainting—treat it like found money. A mast-down inspection every 2–3 years is a realistic cadence for cruising boats because it exposes the parts that actually fail: masthead sheaves, tang fasteners, internal wiring chafe, spreader roots, and the step interface.
You can climb instead, and sometimes you should. But there’s no substitute for having hardware at chest height where you can check holes for ovaling, remove sheave pins, and inspect for corrosion blooms under fittings. Your future self offshore will be grateful, and your wallet will be less surprised.

Photo by Marc Wieland on Unsplash
Standing Rigging Inspection Checklist: Wire, Terminals, Tune
Wire rope condition (1×19): strands, kinks, and corrosion
Work bow-to-stern and port-to-starboard so you don’t miss pieces. On 1×19 wire, any broken strand is a hard stop: 0 broken strands tolerated, even if it’s “just one.” Those little needles (“fishhooks”) are often the first visible sign of fatigue, and once strands start going, the remaining wires pick up load and fail faster.
Look for kinks, crushed sections, and hard bends—wire doesn’t forgive abuse. Check wire near spreaders and any spot that touches something under load. If you see rust staining, treat it as information: stainless doesn’t “rust” for fun; it’s often telling you there’s crevice corrosion starting where oxygen can’t reach.
Swage and mechanical terminals: cracks, deformation, crevice corrosion
Swages are common, strong, and also where many rigs die. Inspect the swage mouth closely for rust weeping, cracks, and a “ring” line where the wire enters. Use a magnifier and strong angled light; hairline cracks show better when you rotate the fitting slowly.
If something looks suspicious, step up to dye penetrant (clean, apply penetrant, dwell, wipe, developer). It’s cheap insurance compared with a mast in the water. Any visible swage crack = replace, no debate, no “one more season,” no heroic optimism.
Mechanical terminals (like Sta‑Lok or Norseman types) deserve a different check. Confirm the cone is seated correctly, strands are properly splayed, and the body hasn’t backed off. Follow the manufacturer’s torque and assembly guidance; “good and tight” is not a spec, and over-tightening can be its own failure mode.
Turnbuckles, toggles, clevis pins: alignment and engagement
Turnbuckles should be straight under load, with toggles free to articulate. Misalignment creates cyclic bending at studs and tangs, which is a fatigue recipe. Inspect threads for galling, especially stainless-on-stainless, and use anti-seize (Tef‑Gel or similar) on assembly; bronze bodies with stainless studs are kinder in this respect.
Measure thread engagement. ABYC best-practice guidance commonly cited is ≥ 1.5× the thread diameter engaged inside the turnbuckle body, and I like more when I can get it without running out of adjustment. If you can see too many threads, or one stud is barely in while the other is buried, correct it—then re-check tune.
Pins are wear items. Look for grooves, corrosion, and bent cotters; and don’t reuse cotter pins like they’re heirloom hardware. Those 1/16–3/32 in pins work-harden, lose spring tension, and fail when you least want them to. Replace them, tape sharp ends, and keep spares aboard.
Baseline rig tune checks: symmetry, tension, mast column
A tune check isn’t about chasing racing numbers; it’s about keeping the mast in column and loads reasonable. Sight up the mast track and confirm it’s straight side-to-side, with consistent prebend if your rig calls for it. Check that port and starboard shrouds “feel” similar by hand, then verify with a gauge.
As a starting point, many production sloops land caps around 15–20% of wire breaking strength, then tune lowers/backstay to support mast shape and headsail set. Using catalog-typical break strengths for 1×19 316: 5/32 in ≈ 3,300 lb (14.7 kN), 3/16 in ≈ 4,700 lb (20.9 kN), and 1/4 in ≈ 8,100 lb (36.0 kN). Record your numbers in the log so you can spot changes later.

Photo by Tanner Mardis on Unsplash
Chainplates, Tangs, Spreaders, Mast Step: Hidden Failures
Chainplate inspection at deck line and below decks
Chainplates fail where you can’t see them, which is why they’re so good at ruining weekends. The deck line is a classic stainless steel wire rope corrosion crevice environment: water gets in, oxygen gets out, and corrosion starts quietly. Look for staining, weeping, cracked sealant, and any movement when the rig loads up.
Below decks, inspect backing plates, bulkhead tabbing, and fasteners for black streaks, rust trails, or crushed laminate. If you suspect wet core around chainplates, treat it as structural, not cosmetic. Water intrusion around loaded penetrations can compromise deck integrity and watertightness—this is where ISO 12215/12216 context matters, even if they’re not “rigging standards.”
If in doubt, pull a trim piece and look. A moisture meter can help, but your eyes and a screwdriver handle used for tap-testing will tell you plenty. Re-bedding a chainplate might cost $150–$800 in labor and sealant, while rebuilding wet core costs real money and time.
Tangs and spreader tips: wear, alignment, and galvanic couples
Mast tangs and their holes deserve close attention because small wear becomes big load concentration. Look for ovaled or elongated holes, cracked tangs, and clevis pins that show grooves. Any measurable ovalization, necking, or bending at toggles/clevis interfaces is a replace-now trigger, because it indicates the metal has been moving under load.
Spreader tips are where shrouds get sawn to death if chafe gear is missing or worn through. Inspect spreader tip guards, the angle of the spreader, and any sharp edges. A tiny burr can start broken strands, and once that begins, you’re living on borrowed time.
Watch the stainless/aluminum interface at tang fasteners and spreader roots. Corrosion blooms, white powder, and looseness are signs of galvanic activity and fretting. Clean, isolate with proper compounds where appropriate, and replace questionable fasteners rather than admiring them.
Mast step/partners and mast wiring chafe (ABYC tie-in)
At the mast step, look for corrosion, cracking, and compression damage. A step that’s sinking into the structure or a mast base that shows new deformation should stop the show until investigated. Fretting dust and unexplained movement are hints that the step isn’t transferring load properly.
If you’re climbing or the mast is down, inspect internal wiring and exit points. ABYC E‑11 is relevant here: you want chafe protection, strain relief, and proper support so conductors don’t saw through insulation over thousands of vibration cycles. Check the VHF coax especially—one chafe point can turn your “range problem” into a safety problem.

Photo by Pawel Kadysz on Unsplash
Running Rigging Inspection Checklist: Halyards, Sheets, Clutches
Line-by-line inspection: cover, core, and terminations
Running rigging inspection is simple but not quick: you need to run each line end-to-end. Look for cover fuzzing, flat spots, hard glazing, core exposure, and diameter reduction. Feel matters—if one section is stiff like a broom handle or oddly thin, it’s telling you the fibers have been heat-damaged or crushed.
Check splices, shackles, and knots at both ends. Eye splices should be tight with intact cover, and shackles should have mousing where appropriate. Mark recurring chafe zones with a small stitch of whipping twine so you can find and compare them next month.
Typical sizes on 30–40 ft boats are 3/8–7/16 in (10–11 mm) halyards and 7/16–1/2 in (11–12 mm) sheets. If someone downsized for racing, verify your clutches and winches are actually compatible, because low friction is great until the clutch won’t hold at 25 knots and you’re doing emergency sail handling.
Chafe/heat points: clutches, winches, fairleads, sheaves
Most line damage happens where fibers are loaded while moving: clutches, jammers, winches, and organizers. Inspect clutch cams for sharp wear, springs that don’t bite evenly, and aluminum teeth that have gone from “grippy” to “line shredder.” A glazed line is often a heat story: too much slip under load.
On winches, check the drum for scoring and the stripper arm for burrs. Fairleads and blocks should rotate smoothly without grinding, and organizers should have sheaves that spin freely. If a sheave is dragging, your halyard cover becomes the bearing surface, and it will lose that argument.
At the masthead, worn sheaves accelerate damage fast. Typical masthead sheaves on this size boat are 2–3 in (50–75 mm) diameter; inspect the groove for sharp edges, side cheeks for rubbing, and the pin/bushing for play. If the sheave wobbles, you’ll see cover wear in the same spot repeatedly.
Dyneema/HMPE specifics: core slip, glazing, and cover strategy
HMPE cores (Dyneema SK78 and similar) can last a long time, but they don’t tolerate heat and abrasion at clutches. Look for glazing—shiny, hardened sections—especially where the rope sits in a clutch under load. If the line has “steps” in diameter or the cover has migrated, you may be seeing core/cover movement or creep-related issues.
Evaluate the cover as a sacrificial component. Many HMPE halyards are built with a durable polyester or blended cover in high-wear zones; once the cover is worn through, the core will start taking abuse it wasn’t dressed for. If your sailing involves a lot of hoist-and-drop, consider a cover upgrade or chafe sleeve instead of pretending your clutch will become kinder.
Replacement intervals are use-dependent, but polyester double braid often lands at 3–7 years in real life. HMPE cores may go longer, yet still require frequent inspections at the same friction points. Lines don’t retire based on age alone; they retire when the fibers and hardware agree they’re done.
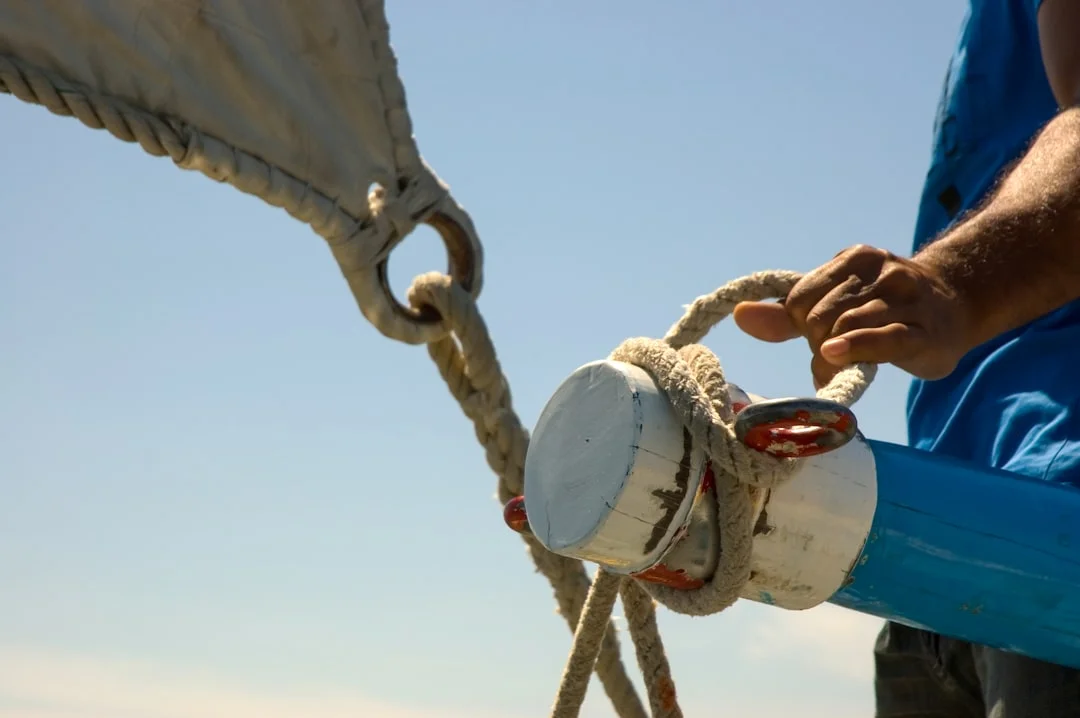
Photo by Eduardo Goody on Unsplash
Replacement Intervals & Decision Matrix: Monitor vs Replace
Standing rigging intervals: age, use profile, and proof-of-care
The “10-year rule” is best understood as an offshore expectation, not a universal death sentence. Many insurers and surveyors recommend stainless standing rigging replacement at about 10 years for offshore use, because fatigue and crevice corrosion are hard to disprove with eyeballs. Coastal boats with lighter loads and good documentation often run 12–15 years, but that’s earned, not assumed.
Life shorteners are consistent: tropical salt and heat, high cyclic loading, racing loads, poor tune, dissimilar-metal corrosion at mast fittings, and chronic leaks at chainplates. If you can’t prove the rig’s age and care history, the default assumption is “older than you think.” That’s not pessimism; it’s how risk management works when the downside is a dismasting.
The smartest move is building “proof-of-care.” Keep dated photos, tension notes, receipts, and a simple inspection log. If you ever sell the boat—or ask an insurer to trust your rig—documentation is worth more than your opinions.
Upgrade paths: wire vs rod, swage vs mechanical terminals
Wire is the cruising default for a reason: it’s inspectable, serviceable, and widely supported. Rod rigging can be excellent but typically demands specialist inspection and replacement, and it’s less forgiving of amateur improvisation. If your boat is rod-rigged, budget accordingly and lean on experienced riggers.
Terminal choices matter too. Swages are clean and common, but you must inspect them aggressively for cracks and crevice corrosion at the mouth. Mechanical terminals can be field-serviceable, but only if assembled correctly, rechecked, and protected from water ingress under boots and tape. Either system fails when it’s neglected, and both fail faster when misaligned.
Hardware upgrades are often boring but effective: better toggles to reduce bending, new turnbuckles to eliminate galling, and renewed chainplates to remove hidden corrosion risk. Budget for small metal parts; they’re cheaper than a mast and a lot cheaper than a helicopter ride.
Route planning tie-in: matching rig risk to passage length
Route length changes how conservative you should be. If you’re planning a long leg, remote cruising, or a season where the “nearest safe harbor” is a long way off, reduce tolerance for marginal findings. A small crack that might limp through a short daysail becomes unacceptable when the consequence includes a drifting night and a jury rig.
Use a planning habit: match rig condition to maximum distance-to-safe-harbor, forecast sea state, and crew capacity. Check the nautical miles between ports between bail-out options, then use that number to decide if “monitor” becomes “replace before departure.” I also use it when estimating motoring time for plan-B routes after a rig problem forces a detour.
Here’s a practical decision matrix you can actually apply without mysticism:
| Finding | Monitor (document) | Service (schedule) | Replace now (no-sail trigger) |
|---|---|---|---|
| Standing wire | Light surface staining you can explain and track | Suspect corrosion under boots; history unknown; tune drifting | Any broken strand (0 tolerated), kinked/crushed wire |
| Swage terminals | Clean, no weeping, no lines | Rust weeping at mouth; suspicious discoloration | Any visible crack or confirmed dye-penetrant indication |
| Turnbuckles/toggles | Straight under load; threads clean; toggles free | Minor galling; misalignment; low thread engagement | Bent studs, frozen threads, ovaled holes, deformation |
| Chainplates | Dry, sealed, no movement | Re-bed needed; staining; moisture suspicion | Movement under load, cracks, heavy weeping, structural rot |
| Running rigging | Minor fuzz; stable diameter | Local chafe zones; clutch slip/glazing developing | Core exposure, severe glazing, major diameter loss near clutch |

Photo by Davide Baraldi on Unsplash
Costs, Survey Expectations, and Budget Planning for Rig Work
What a professional rig inspection typically includes
A good rig inspection isn’t a vibe check; it’s systematic, with a written report and photos. Deck-level work typically covers terminals, turnbuckles, chainplate areas, visible tangs, and basic tune notes. Add a mast climb when you need eyes on masthead sheaves, tang fasteners, antenna mounts, and exit slots—places that quietly eat halyards and sometimes rigging.
Surveyors and insurers frame recommendations around consequence and uncertainty. If rig age is unknown, or if you’re planning offshore, they’ll often push toward replacement because it’s hard to “prove safe” with non-destructive inspection alone. Your documentation—log entries, dated photos, receipts—can legitimately shift that conversation from assumption to evidence.
When mast climb vs unstep is worth the money
A mast climb is often the quickest way to catch masthead problems before they shred a halyard or fail a fitting. Unstepping costs more, but it gives you access to do real work: sheave pin/bushing replacement, tang inspection with hardware removed, internal wiring support per ABYC E‑11, and corrosion mitigation at stainless/aluminum interfaces.
If you’re planning a longer passage, use a sea distance tool to plan your route to sanity-check your risk exposure. The longer the leg and the fewer bailouts, the more valuable masthead certainty becomes. Offshore miles have a way of making “probably fine” feel less convincing.
How to document for insurers and future buyers
Keep it simple: a spreadsheet or notebook with dates, findings, and what you replaced. Photograph swages, turnbuckles, chainplates, and masthead gear every season, from the same angles if possible. Record wire sizes (e.g., 3/16 in, 1/4 in) and any tension baselines, and staple in receipts.
When you sell, buyers don’t just buy hardware; they buy the story of how it was cared for. And when an insurer asks for rig age, “I have a log and invoices” beats “the marina guy said it looks good.” That’s not romance, but it keeps premiums and arguments down.
| Service/Scope | Typical scope | Typical time | Typical cost (USD) |
|---|---|---|---|
| Deck-level rig inspection + written report | Terminals, turnbuckles, chainplates, visible mast fittings, tune notes | 1–2.5 hrs | $200–$600 |
| Mast climb add-on | Masthead sheaves, tangs/fasteners, antennas/lights, exit slots | 0.5–1.5 hrs | $150–$350 |
| Mast unstep/step (yard crane, per operation) | Full access to masthead, spreaders, wiring, step/partners | 0.5–2 hrs | $400–$1,200 |
| Re-rig tier (30–40 ft monohull) | What’s included | Typical cost band (USD) |
|---|---|---|
| Standing wire + swaged terminals only | New 1×19 wire, new swages, reuse serviceable turnbuckles | $3,000–$8,000 |
| Wire + turnbuckles/toggles refresh | Adds new turnbuckles, toggles, clevis pins, cotters | $6,000–$12,000 |
| Full attachments scope | Adds chainplates, tangs/spreader hardware, masthead sheaves/pins, step work | $8,000–$15,000+ |
Frequently Asked Questions
How do I verify turnbuckle safety by measuring ≥1.5× thread diameter engagement, and what defects (galling, bent studs) require immediate replacement?
Measure the stud thread diameter (for example, 3/8 in thread), then confirm at least 1.5× that diameter—here 9/16 in—is engaged inside the turnbuckle body on both ends after tuning. If threads are galled (torn, smeared, or seized), studs are bent, the body is cracked, or toggles/holes show deformation or ovaling, replace immediately; those are fatigue and stress-concentration problems, not “maintenance items.”
What are the most reliable methods to detect hairline swage cracks and early crevice corrosion—visual, magnification, dye penetrant—and when is each appropriate?
Start with strong angled light and a careful visual scan for rust weeping at the swage mouth, then use a magnifier to look for hairline lines that don’t match machining marks. If anything looks suspicious—or if the rig has unknown age and you’re planning offshore—use dye penetrant to confirm cracks that eyes miss. Any confirmed crack, or consistent rust weeping from the swage mouth, is a replacement-level finding.
How can I estimate a safe baseline cap shroud tension using a Loos gauge and a 15–20% of breaking-strength target, given my wire diameter (e.g., 5/32, 3/16, 1/4 in)?
Use catalog-typical breaking strengths as a starting reference: 5/32 in ≈ 3,300 lb, 3/16 in ≈ 4,700 lb, 1/4 in ≈ 8,100 lb. A 15–20% baseline target would be about 500–660 lb for 5/32, 700–940 lb for 3/16, and 1,200–1,620 lb for 1/4, then adjust per spar maker/designer tuning guidance and mast behavior (column, prebend). Use a Loos gauge calibrated for your wire size, and record the readings port/starboard so you can repeat them and spot drift.
For Dyneema/HMPE halyards, what inspection signs indicate core damage or heat glazing at rope clutches, and how should cover-to-core wear be evaluated?
Look for glazing (shiny, hardened, sometimes flattened sections) where the line sits in a clutch or jammer under load, and feel for stiff or thin “steps” that suggest heat or compression damage. Check for cover migration that exposes core or changes diameter, and inspect the exact clutch bite zone every month during the season. Treat cover wear as your early warning; once the cover is compromised in high-load zones, the core will follow quickly unless you re-cover, sleeve, or replace.
When inspecting masthead sheaves (2–3 in typical), what groove/sharp-edge and pin/bushing play thresholds justify replacement to prevent halyard cover failures?
If you can feel a sharp edge with a fingernail anywhere in the groove, or see a ridge that’s cutting into line fibers, replace or recondition the sheave. Also replace if the sheave wobbles on its pin, shows obvious side-to-side slop, or the bushing is ovaled—because that misalignment forces the halyard to run on edges and cheeks. On 2–3 in (50–75 mm) sheaves, small wear becomes big line damage surprisingly fast, and masthead access is never cheaper than when you’re already up there.
About the Author
Related Articles

San Francisco Bay Sailing: Winds, Tides & Hazards Guide
Plan safer San Francisco Bay sailing with wind patterns, tides, currents, fog and key hazards. Use this guide to pick a route and go sail today.
By Breezada Team

Sailboat Engine Won't Start: Diagnostic Flowchart
Troubleshoot a sailboat engine that won't start with a step-by-step flowchart for batteries, starter, fuel, air, glow plugs & alarms. Fix it now.
By Breezada Team
Sailboat Bottom Paint Guide: Types, Costs & Prep
Learn sailboat bottom paint types, costs, and prep steps—plus how often to repaint. Get the right antifouling plan for your boat today.
By Breezada Team
Diesel Heater Troubleshooting Boat: No-Start & Soot Fixes
Fix diesel heater no-start and sooting on your boat. Step-by-step checks for power, fuel, air/exhaust and maintenance—read the guide now.
By Breezada Team