Croatia Sailing Itinerary: Split to Dubrovnik (7 Days)
Split to Dubrovnik 7-Day Croatia Sailing Itinerary (with NM legs, moorings, and real-world costs)
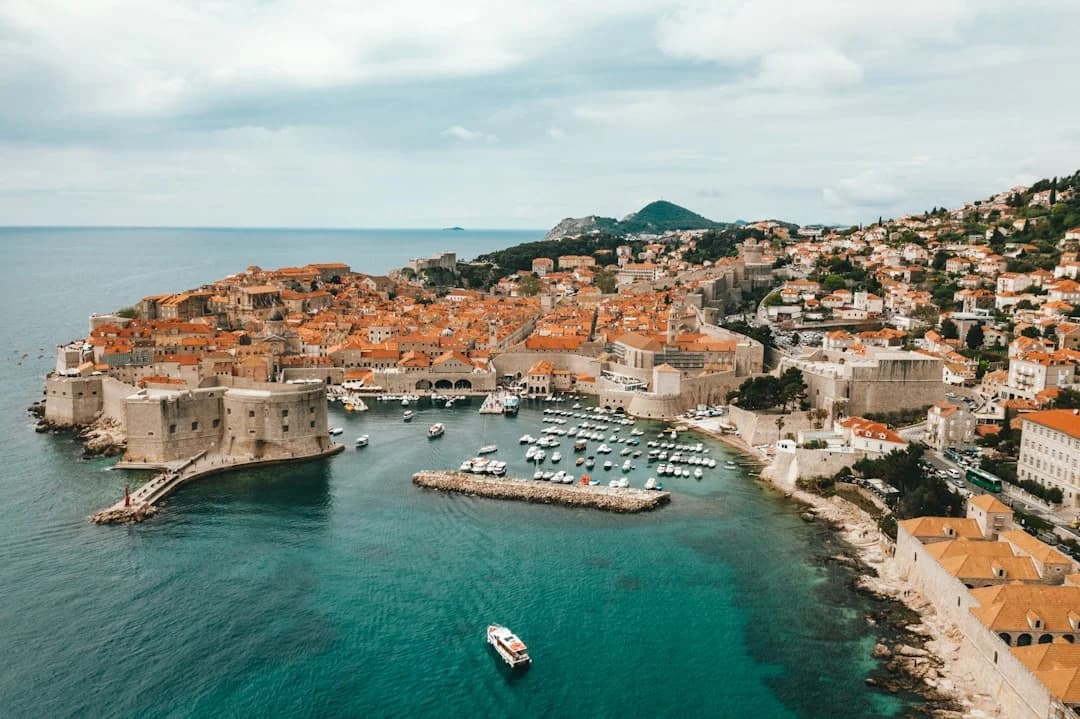
A Split to Dubrovnik Croatia sailing itinerary looks easy on a map: point the bow southeast, enjoy the islands, arrive smug. In practice, the best week comes from planning in nautical miles, timing the Maestral (NW sea breeze), and keeping a Bora (NE) escape hatch when the forecast turns sharp.
This plan assumes a typical charter monohull and the usual Dalmatian reality: buoy fields where you expected to anchor, town quays that demand tidy Med-mooring, and Dubrovnik-area berths priced like they’ve seen your charter contract.

Photo by Spencer Davis on Unsplash
Route overview: assumptions, miles, and time windows
Navigation assumptions (boat, speed, draft, daylight)
I’m baselining this itinerary on a 40–46 ft (12–14 m) charter monohull with 2.0–2.4 m draft and a realistic passage average of 5–7 kn. That’s not polar performance; it’s “full main, bit of genoa, and you still had time for coffee” speed, including traffic dodging and the occasional sail trim debate.
Daylight in summer gives you generous margins, but crews waste it by departing late and then bashing upwind into the afternoon Maestral. If you want the pleasant part of the day, aim to be underway by 09:00–10:00, especially when your leg is 25–35 NM and you’d like to arrive before the buoy-field lottery begins.
With clear water over rock shelves, depth perception lies with conviction. I target 0.5–1.0 m under-keel margin in swell-prone bays, and I treat “it looks deep” as meaningless unless the sounder agrees.
Sea distance math: direct vs island-hopping totals
Split to Dubrovnik direct is about 100–110 NM depending on where you draw the line and how allergic you are to headlands. A real 7-day charter week is rarely direct, because you’ll detour for Hvar/Pakleni, maybe Vis, and usually Korčula and Mljet—bringing the total to roughly 120–160 NM.
The skipper’s trick is to compute each leg in NM, then sanity-check it against your speed and daylight. Breezada’s sea distance calculator is handy here: run both the “straight shot” and the “island-hopping” option and you’ll see where your week quietly turns into a delivery.
How to choose clockwise vs counter-clockwise micro-routes
Between Split and Dubrovnik you’ll constantly choose north-side versus south-side bays and channels. Your decision levers are: sleep quality (swell wrap and taxi wakes), Bora exposure (gusts funneling through gaps), and whether a buoy field will be full by 15:00 in July–August.
One-way logistics also matter. Split check-in often starts mid-afternoon, and Dubrovnik drop-off mornings can be tight; plan your final night within 10–15 NM of the handover point if the operator wants an early return.
Practical tip: Plan days at 20–35 NM and protect your mornings. If you’re still in the cockpit arguing about breakfast at 11:30, you’re volunteering for a Maestral upwind slog.
Day-by-day Split to Dubrovnik plan (7 days, legs in NM)
Days 1–2: Split base shakedown to Hvar/Pakleni
Day 1 (Split → Šolta or Drvenik): 10–18 NM, ~1.5–3.0 h at 5–7 kn. After handover, I like a short hop to test steering, windlass, and the crew’s fender instincts. If you arrive late, a buoy or quay is faster than anchoring gymnastics in fading light.
Day 2 (Šolta/Drvenik → Hvar Town or Pakleni Islands): 15–25 NM, ~2.5–4.5 h. Leave by 09:00–10:00 and you’ll usually beat the worst ferry corridors. Near Split–Hvar you’ll see fast cats doing commuter things; COLREGs still apply even when they look impatient.
Overnight default here is usually buoy (Pakleni) or town quay/marina (Hvar Town) if you need showers and 230V power. In peak season, arriving after 14:00–15:00 is a great way to practice disappointment.
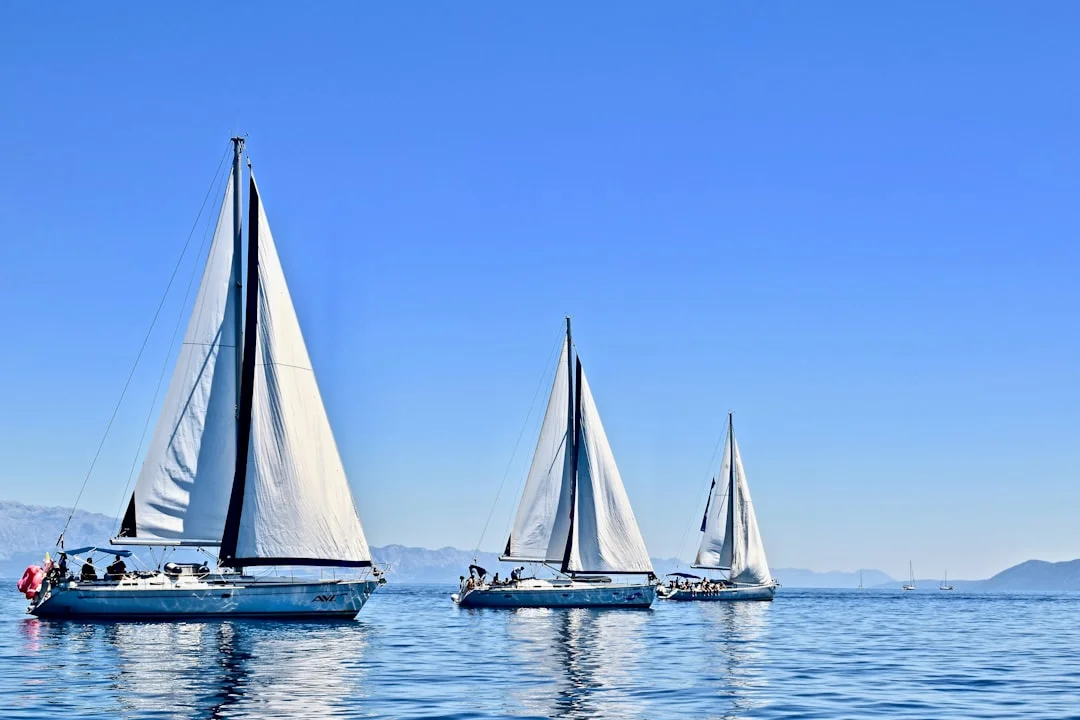
Photo by Karla Car on Unsplash
Days 3–4: Hvar/Vis option to Korčula (the long leg)
Day 3 option A (Pakleni/Hvar → south Hvar bays): 8–15 NM, ~1.5–3 h. This keeps the week relaxed and gives you time for swim stops. The “bad-weather” version is simply hugging the lee and choosing bays with protection from NW chop.
Day 3 option B (Hvar → Vis): ~20–30 NM, ~3–5.5 h. Vis is worth it when you want fewer crowds and better anchoring options, but it adds a real crossing. If Bora is forecast, this is one of your key decision points; keep a bailout within 10–15 NM.
Day 4 (Hvar area or Vis → Korčula area): ~30–45 NM, ~4.5–8 h depending on start/finish bays. This can be the longest leg of the week if you route it aggressively. If your crew starts counting engine hours out loud, shorten the day with an earlier stop and accept you’re trading NM for sanity.
Korčula’s channels get busy with ferries and day boats. Maintain a proper watch, keep your VHF on Ch. 16, and don’t assume the other skipper is as impressed by your right-of-way as you are.
Days 5–7: Mljet to Dubrovnik approaches and finish logistics
Day 5 (Korčula → Mljet): 20–30 NM, ~3–5.5 h. This is usually pleasant in the morning and can become punchy later if the Maestral builds. Mljet is where many itineraries go from “holiday” to “park rules,” so read the anchoring and buoy signage carefully.
Day 6 (Mljet → Elafiti or Dubrovnik approaches): 15–25 NM, ~2.5–4.5 h. Your choice is between a quiet outer island night or positioning closer for a clean checkout. If Dubrovnik premium berthing is painful, spend this night outside and go in early next morning.
Day 7 (Approaches → Dubrovnik base/fuel dock): 5–15 NM, ~1–2.5 h. Build time for the fuel dock queue, which can easily be 30–90 minutes at peak. Budget total engine time for the week at 15–25 h (calms, docking, charging), because nobody ever returns a charter with “0 engine hours” unless it stayed tied up.
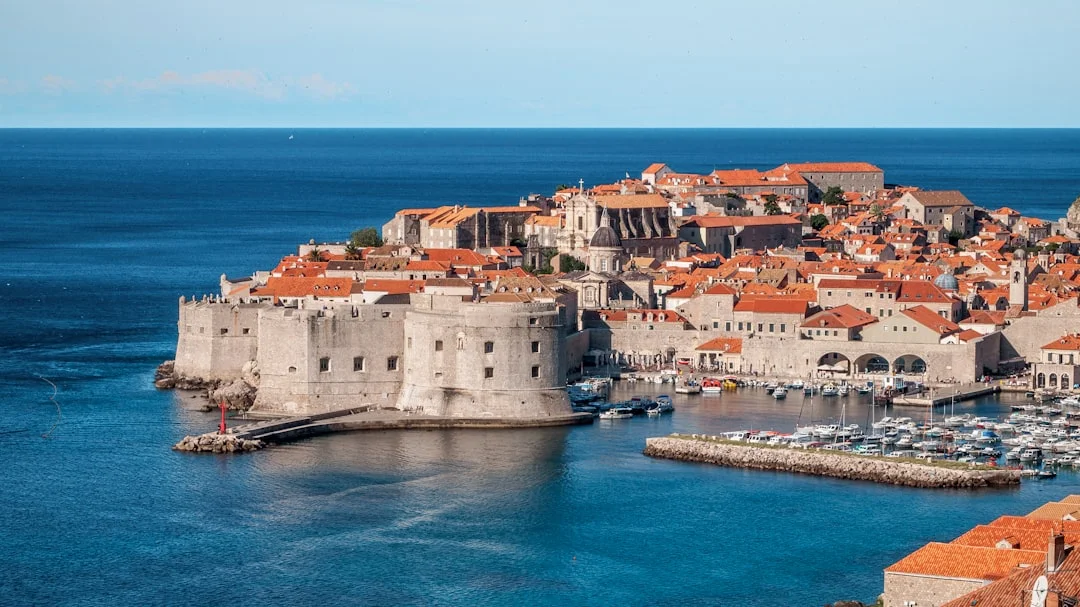
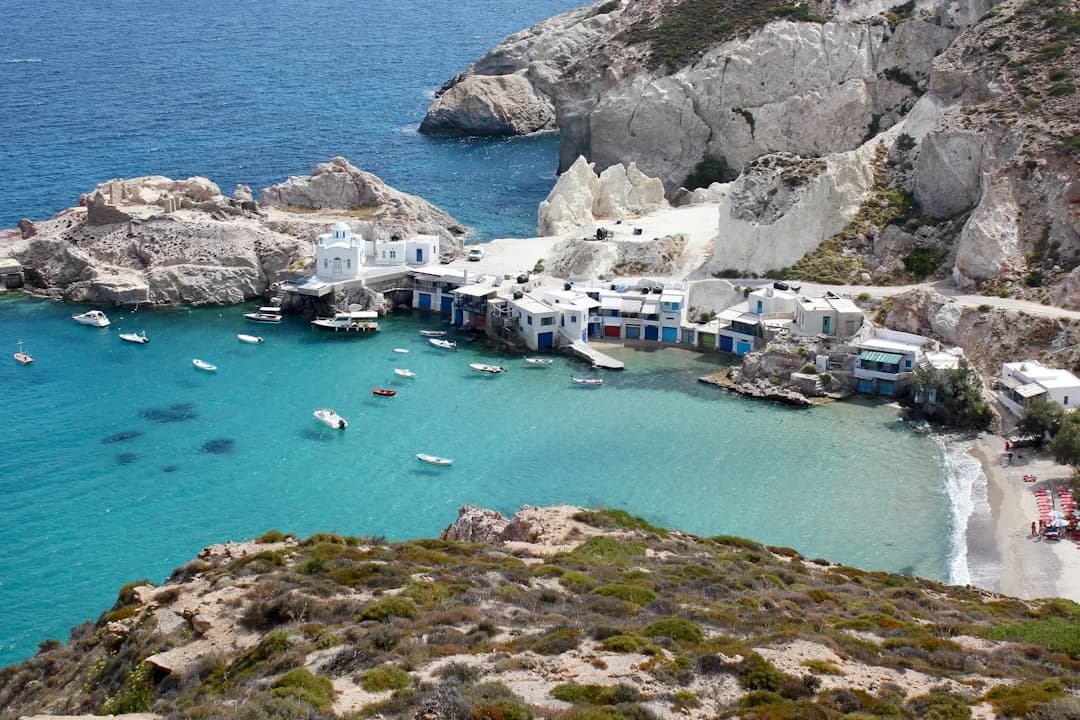
Photo by Ivan Ivankovic on Unsplash
Best overnight anchorages: holding, depths, and protection
How to evaluate a Croatian bay (bottom, scope, swing room)
Croatian bays reward skippers who anchor like they mean it. Look for sand or mud patches in 5–15 m and confirm the depth gradient with a slow pass; many coves shelve fast from 6 m to 20 m and make scope math ugly.
Scope targets: 4:1 to 6:1 depending on room and forecast. At 10 m depth, that’s 40–60 m of rode, which is where charter reality intrudes: many boats carry only 20–30 m chain before splice to rope (if you even have rope).
Set the anchor with controlled reverse, then verify you’re not dragging using transits or plotter anchor alarm. If the breeze is unsettled, add a snubber; it reduces shock loads and stops the chain from growling all night like a cheap horror soundtrack.
High-confidence bays by area: Hvar/Pakleni, Korčula, Mljet
Around Hvar/Pakleni, many “classic” spots are now concessioned with buoys in the best sand. If you do anchor, keep clear of buoy lines and leave room for late arrivals who will misjudge their swing radius by roughly your entire LOA.
Around Korčula, pick bays with shelter from NW wind waves if the Maestral is doing its afternoon routine. In channels, wake can be persistent; a bay that looks calm at 16:00 can turn into a washing machine by 22:00 when taxis keep running.
On Mljet, protection is often excellent, but rules are stricter and enforcement more visible in season. Pay attention to where anchoring is prohibited to protect Posidonia oceanica; the fine is never included in the charter “base package,” no matter how creative your broker is.
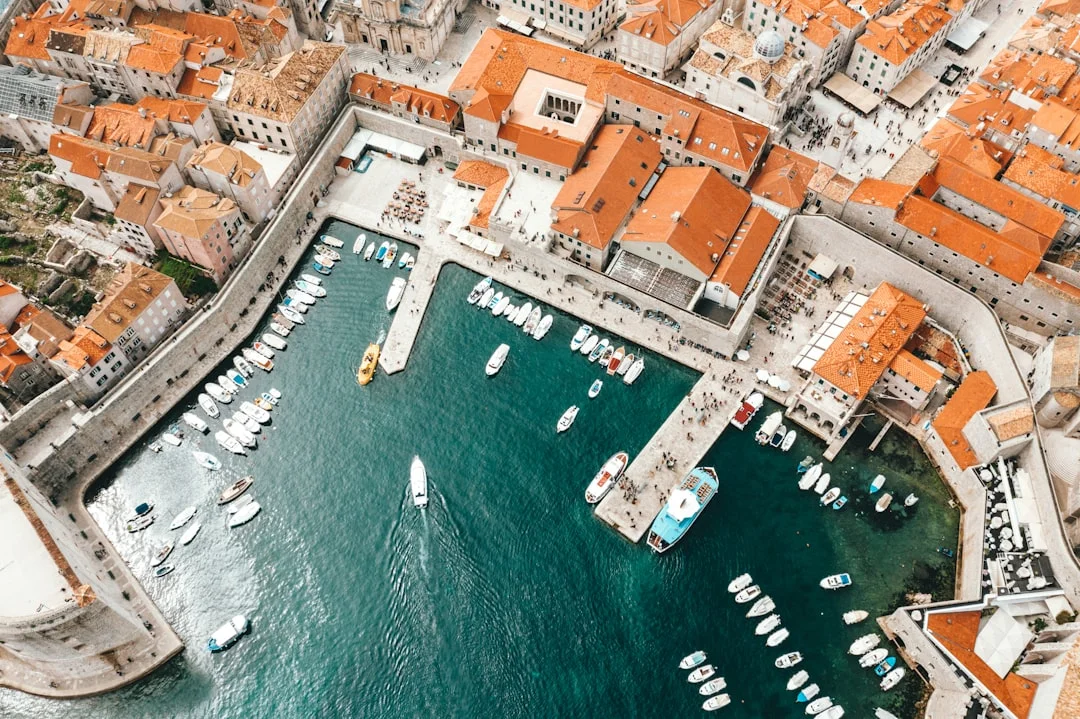
Photo by Spencer Davis on Unsplash
Anchoring restrictions and Posidonia protection realities
If a bay is run as a concession buoy field, anchoring may be prohibited or restricted, particularly over seagrass. In July–August, enforcement is more consistent, and “I didn’t know” doesn’t travel well across a clipboard.
For draft, with 2.0–2.4 m you must respect rocky shelves near shore, especially where swell lifts the stern. The Adriatic can be deceptively calm, then throw a short-period wraparound that makes your depth swing by 0.5 m in seconds.
Charter gear note: check chain markings at handover. If the chain is unmarked, mark it yourself with cable ties or tape—counting links at midnight is a skill best left to people who enjoy spreadsheets for fun.
Mooring buoys, town quays, and marinas: how they work
Concession buoy fields: pickup technique and what’s included
Buoys are fast, usually secure, and often the only legal option in popular bays. They typically include the overnight stay and sometimes trash collection, but water and electricity are usually not included unless you’re tied to a restaurant quay pretending to be a “service.”
Pickup: approach slowly into wind/current, snag the pendant with a boat hook, and rig two bow lines through the pendant eye to separate bow cleats. On 12–14 m boats, I like 14–16 mm polyester lines; thinner lines chafe faster and hurt hands more, which is an underrated downside.
After you’re settled, inspect chafe points and re-check after 30–60 minutes. In gusty conditions, a buoy can look fine at sunset and start sawing your line at 02:00.
Town quay Mediterranean mooring with lazy lines
Town quays are convenient and social, but Med-mooring is not the time for improvisation. Prep 6–10 fenders plus 1–2 ball fenders for rough stone, with fender lines 1.5–2.0 m so you can adjust quickly when the quay height is wrong (it will be wrong).
Approach stern-to with a clear plan: who takes the first stern line, who handles the second, and who hooks the lazy line. Keep the rudder centered when you’re close and avoid bursts of reverse with slack lines in the water; props love souvenirs.
Marinas (ACI/private): shore power limits and services
Marinas cost more, but you’re buying showers, water top-up, and a fighting chance at quiet sleep. Croatia is 230V/50Hz, and pedestals are often 16A (about 3.7 kW) with some 32A spots; your boat’s inlet is frequently 16A, so don’t assume you can use the bigger socket without an adapter and the correct rating.
Good practice aligns with ISO 13297 and ABYC E-11: uncoil the shore cable under load, check connectors for heat, and ensure the RCD/RCBO actually trips. If the pedestal looks cooked, it probably is.
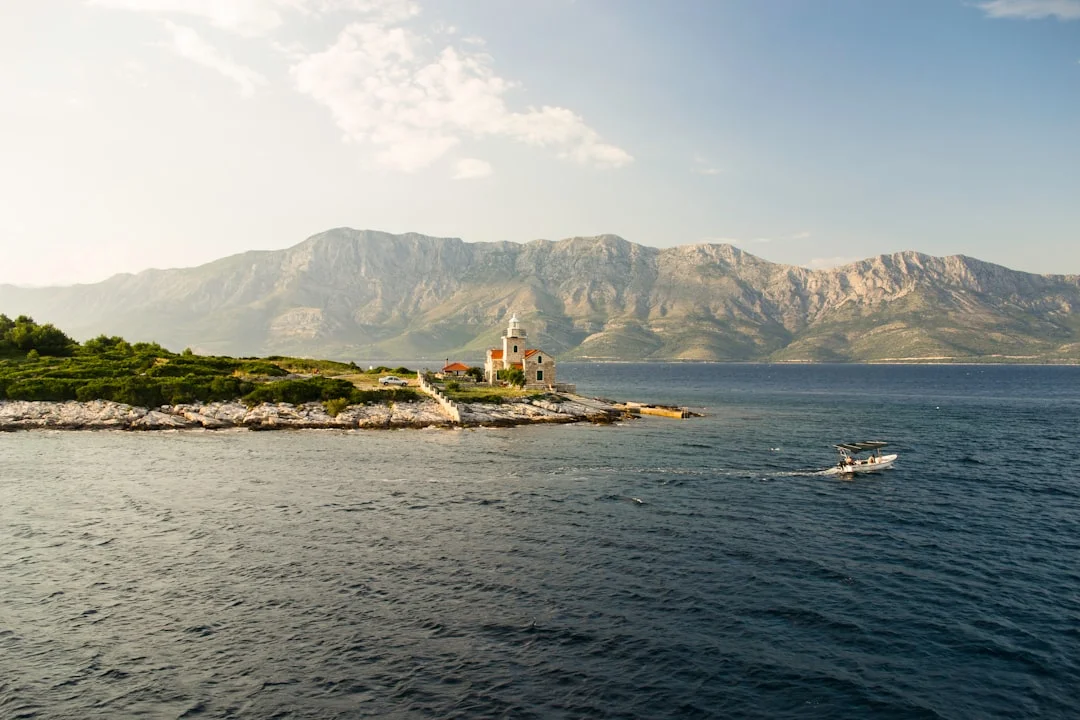
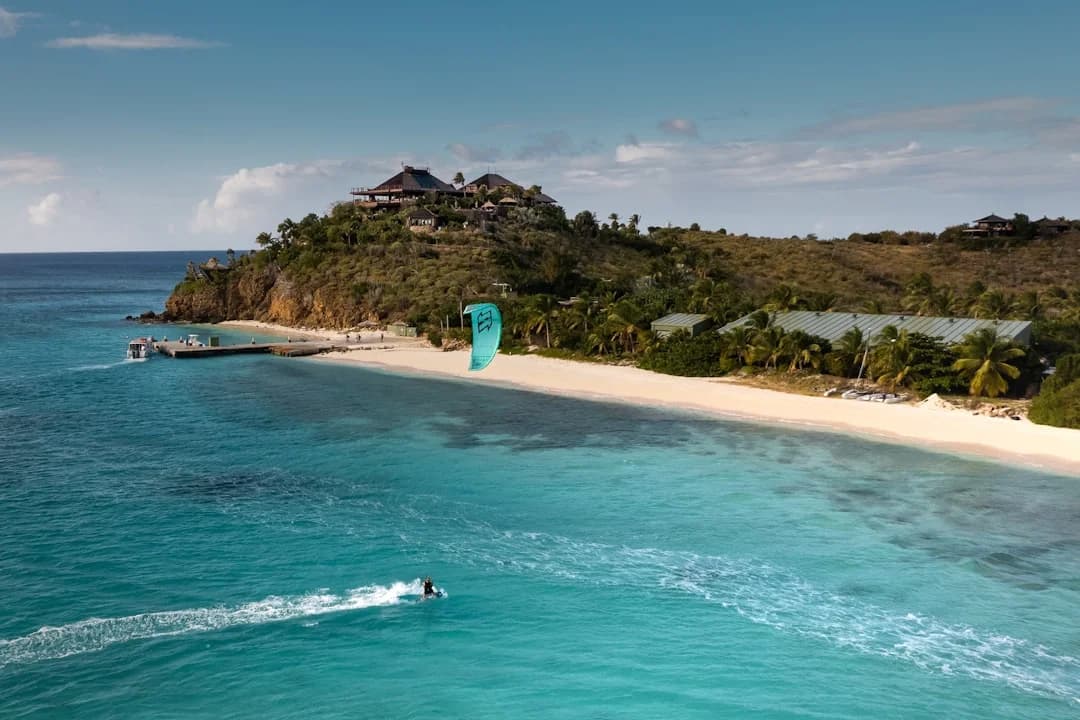
Photo by Daria Andraczko on Unsplash
Fees and budget: buoys, marinas, parks, fuel, one-way costs
Night-by-night cost drivers on this route
Costs are driven by three things: LOA band, season, and location premium (Dubrovnik is the heavyweight). A 12–14 m boat has a manageable range, but if you bump into 15–20 m pricing bands, the numbers jump fast.
Use estimate your fuel needs based on the voyage distance when estimating fuel and deciding whether that “quick detour” to Vis is worth an extra 15–25 NM plus a likely extra paid night. It’s rarely the sailing that breaks a budget; it’s the cascade of marina nights and taxis when you arrive late.
| Overnight option (typical) | 12–14 m shoulder | 12–14 m peak (Jul–Aug) | 15–20 m peak | What you usually get |
|---|---|---|---|---|
| Concession mooring buoy | €30–€60 | €40–€90 | €80–€160 | Mooring only; sometimes trash |
| Town quay / port berth | €40–€90 | €50–€120 | €100–€220 | Often near town; utilities vary |
| Marina (ACI/private) | €70–€140 | €80–€180 | €140–€300 | Water/showers/power (not always strong) |
| Dubrovnik-area marina premium | €100–€180 | €120–€220 | €220–€400+ | Location premium; book early |
Mljet National Park and other authority charges
Mljet National Park fees are structured by LOA band (commonly 9–12 m, 12–15 m, 15–20 m) and season, with July–August being the priciest. Expect “tens to low hundreds of euros” per boat—often roughly €30–€150+, depending on length and timing, and tariffs change yearly.
Treat park fees as must-pay if you enter regulated areas, not as a negotiable suggestion. Skippers who try to game it tend to end up spending their savings explaining themselves.
Fuel, water, and provisioning realism for 7 days
Fuel: assume 3–6 L/h and 15–25 engine hours, giving roughly 50–150 L. At €1.40–€1.80/L, that’s about €70–€270. If you motor hard into afternoon Maestral chop, you’ll trend toward the top end and arrive grumpy.
Provisioning in Split for 4 people / 7 days usually lands around €250–€500, plus the inevitable konoba nights at €20–€45 per person. One-way fees, when available, can add €500–€1,500, and availability is often tighter than charter marketing implies.
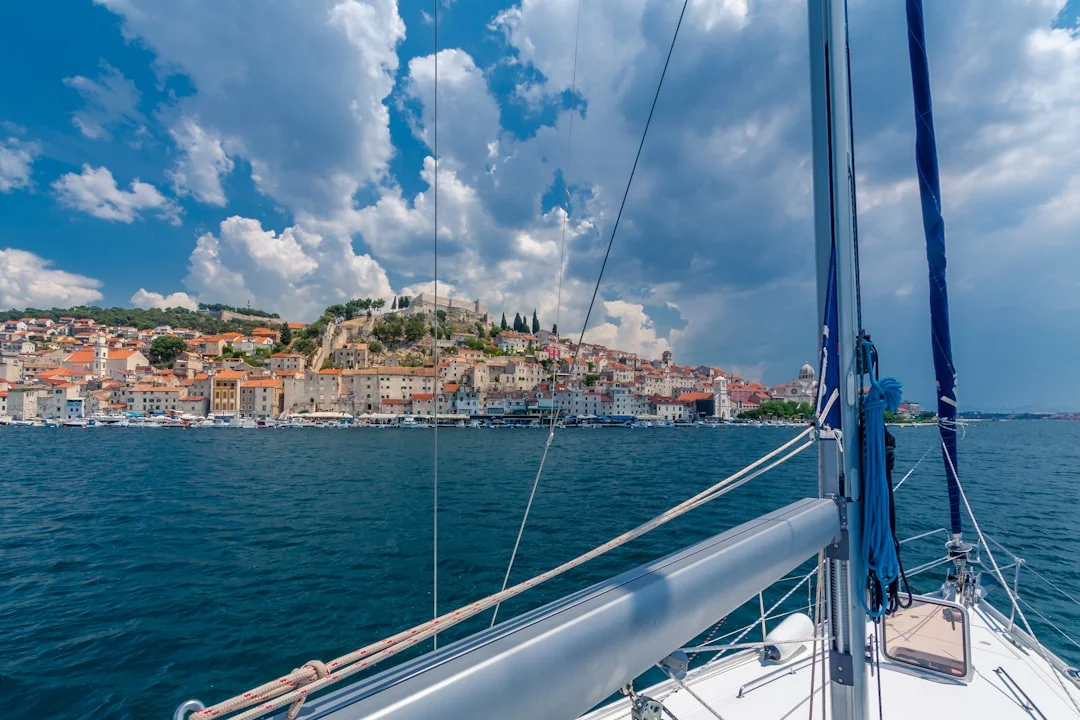
Photo by Sergii Gulenok on Unsplash
Weather, routing, and regulations on the Dalmatian coast
Maestral vs Bora: departure timing and where gusts accelerate
Summer Dalmatia is often ruled by the Maestral: a NW sea breeze that builds late morning, peaks mid-afternoon, and eases toward evening. If your leg is east/southeast and you leave at 11:30, you’ve volunteered for a beat; leave at 08:30–09:30 and you’ll often get flatter water and happier crew.
Bora is the grown-up wind: NE, gusty, and accelerated through gaps and channels. The Korčula and Mljet area can see sharp bullets that turn a calm anchorage into a rigging symphony; choose bays with terrain that blocks NE and avoid long exposed legs when Bora warnings appear.
Routing discipline helps: compute sea distance per leg, set a turn-back time, and keep alternates within 10–15 NM whenever possible. Plan your route using a sea distance calculator for plotting those “Plan B” hops before you’re already committed mid-channel.
Traffic, COLREGs, and VHF working practice
Split–Hvar corridors are busy with ferries and fast cats running schedules that don’t care about your genoa trim. COLREGs apply, but practical seamanship matters more: keep a proper lookout, avoid loitering in narrow traffic lanes, and don’t assume a ferry will adjust early just because you’re technically stand-on.
VHF: keep Ch. 16 monitored for calling/distress. Working channels vary by marina and harbor (you’ll often hear 9/10/17, but verify locally); ask on arrival or check posted signs.
Regulatory hygiene: harbor master, fees, and charter checks
Croatia generally runs efficiently, but paperwork and fees still exist in the background. Your charter operator typically handles core documentation, yet the skipper is still responsible for safe operation and local compliance, including respecting buoy-field restrictions and park boundaries.
Use standards as your handover backbone: confirm safety gear consistent with ISO 9094 (fire protection expectations), steering checks aligned with ISO 8848/10592, and electrical common sense in line with ISO 10133/13297 and ABYC E-11. None of this is abstract—town quays and sketchy pedestals punish boats with neglected basics.
Boat setup and onboard systems checklist for this itinerary
Lines, chafe, and deck workflow for buoys and quays
For a 40–46 ft boat, carry or request at handover: 2× 15–20 m stern lines plus at least 2 longer springs (think 20–25 m if you can). Line diameter around 14–16 mm polyester is the sweet spot: strong, manageable, and less likely to turn into a cheese wire on your hands.
Pre-flake stern lines before entering a harbor, assign roles, and keep a sharp knife accessible (not buried under snorkels). For buoys, rig two bow lines and add chafe protection where the pendant touches your rope; a bit of hose or chafe sleeve can save an overnight failure.
Electrical and shore power (16A reality) + adapters
Croatian pedestals are commonly 230V/50Hz with 16A sockets; that’s about 3.7 kW, which disappears quickly when someone turns on the water heater and the battery charger is already bulk-charging. Some marinas offer 32A (about 7.4 kW), but your boat inlet is often 16A, so the limiting factor may still be onboard.
Check your cable for cuts, corrosion, and heat damage. Don’t run it coiled under load, and feel the plug after 15 minutes; warm is okay, hot is a problem. This is where ABYC E-11 habits beat wishful thinking.
Water, toilets, holding tanks, and pump-out planning
Typical water tanks are 300–600 L. Conservative use is 20–40 L/person/day, so a 4-person crew burns 80–160 L/day and will need top-ups every 2–3 days without a watermaker. If you want long showers, budget more marina nights or accept you’ll run out.
Holding tanks are often 60–120 L. For bigger crews or normal toilet use, plan at least one pump-out midweek; availability varies, so treat pump-out as a “when you see it, take it” opportunity.
Swim-stop safety is not optional. Check the ladder works, brief a reboarding plan, and keep engines off when swimmers are near—ABYC H-41 is a solid benchmark even if it’s not an EU requirement.
Practical tip: On this route, water and power are the real currency. Plan a marina stop every 2–3 nights unless your crew showers like monks.
Alternatives, extensions, and bad-weather fallbacks (maps logic)
If you want flexibility without reinventing the week mid-sail, keep three route modules in mind: Classic, Vis Detour, and Conservative Weather. Each preserves the Split→Dubrovnik flow while changing your exposure and crowd profile, and you can compare them quickly by total NM and longest leg.
| Variant | Approx total NM (7 days) | Longest leg | Exposure profile | Overnight mix (typical) |
|---|---|---|---|---|
| Classic (Hvar → Korčula → Mljet) | ~120–145 NM | ~35 NM | Moderate; channel traffic | Buoys + 1–2 marinas + 1 quay |
| Vis Detour (adds Vis) | ~140–160 NM | ~40–45 NM | Higher crossings; cleaner anchor options | More anchoring/buoys, fewer quays |
| Conservative Weather (short hops) | ~120–140 NM | ~25–30 NM | Lower; more lee-hugging | More marinas/quays, fewer exposed bays |
Vis is “worth it” when buoy fields are packed and you want better holding and less chaos, even if it adds 15–25 NM and possibly one extra paid night. Near the finish, Pelješac or the Elafiti can give you a calmer last night, then you run into Dubrovnik early to beat the fuel dock crowd.
Two conservative Bora swaps that work: (1) shorten Korčula→Mljet into a sheltered intermediate hop, keeping legs 15–25 NM; (2) if Bora is imminent, choose north-side bays and avoid committing to a long exposed crossing after 12:00. The goal isn’t heroism—it’s arriving with gear intact and a crew that will still speak to you.
Frequently Asked Questions
For a 12–14 m charter monohull averaging 5.5 kn, what are realistic ETA ranges (including reefing/traffic) for the Hvar→Korčula leg at 30–35 NM, and what turn-back time should you set?
At 5.5 kn, 30–35 NM is 5.5–6.5 hours underway in clean conditions. Add reefing, traffic avoidance, and one “why is the autopilot doing that” moment, and 6–8 hours is a realistic door-to-door range. I set a turn-back time based on arrival before buoy-field crunch: if you want to be tied by 15:00, and you expect 7 hours, your “commit” point is around 08:00 plus any delays.
What scope and chain/rode configuration is workable if your charter boat has only 25–30 m of chain and you need to anchor in 12–14 m—when should you add a snubber or switch to a buoy?
In 12–14 m, ideal scope is 4:1–6:1, meaning 48–84 m of rode, which exceeds the all-chain many charters carry. If you have 25–30 m chain plus rope, you can anchor if there’s room and conditions are moderate, but you must ensure the rope splice is sound and you’re not relying on too-steep a catenary. Add a snubber whenever there’s gusting or chop to reduce shock loads; switch to a buoy if you can’t achieve safe scope, if the bay is crowded, or if anchoring is restricted.
How do you rig two bow lines on a Croatian concession mooring buoy to minimize chafe, and what inspection interval is prudent overnight in gusty Bora conditions?
Pick up the pendant and run two separate lines through the pendant eye (or through the buoy’s ring if provided), then lead them to two bow cleats, sharing the load. Keep the lines clear of the bow roller edges, add chafe gear where they touch, and avoid a single-point failure on one cleat. In Bora gusts, I re-check after 30 minutes, again at bedtime, and at least once overnight (or set an alarm) if gusts are over 25–30 kn.
What is the correct step-by-step lazy-line (Mediterranean mooring) procedure to avoid prop fouling when backing to a town quay, and what line lengths (stern + springs) are optimal for a 40–46 ft boat?
Prep 6–10 fenders plus 1–2 ball fenders, rig 2× 15–20 m stern lines, and have 2 springs ready (ideally 20–25 m). Approach slowly, drop/hand off the first stern line early, then the second, keeping them controlled and out of the water. Only once stern lines are controlling distance do you pick up the lazy line with a hook/boat hook, lead it forward outside everything, and make it fast at the bow—never motor with slack lines near the prop.
On 230V/50Hz 16A pedestals, which onboard loads typically trip breakers on charter yachts (water heater, air-con, battery charger), and what cable/adapter checks reduce overheating risk?
On 16A (~3.7 kW), the usual offenders are the water heater (often ~1–2 kW), air-conditioning (can exceed capacity on startup), and a battery charger in bulk mode—run two of those together and you’ll often trip the pedestal. Reduce risk by uncoiling the shore cord, fully seating connectors, using correct CEE adapters, and checking plugs for heat after 10–15 minutes under load. If the pedestal is marginal, stagger loads: charge batteries first, then heat water, and don’t pretend the air-con will be happy about it.
Skipper’s recap: A 7-day Split→Dubrovnik run is best when you plan in NM, aim for 20–35 NM days, and leave early to avoid afternoon Maestral work. Choose nights by protection and services (buoy vs quay vs marina), budget realistically for Mljet fees, berthing, fuel, and provisioning, and keep Bora-safe alternates within 10–15 NM. Before you cast off: confirm one-way logistics, pre-book peak-season berths, verify chain length/line inventory/adapters at handover, and check the nautical miles for your planned route so your timing, daylight, and fuel dock queues all line up.
About the Author
Related Articles
Best Greek Islands for Sailing: Cyclades vs Ionian
Compare Cyclades vs Ionian to choose the best Greek islands for sailing. Discover winds, routes & tips—read now and plan your trip!
By Breezada Team
7-Day Sailing BVI Itinerary: Anchorages & Fees
Plan a 7-day sailing BVI itinerary with top anchorages and fees. Get the route, costs, and tips—start planning your trip today!
By Breezada Team

Best Sailing in Greece: Cyclades vs Ionian vs Dodecanese
Compare the Cyclades, Ionian, and Dodecanese to choose the best sailing in Greece—get tips and pick your ideal route. Read now!
By Breezada Team
Greek islands sailing itinerary 7 days from Athens
Plan a Greek islands sailing itinerary 7 days from Athens. Follow this 7-day route, stops, and tips—read now and start planning your trip.
By Breezada Team