Spring commissioning is the deliberate, methodical work of bringing a boat from winter storage back into seaworthy condition — and it usually takes longer than people expect. A typical 35-foot cruising sailboat needs 15 to 25 hours of focused labor spread across two or three weekends, plus a haul-out window if you skipped autumn antifouling. Skip a step and you will find out about it offshore, in the rain, with the engine refusing to start.
This guide walks through every system on a typical sailboat in the order that actually matters in a yard — hull first because the boat is on the hard, then engine and plumbing because they need water tests, then rigging and sails once the mast is stepped, and finally electronics and safety gear before you cast off the dock lines.
Photo by Andrew Danks on Unsplash
Start With a Walk-Around and a Plan
Before you touch a single bolt, walk slowly around the boat with a notebook and a flashlight. Look at it the way a surveyor would: bow to stern, port to starboard, hull to masthead. Note every single thing that needs attention. You are building the punch list that will drive the next two weekends.
What you are looking for: cracks in the gelcoat, weeping keel-hull joints, weeping rudder bearings, bubbles in the bottom paint, chafe on running rigging, dezincification on bronze through-hulls, hairline cracks in the boom and mast collars, mildew inside lockers, and any fastener that is now obviously a different color than it was last October. Photograph each item. You will forget half of them by the time you make it to the parts store.
If you are aiming the boat at a specific cruise this season, verify distances between waypoints before you start so you know whether you are commissioning for an overnight delivery or a 600-mile coastal run — the prep list scales with the passage. A realistic time budget for a well-kept 32–40 foot sailboat looks like this:
| System | Hours | Materials cost (USD) |
|---|---|---|
| Hull, bottom paint, anodes | 4–8 | $150–$400 |
| Engine and fuel system | 3–5 | $80–$250 |
| Plumbing and seacocks | 2–3 | $40–$120 |
| Rigging and sails | 2–4 | $50–$200 |
| Electrics and electronics | 2–3 | $30–$150 |
| Safety gear and inflatables | 1–2 | $20–$100 |
| Total | 14–25 | $370–$1,220 |
That assumes nothing is broken. If you find a weeping seacock or a wet core under the deck, double the hours and add a zero to the parts budget.
Hull and Bottom: The Boat Is on the Hard for a Reason
Spring commissioning starts under the boat because the moment it goes back in the water, half of what you can do becomes impossible — or much harder. Plan to spend an entire weekend on the hull while the yard's travel lift schedule still gives you that option.
Bottom paint. Inspect last year's antifouling. If it looks chalky, patchy, or you can rub it off with a glove, the boat is due for a new coat. Sand lightly with 80-grit, mask the waterline, and roll on two coats of antifouling matched to your sailing area — hard paints for trailered boats, ablative for coastal cruisers, copper-free for inland lakes that ban it. A 40-foot boat needs about two gallons of antifouling per coat at $250–$350 per gallon. Do not get cheap on this one — failed antifouling means a weekend of scraping barnacles in July.
Anodes. Pull every zinc — shaft, propeller, hull plate, rudder, trim tabs, and any internal anodes inside the engine raw-water circuit. If an anode has lost more than 50% of its mass, replace it. Sailboats in marinas with stray current can eat anodes in three months; freshwater boats might go two seasons. Use zinc for saltwater, aluminum for brackish, magnesium for fresh. Mix them up and you get either no protection or rapid self-destruction.
Through-hulls and seacocks. Operate every seacock through its full range. Any handle that does not move with finger pressure needs to come apart, get cleaned, and get re-greased with waterproof grease. A seized seacock that cannot be closed underway is the reason boats sink at the dock. Replace any bronze fitting that shows pink or copper-colored zones — that is dezincification, and the metal is now structurally compromised.
Photo by Francois Olwage on Unsplash
Keel-hull joint. A hairline crack at the keel-hull joint is normal and cosmetic. A crack you can fit a fingernail into, brown weeping stains, or any movement when you push on the keel is not. Have the boat surveyed before launching if you see any of those.
Rudder. Grab the bottom of the rudder and try to wiggle it side-to-side and fore-and-aft. More than about 1 mm of play means the bearings need attention. Tap along the rudder skin with a coin — a hollow, flat thump where the rest sounds dense indicates water intrusion. Drill a small drain hole at the lowest point and let it weep for a week if you suspect water inside.
Engine: Where Most Spring Failures Live
If your boat does not start on launch day, it is almost always the engine — and almost always something you could have caught in the yard. The engine deserves at least half a day of focused attention.
Oil and filter. If you did not change the oil in autumn, change it now. Diesel oil that has sat all winter holds acidic combustion byproducts that pit cylinder walls and bearings. Drain warm if possible, replace the filter, and refill with the grade your engine manual specifies — usually 15W-40 for marine diesels. Also change the transmission oil (often Dexron III ATF or 30-weight, check the manual) — this gets forgotten until the gearbox starts making noise.
Fuel system. Diesel that has been sitting for five months grows microbes at the fuel-water interface. Drain water from the Racor or primary filter into a clear jar — you should see clean diesel, no haze, no black flecks. Replace both the primary and secondary fuel filters, then bleed the system. Most modern marine diesels have a self-bleeding lift pump; older Yanmars and Volvos need manual bleeding at the injector pump and sometimes the injectors themselves.
Photo by Richard Bell on Unsplash
Raw-water impeller. Pull the cover off the raw-water pump. The impeller is rubber and degrades when it sits dry against the pump housing — vanes take a set, then snap off on first run, sending shrapnel into the heat exchanger. Replace the impeller every spring as a rule, and inspect the cover gasket while you are in there. Keep the old impeller in your spares bag if it still has all its vanes.
Belts and hoses. Press your thumb on every coolant and exhaust hose. If it cracks, crunches, or feels mushy where the wire reinforcement should be, replace it. Check belt tension — about half an inch of deflection at the longest run between pulleys. A glazed belt (shiny on the V-faces) is slipping; replace it before it fails.
Heat exchanger and exhaust mixing elbow. Both clog with salt and carbon. A blocked mixing elbow is the single most common cause of overheating on saltwater boats — symptom is a perfectly normal raw-water flow but engine temperature creeping up under load. Remove the elbow every 500 hours or every two seasons and clean or replace it. They cost $150–$400 but they will leave you adrift if neglected.
If your sailboat has a tender with an outboard, that engine needs the same kind of attention — see our outboard motor maintenance guide for dinghies and tenders for the procedure.
Plumbing, Tanks, and Heads
Winter freezes burst things you forgot existed. Walk every line, every fitting, every pump, and every joint.
Freshwater system. If you used non-toxic plumbing antifreeze, run fresh water through every tap, the shower, the head sink, and the deck wash until the pink runs clear and you taste only water. Drink a glass — if it tastes like plastic or chemical, keep flushing. Inspect the freshwater pump's pulsation dampener; cracked diaphragms send the pump into a cycle-cycle pattern that wears it out fast.
Water heater. Plug in shore power and let the heater come up to temperature. A hissing relief valve is a sign of either a stuck thermostat or a sediment-clogged tank. Drain it through the bottom plug — if brown water comes out, flush until clear.
Holding tank and head. Pump out, then run a gallon of fresh water through the head with each stroke until the tank gauge reads empty. Check that the joker valve in the head pump still seats properly — if you can hear water running back into the bowl after pumping, the valve is shot. Spare joker valves are $15 and a five-minute job; do this annually.
Bilge pumps. Pour a few gallons in the bilge and verify each pump — automatic and manual — comes on at the right level and shuts off cleanly. The float switch is the part that fails, not the motor.
Standing and Running Rigging
If your mast came down for winter, take this opportunity to inspect every fitting you can reach with a flashlight and a magnifying glass before stepping it.
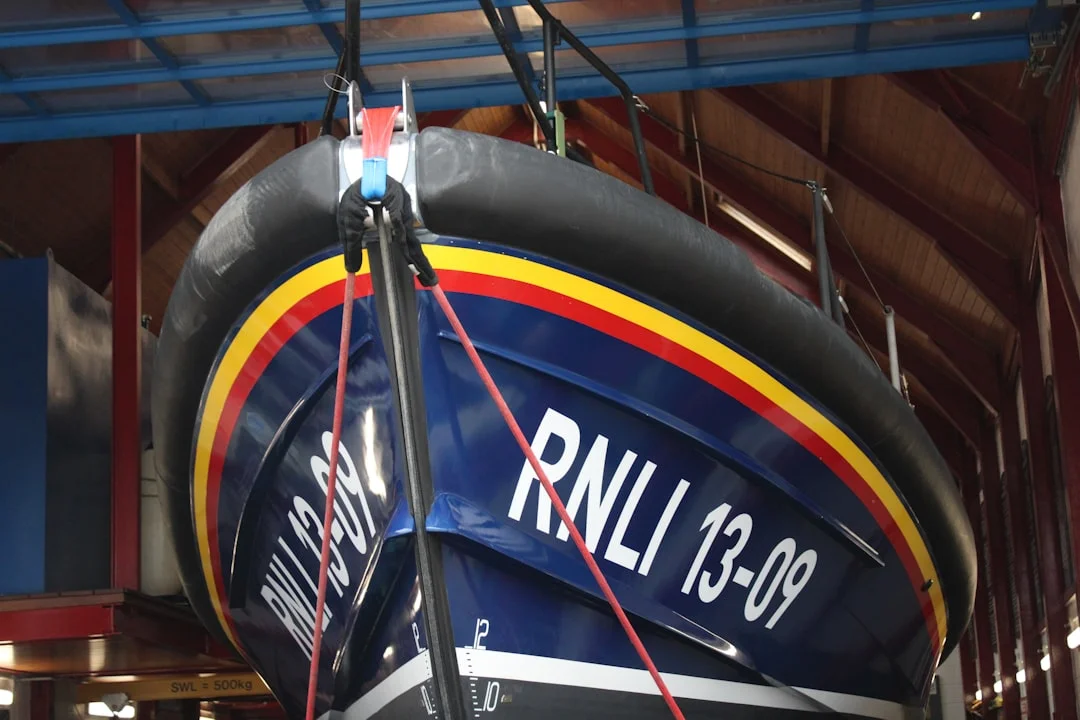
Photo by balesstudio on Unsplash
Standing rigging. Look at every swage fitting and every turnbuckle. Hairline cracks at the swage are the first sign that the wire inside is corroding — replace the entire stay if you see one. Standing rigging on offshore cruising boats is generally retired at 10 years or 25,000 nautical miles, whichever comes first. Bluewater insurers increasingly require it.
Running rigging. Sheets, halyards, control lines. End-for-end any halyard that has chafe on the working end — you double the life by simply flipping which end runs through the masthead sheave. Replace any line that shows broken yarns, hard spots, or loss of cover.
Mast and boom. Inspect spreaders, masthead sheaves, the gooseneck, the vang attachment, the reefing hooks. Lubricate sail tracks with a dry PTFE spray, not oil — oil attracts dust and gums up. Check that all halyard exit boxes and turning blocks spin freely.
Sails. Unfold each sail on a clean lawn. Look for chafe at the spreader patches, the leech, the foot, and along any reefing point. UV cover stitching on roller-furling jibs is the first thing to fail; if you can pull a thread loose with your fingers, the cover needs to be re-stitched before launch. A loft will do this for $80–$150; doing it yourself with a Sailrite kit is half a day.
Electrical, Electronics, and Batteries
Winter is hard on lead-acid and AGM batteries. Lithium banks fare better but still need attention.
Battery health. Charge the bank fully, disconnect the charger, and let it rest for at least four hours. Measure resting voltage — a flooded lead-acid battery should read 12.6–12.8V, AGM 12.8–13.0V, lithium 13.2–13.4V. Anything 0.2V below those numbers means the battery is degraded and probably needs replacement before the season starts.
Connections. Pull off battery terminals, wire-brush the lead and the cable lug, apply terminal grease, and re-torque to spec (about 10–14 Nm for marine battery posts). Repeat at every busbar in the engine compartment. Loose connections heat up under load and start fires.
Navigation lights. Turn each one on and walk around the boat at dusk to verify visibility, color, and arc. LED replacements are now cheap and worth the upgrade — old incandescents draw 25 watts each, LEDs draw 1–2 watts and last 10 years.
VHF, plotter, AIS, autopilot. Power each up and verify it sees its sensors. If your VHF is the primary distress radio, do a radio check on channel 16 with a marina office or another boater (never the Coast Guard except for genuine emergencies).
Compass. A compass that has been left in a cold cabin can develop a bubble. Bubbles smaller than a pea are usually fine; anything larger means the compass needs a refill — most chandleries do this for $40.
Sails Up and Sea Trial
The first sail of the season should be a deliberate sea trial, not a delivery passage.
Pick a day with 10–15 knots of wind, no fog, and a known easy route — somewhere you have sailed many times before. Run the engine for 30 minutes at cruising RPM and watch the temperature, oil pressure, and exhaust water flow. Hoist the main, unfurl the jib, and sail close-hauled, then beam reach, then a controlled gybe. Tack the boat at least three times. Try the autopilot in both modes. Listen for new noises — every creak, click, and squeak is information.
If you are planning a longer passage early in the season, calculate the distance between your departure and destination ports and budget realistic average speeds. A well-prepared 35-foot sailboat averages 5–6 knots over a coastal hop, less in light air. Knowing the actual nautical miles ahead of time keeps you from arriving after dark with a tired crew.
For deeper system-by-system intervals throughout the year, our sailboat maintenance checklist with monthly, seasonal, and annual intervals sets out the full year-round schedule that pairs with the spring commissioning work above.
Safety Gear: The Stuff That Lives in Lockers
Safety gear is the equipment you do not think about until you need it, which means spring is when you check it.
- Life jackets: inflate manually each PFD with a CO2-style inflator, leave overnight, see if it holds pressure. Replace CO2 cylinders that show corrosion at the threads.
- Flares: check expiration dates. SOLAS-grade flares are good for 42 months from manufacture; expired flares should be retained as backup but not relied upon.
- EPIRB / PLB: self-test, check battery expiration, register with the relevant authority (NOAA in the US, MCA in the UK).
- Liferaft: due for service every 1–3 years depending on certification. Service costs $300–$600 but a liferaft that does not inflate is just expensive ballast.
- First aid kit: replace anything expired, especially injectables and seasickness medication.
- Fire extinguishers: weigh dry chemical extinguishers — if more than 10% below stamped weight, recharge or replace.
Once everything on this list checks out, you are ready to launch. Take it slow on the first weekend back. The boat has been still for months and so have you — the muscle memory comes back fastest if you do not rush.
Frequently Asked Questions
How long does spring commissioning take for an average sailboat?
For a 32–40 foot cruising sailboat in good condition, plan on 15–25 hours of work spread across two or three weekends. That includes hull, engine, plumbing, rigging, electrics, and safety gear. If you find a problem — a weeping seacock, water in the rudder, a degraded battery bank — add another 5–15 hours per issue. Boats that were properly winterized and stored under cover tend toward the shorter end; boats stored uncovered or that skipped fall service can easily run 40+ hours.
When is the right time to start spring commissioning?
Start about four to six weeks before your target launch date. That gives you time to find problems, order parts that take a week to arrive, get a second weekend if weather cancels the first, and complete any work that requires the boat on the hard. Booking a yard launch slot is the deadline that drives everything — most yards in temperate latitudes get fully booked between April 15 and June 1, so confirm the date early and work backward.
Do I need to repaint the bottom every spring?
No — most antifouling paints are good for one to three seasons depending on type, water salinity, and how aggressively the boat is used. Check the existing coat first: if it looks chalky and powders off when you rub it, it is spent and a new coat is due. If it still has color and integrity, a single touch-up coat at the waterline and along high-wear areas is enough. Hard paints (epoxy-based, common on trailered boats) often last 2–3 seasons; ablative paints typically need annual refreshing.
What is the most common reason a boat fails on first launch?
A blocked or stuck raw-water impeller, followed by a clogged exhaust mixing elbow, followed by a flat or sulfated battery. All three are completely preventable with 30 minutes of inspection. Engine cooling issues account for roughly half of all early-season tow calls in coastal marinas, which is why pulling the impeller and inspecting the elbow are the two non-negotiable engine items in this checklist.
Can I do spring commissioning myself or should I hire a yard?
Most of it is well within reach for a moderately handy boat owner. Bottom paint, oil change, filter changes, anode replacement, plumbing, basic electrical work — all DIY-friendly with patience and the boat's manuals. Tasks worth hiring out: rigging inspections (specifically swage fitting evaluation), liferaft service, professional engine surveys if your boat is past 15 years, and any keel-related concern. The rule of thumb is that anything that involves life safety at sea or a structural unknown is worth paying for; everything else is a learning opportunity.
How much should spring commissioning cost in materials?
For a 32–40 foot sailboat in average condition, plan on $370–$1,220 in consumables: bottom paint, oil and filters, fuel filters, impeller, hose clamps, sealants, anodes, plumbing antifreeze flush, and minor parts. Add $200–$500 if any single part needs replacement (mixing elbow, hoses, belts, batteries). A boat that has been neglected for two seasons easily doubles those numbers. Keeping a written log of what you replaced when — engine hours, dates, part numbers — pays for itself in clarity at the next commissioning.
About the Author
Related Articles
Diesel Heater Troubleshooting Boat: No-Start & Soot Fixes
Fix diesel heater no-start and sooting on your boat. Step-by-step checks for power, fuel, air/exhaust and maintenance—read the guide now.
By Breezada Team

Docking a Catamaran: Maneuvers, Springs & Crew
Master docking a catamaran with close-quarters maneuvers, spring lines, and crew roles. Learn the steps and dock with confidence—read now.
By Breezada Team

Best Stove for a Sailboat: Propane vs Diesel vs Induction
Compare propane, diesel, and induction stoves for cruising safety, cost, and power needs—use our guide to choose the best stove for your sailboat.
By Breezada Team

Single Handed Docking Sailboat: Line Methods & Drills
Learn single handed docking sailboat line-first methods, setup, and drills for crosswind/current. Practice safely—get the step-by-step plan now.
By Breezada Team