Outboard Motor Maintenance for Dinghies & Tenders
Outboard Motor Maintenance for Dinghies & Tenders
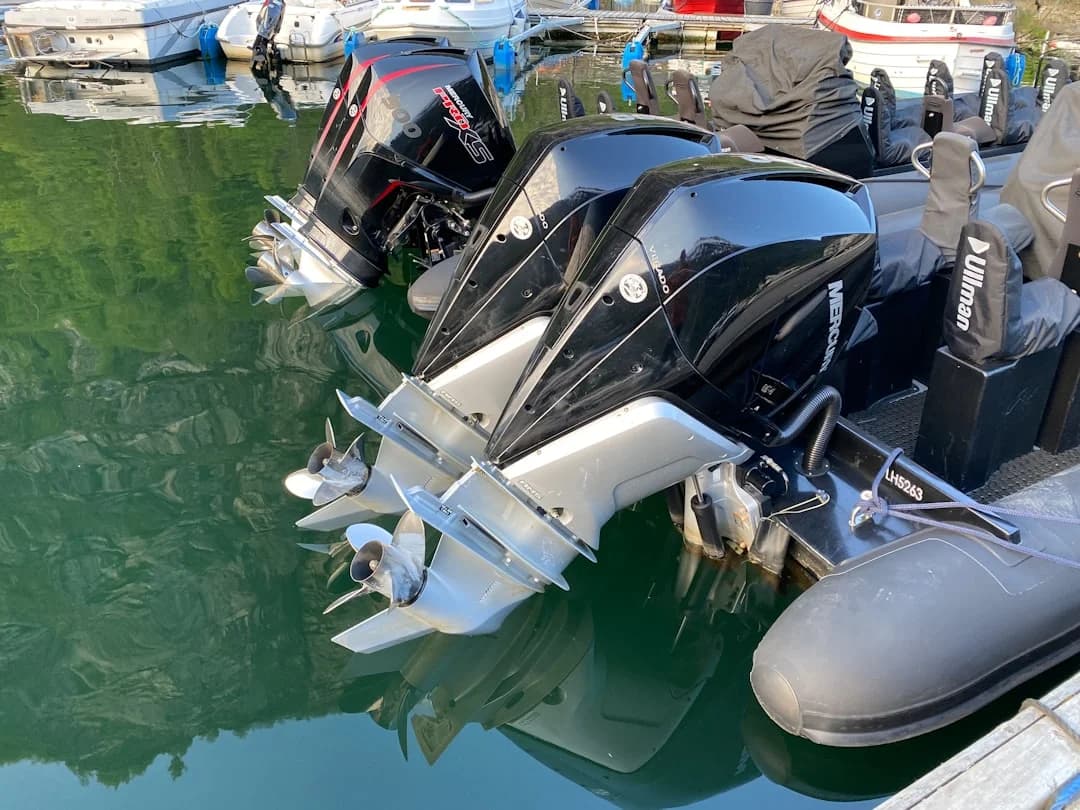
Tender outboards live a rougher life than their hour meters suggest. Most are in the 2.5–15 hp range, get manhandled on and off brackets, and spend their days breathing salt spray like it’s a wellness trend. With weights around 30–115 lb (14–52 kg), they also get dropped, banged, and stored in awkward places where corrosion and stale fuel quietly do their work.
This is practical outboard motor maintenance aimed at dinghies and tenders: short runs, cold starts, frequent tilting, beach launches, and portable tanks that get baked in the sun. Follow the intervals, log what you do, and your “quick trip ashore” won’t turn into a row back in a crosswind.
Photo by Dmitrijs Safrans on Unsplash
Annual Service Checklist (2‑Stroke vs 4‑Stroke)
Service cadence: calendar vs engine hours (tender duty cycle)
Tender duty cycles punish engines in ways a fishing skiff doesn’t. Five minutes at idle, a cold blast to the dock, shut down, then sit tilted on davits while salt dries into crystals—repeat for months. Even if you only run 20–40 hours/year, you should still inspect on a calendar because corrosion, ethanol fuel aging, and stuck rings don’t care about your hour meter.
As a working baseline, do a true annual service every 12 months or 100 hours, whichever comes first. For liveaboards commuting daily, plug checks at ~100 hours, gear oil at 100 hours, and impeller planning at 200–300 hours keeps you ahead of surprises. If you’re the “occasional user,” plan on calendar intervals and add extra inspections after beaching or any sand ingestion event.
2‑stroke vs 4‑stroke: what changes in the checklist
The flow is the same—pre-checks → fluids → ignition → cooling checks → prop/gearcase → run test—but the “fluids” step is where 2‑stroke and 4‑stroke diverge. Two-strokes need correct oiling (TC‑W3 premix or injection) and clean plugs; four-strokes need crankcase oil management and sometimes a small filter. Typical 4‑stroke oil capacity is ~0.3–1.0 qt (0.28–0.95 L), often NMMA FC‑W 10W‑30 or 10W‑40, with OEM specs winning any argument.
A practical annual sequence: inspect mounts and clamps, check prop for dings, then service spark plugs (often 0.028–0.032 in / 0.7–0.8 mm gap, model-specific). Change 4‑stroke oil, then do lower-unit gear oil, then verify cooling tell‑tale strength, then final run test in a barrel or on flush. If you pay a shop, expect 1.0–2.5 hours labor at $120–$180/hr, plus $60–$200 in parts depending on whether the impeller is included.
Owner logbook: documenting intervals, parts, and torque values
A logbook turns maintenance from “I think I did that” into “I know I did that.” Record engine hours, date, plug part number, gear lube type, and any torque values you used (especially prop nut and drain screws). Many small props torque in the ~18–25 ft‑lb (24–34 N·m) range, but your service manual gets the final vote.
Also log the small details that matter later: which side a 4‑stroke is allowed to lie on, the last impeller date, and whether you replaced drain/fill gaskets. Those $2–$8 gasket pairs prevent the kind of seep that becomes milky gear oil by mid-season. When the outboard starts acting up at dusk, you’ll troubleshoot faster with a record than with optimism.
Practical tip (annual checklist mindset): If your tender runs short hops, treat “annual” as mandatory even at low hours. Salt exposure, stale E10 fuel, and long tilted storage are the real interval drivers.
Cooling System & Impeller Service: Flushing and Overheat Prevention
Saltwater flushing: muffs vs flush port (what good flow looks like)
On small outboards the cooling circuit is straightforward: intake screens feed the pump, the rubber impeller pushes water through the block and thermostat, and excess exits the tell‑tale. The trick is that tender engines often run in shallow water, which loads the intake with sand and eelgrass, then get tilted up and baked dry. A flush is cheap insurance, but only if it’s done correctly.
Use a strong water supply, run the engine at idle only, and flush for 5–10 minutes with a solid tell‑tale stream. On “ear muffs,” avoid high RPM because the muffs can’t always supply enough water volume, and you’ll overheat the pump you’re trying to protect. If your motor has a built-in flush port, follow the OEM guidance—some allow flushing without running, others require idle to circulate properly.
Tell‑tale diagnosis: weak stream, intermittent flow, and false confidence
A tell‑tale can lie to you. A small stream might still appear even with a failing impeller if the indicator hose is partially fed, and that’s how people cook powerheads at the dock. A healthy stream is steady and warm after a few minutes; intermittent spurts, steam, or a “dribble” are warnings.
Before disassembly, do quick checks: clear the tell‑tale nozzle with monofilament or a zip tie (don’t jam a drill bit in there like you’re angry at it). Confirm the intake screens aren’t packed with sand, and make sure the motor is fully submerged if running in a barrel. If the stream improves briefly then fades, suspect impeller vanes or a collapsing water tube grommet, not just a blocked nozzle.
Impeller intervals and sandy-water wear patterns
Impellers age from time and heat, not just hours. A common interval is every 2–3 years or ~200–300 hours, but a single sandy launch can sandblast vane edges and shorten that dramatically. If you beach-launch daily, plan to inspect more often, and don’t be surprised if “2–3 years” becomes “every other season.”
Parts costs are reasonable: an impeller kit is typically $25–$90, and a full pump kit (housing/plate/cup plus impeller) runs $60–$180 when the stainless wear plate is grooved. Replace the full housing if you see scoring, melted rubber, or a cup that’s no longer smooth. When you’re done, do a run test and verify a strong tell‑tale at idle for several minutes; that’s the only proof that matters.
Practical tip (cooling reality): A weak tell‑tale after a sandy run is not “probably fine.” Clear the nozzle first, then assume the impeller is guilty until proven innocent.
Gearcase & Prop Maintenance: Oil, Seals, Line, and Torque
Lower-unit oil change: contamination signs and correct fill method
Most portable outboards carry only ~6–12 oz (180–355 mL) of gear oil, which means contamination shows up quickly. Change lower-unit oil at least annually or every 100 hours, using the OEM-specified marine gearcase lubricant (often 80W‑90, but verify). The process that prevents air pockets is bottom-fill: drain from the bottom, then pump fresh oil in through the lower hole until it appears at the upper vent.
Once oil reaches the upper hole, install the top screw with a new gasket, then remove the pump and quickly install the bottom screw with a new gasket. Don’t reuse old crush washers; they’re cheap and they don’t “crush twice.” DIY cost is usually one tube/bottle 8–16 oz at $10–$25, plus $2–$8 for gaskets.
Seal health: when to pay for a pressure/vac test
Your drained oil tells a story. A milky emulsion means water intrusion, usually through prop shaft seals or drain screw gaskets, while a metallic sheen can mean gear wear or bearing distress. A burnt smell suggests overheating or insufficient lubrication, often from low oil level after a slow leak.
For tender outboards, seal damage often comes from beaching impacts, line ingestion, or prop strikes in shallow water. If you see milky oil—or you’ve hit something hard—pay for a gearcase pressure/vac test at $60–$150. It’s cheaper than discovering rusted bearings after the gearcase starts growling a mile from the yacht.
Prop removal: fishing line, shear pins, and hub inspection
Pull the prop at least annually, and more often if you operate near fishing gear. Fishing line can wind into the prop shaft and cut seals, then your gear oil becomes a latte. When you remove the prop, lay out parts in order—thrust washer, prop, spacer, nut—and take a quick photo because your future self won’t remember.
If your motor uses a shear pin, don’t just replace it and call it done if it shears again. Investigate for a bent prop, debris in the hub, or a prop that’s binding against the gearcase. Reinstall with correct torque—often ~18–25 ft‑lb (24–34 N·m)—and a fresh cotter pin if applicable, because “hand tight” is a maintenance strategy with a short lifespan.
Practical tip (gearcase sanity check): If the oil is milky, don’t “run it a bit and see.” Change it, test seals, and fix the leak before corrosion turns expensive.
Fuel System Care & Ethanol Problems (Portable Tanks and Lines)
E0 vs E10 strategy for tenders: rotation, stabilizers, and phase separation
Tender outboards are fussy about fuel because they use small passages, sit idle, and get heat-soaked in the sun. If you can get E0 (ethanol-free), use it; your carburetor will thank you quietly by not ruining your weekend. If you’re stuck with E10, treat it with a marine stabilizer and rotate it within ~30–90 days, because oxidation and volatility loss are real on small engines.
Phase separation becomes a risk when ethanol fuel absorbs enough water—often discussed around ~0.5% water by volume, depending on temperature and blend. Once it separates, you don’t “stir it back together” with optimism; the ethanol-water mix drops out, octane drops, and corrosion risk rises. Prevention is keeping tanks sealed, minimizing humid air exchange, and not storing half-full portable tanks for months.
Portable tank + primer bulb diagnostics: air leaks and restrictions
When a tender won’t stay running, suspect air leaks and restrictions before you blame ignition. Start at the tank: confirm the vent is open, the pickup isn’t clogged, and the fuel is fresh enough to smell like gasoline instead of varnish. Squeeze the primer bulb; it should firm up, and it should be oriented correctly if it has an arrow for flow direction.
Check quick-connect fittings for cracked O-rings and poor engagement, especially after tanks have been dragged around lockers. Hoses and primer bulbs are consumables in UV and salt; replacing the whole line/bulb assembly often costs $25–$70, and a bad quick-connect is usually $10–$25. Add an in-line filter ($5–$20) and replace it when you see debris or persistent fuel starvation symptoms.
Carb vs EFI: varnish prevention and cleaning decision points
Most small tender engines are carbureted, and carbs punish neglect quickly. If the motor starts only on choke, won’t idle, or surges at low throttle, the idle circuit may be varnished. You can sometimes fix mild issues by running fresh treated fuel and exercising the engine under load, but don’t expect miracles if it’s been sitting for a year.
If you’re at the point of repeated no-starts, a proper carb clean/rebuild often runs $150–$400 at a shop, with a carb kit typically $15–$60 plus labor. EFI tends to be less varnish-prone but still hates contaminated fuel and water, and diagnosis is less “dockside-friendly” without tools. For larger portable tank setups, a small fuel-water separator ($30–$80) can reduce water-related misery, though it won’t cure already-separated fuel.
ABYC H‑24 and USCG 33 CFR 183 aren’t just paperwork—use marine-rated hose, proper clamps, and store portable tanks where vapors can’t collect. On the mother ship, treat gasoline like it’s trying to embarrass you in front of your insurance company, because it is. Ventilate lockers, keep tanks away from ignition sources, and don’t service fuel systems in a closed cabin.
Ignition & No‑Start Troubleshooting: A Field Decision Tree
Separate the problem: spark vs fuel vs compression (fast tests)
When an outboard won’t start at anchor, don’t thrash. Split the problem into spark, fuel, or compression, and do the fastest checks first with minimal tools. Step one is embarrassingly common: confirm the kill switch lanyard is seated and the stop switch isn’t stuck, then verify the tank vent is open.
For spark, pull the plug, inspect it, and test with proper grounding to the block. Many small outboards use 1–2 plugs, often NGK-style at $4–$12 each, so carrying spares is cheap. If you’ve got spark and the plug isn’t soaked, move to fuel checks before you assume internal damage.
Hard starting, surging, and stalling: symptom-to-system mapping
A wet plug and fuel smell points toward flooding, incorrect choke use, or a stuck float in a carb. A dry plug with no fuel smell points toward a supply problem—closed vent, air leak at quick-connect, or a primer bulb that never firms up. If it starts then dies when you advance throttle, suspect fuel restriction, clogged idle circuit, or water in fuel.
For 2‑strokes, plug fouling is common with short cold runs and rich idling; that’s why a slightly longer warm-up run matters. For 4‑strokes, watch for oil dilution and fuel-washed cylinders if the engine has been over-choked repeatedly. Thermostat behavior matters too: a thermostat stuck open (often designed to open around ~120–160°F / 49–71°C) can keep the engine too cool, contributing to poor idle and fouling.
When to stop: safety and “shop time” thresholds
Compression is the last branch because it usually indicates deeper issues. A rule-of-thumb range is ~90–150 psi, with cylinders within ~10% of each other; consistency matters more than the exact number. If one cylinder is low, you may be dealing with rings, a scored bore, or reed/valve issues depending on design, and that’s not an anchorage repair.
Stop and get help if you smell raw fuel in a confined space, if you’re tempted to spray starting fluid around open vapors, or if repeated pulls are turning the cockpit into a gym session nobody requested. Some problems are legitimately “shop time,” and you’ll spend less by admitting it early. The goal is reliable tender transportation, not a personal relationship with your recoil starter.
Practical tip (anchorage triage): Carry two new plugs and a plug wrench. Swapping in a known-good plug is often the fastest way to isolate ignition vs fuel in five minutes.
Corrosion Control for Saltwater Tenders (Anodes, Rinsing, Fasteners)
Anode selection and replacement thresholds
Small outboards corrode fast because they’re a mixed-metal assembly constantly wet with salt and often stored tilted, which traps salty water in crevices. Use the correct anode material: zinc for saltwater, aluminum for brackish/salt, and magnesium for freshwater. Replace anodes when they’re about 50% wasted, and expect typical costs around $10–$40 each.
Make sure the anode has clean electrical contact; paint or heavy corrosion under the mounting surface can make it decorative instead of functional. Don’t coat anodes with anti-corrosion sprays or paint, no matter how satisfying it feels in the moment. If the anode isn’t working, your gearcase becomes the anode, and that’s a bad trade.
Anti-corrosion coatings and rinsing discipline for davit-stored outboards
A tender outboard living on davits gets constant salt spray and sun, which is a rough combination for fasteners and wiring. Rinse with fresh water after use when possible, then hit key areas with a corrosion inhibitor (think products like Boeshield T‑9, CRC Heavy Duty Corrosion Inhibitor, or OEM sprays). Focus on tilt pivots, clamp screws, and the transom bracket springs where salt likes to hide.
After rinsing, tilt the engine through its range to shake water out of pockets, then let it drain before covering. Covers are helpful, but a sealed cover over a wet engine is basically a humidity incubator. If the engine was dunked, pull the cowl and deal with it immediately—salt mist inside the cowl does silent damage in days, not months.
Fasteners, steering pivots, and galvanic hot spots
Fasteners seize on small outboards because they’re small, hot, salty, and rarely moved. Once or twice a season, remove and grease clamp screws and pivot points, and check steering friction hardware for binding. Pay attention under the cowl: electrical connectors, coil grounds, and any place saltwater can sit in a recess.
Galvanic corrosion is the slow electrical kind; crevice corrosion is the sneaky trapped-water kind. Tenders get both because they’re frequently wet and then stored without a full dry-out. If you keep the engine clean, greased, and anodes healthy, you’ll spend more time driving and less time persuading stuck bolts.
Storage, Winterization, and Transport Orientation (2‑/4‑Stroke)
Short-term storage between trips: fuel, flushing, and theft deterrence
Decide whether the motor stays on the tender, on a rail bracket, or comes aboard. With 30–115 lb (14–52 kg) to handle, removing it daily may be unrealistic without an outboard stand/cart ($80–$250) and a decent back. If it stays outside, rinse it, tilt to drain, and store it where it won’t become the marina’s free giveaway.
Fuel policy matters even for short-term storage. Stabilize fuel, label the tank with purchase date, and rotate within 30–90 days if using E10. Flush for 5–10 minutes at idle after saltwater use, and don’t run high RPM on muffs unless your OEM explicitly allows it.
Long-term/winter layup: fogging, draining vs stabilized fuel, and oil timing
For long layups, your goal is to prevent corrosion inside the engine and varnish in the fuel system. Fogging oil costs about $8–$18 and is cheap compared with rings that stick over winter. Two-strokes often tolerate fogging easily; on four-strokes, follow OEM guidance so you don’t foul sensors or overdo it. The tender outboard is only one piece of the picture — our complete boat winterization guide covers the same logic applied to the engine, freshwater system, and rig on the mother ship. When the season turns, the spring commissioning boat checklist is the matching playbook for waking everything back up.
Carbureted engines give you a choice: drain the bowl(s) or leave stabilized fuel in place. Draining reduces varnish risk but can dry seals; stabilized fuel avoids dry-out but must be truly treated and fresh. For four-strokes, many mechanics prefer changing oil before storage so acids aren’t sitting in the crankcase, especially when capacity is only 0.3–1.0 qt and contamination concentration is high.
Safe transport orientation for 4-strokes to prevent oil migration
Four-strokes are picky about how they’re laid down. Put them on the wrong side and oil migrates into the airbox or cylinder, then you get smoke, hard starting, or a hydraulic lock scenario that turns expensive fast. The correct answer is always the OEM manual’s “storage side” diagram, because models vary by sump and breather layout.
As a general practice, transport upright whenever possible, and if you must lay it down, keep the tiller/handle side and “approved side” per the manual. After any sideways storage mistake, check oil level, inspect the airbox for oil, and expect smoke on restart—if it won’t pull over smoothly, stop and investigate. Your recoil starter should not feel like it hit a brick wall.
Also consider tender operations: if your runs are consistently short, plan one longer “exercise run” occasionally to fully warm the engine. It reduces plug fouling, evaporates moisture, and helps keep thermostats and idle circuits happier. If you’re unsure how long your typical tender commute actually is, use this tool to check the nautical miles for your planned route to estimate run time and build your maintenance schedule on real operating hours rather than guesses.
Practical tip (storage discipline): For carbureted motors, either drain bowls properly for long layup or commit to fresh stabilized fuel and rotation. Half-measures create varnish—reliably.
Service Planning, Tools, Spares, and On‑Water Readiness
DIY vs shop: a realistic cost and time model
There’s no shame in paying a shop for the tasks that require special tools or experience, and doing the rest yourself. Plugs, gear oil, basic inspections, and external flushing are realistic DIY wins, saving you most of the $120–$450 labor that annual service can cost. Carb rebuilds, gearcase seal work, and pressure/vac testing are often best left to a shop unless you enjoy buying tools for one job.
Budgeting helps you actually do the maintenance instead of postponing it. A typical annual parts bundle runs $60–$200, plus gear lube $10–$25, plus an impeller kit $25–$90 if due. If you keep a log and plan impellers at 200–300 hours or 2–3 years, you can schedule service before the busy season when shops are overloaded and grumpy.
Minimal onboard spares kit for 2.5–15 hp tenders
A tender spares kit should be small, cheap, and based on what actually fails. Carry 2 spark plugs (often $8–$24 total), a plug wrench, shear pin(s) if applicable, prop nut hardware, and a small tube of waterproof marine grease. Add lower-unit drain/fill gaskets ($2–$8) and a small bottle/tube of gear lube, because a weeping screw can ruin a trip.
Fuel issues are common, so carry a spare primer bulb/line assembly ($25–$70) and an in-line filter ($5–$20). If your tender runs far or you’re cruising remote, a spare prop ($80–$250) is worth the space. The day you wrap a crab pot line and nick a blade, you’ll discover how far “good enough” gets you.
Route planning and range: maintenance implications offshore
Tender reliability matters more when the anchorage is exposed or the dinghy run is long. Use a sea distance tool to calculate the distance between ports to measure your typical shore run in nautical miles, then translate that into run time and fuel use based on your outboard’s real-world consumption. That lets you set practical reserve fuel rules and avoid the “one-way trip” problem.
Once you track distance and time, you can track maintenance by actual duty. If you’re doing two 1.5 nm runs daily all season, that’s real hour accumulation even if each run feels short, and it pushes you toward plug checks at ~100 hours and impeller planning at 200–300 hours. Record hours monthly, note any overheating or weak tell‑tale events, and keep a QR link in your logbook to the OEM service manual and parts diagram for quick ordering.
Practical tip (readiness): The best spares kit is the one sized to your routes. If your run ashore is 0.3 nm, you can gamble; if it’s 3 nm in chop, you shouldn’t.
FAQ: Tender Outboard Maintenance (Real-World Answers)
When changing lower-unit oil on a 2.5–15 hp outboard, how do you correctly bottom-fill to avoid air pockets, and what does a milky emulsion vs metallic sheen indicate about seals/gears?
Drain the gearcase by removing the bottom drain screw first, then the upper vent screw. Pump fresh gear lube into the bottom hole until it flows steadily out the upper vent; that’s how you purge air pockets in a gearcase that only holds ~6–12 oz (180–355 mL). Install the upper screw with a new gasket, then quickly remove the pump and install the lower screw with a new gasket.
A milky emulsion indicates water intrusion, commonly from prop shaft seals, a damaged seal after a strike, or reused/failed drain screw gaskets. A metallic sheen suggests gear or bearing wear; change oil, inspect the magnetic drain plug if equipped, and consider a shop evaluation before it becomes a full gearcase rebuild.
What diagnostic steps isolate a weak tell-tale stream between a blocked indicator nozzle, a worn impeller, and a thermostat opening around 120–160°F (49–71°C)?
Start simple: clear the tell‑tale outlet with flexible line and confirm strong water supply on muffs, running idle only for 5–10 minutes. If the stream improves immediately and stays strong, it was likely a blocked nozzle or indicator hose. If it improves briefly then fades, suspect impeller wear or intake restriction.
If the tell‑tale is okay but the engine runs too cool (poor idle/fouling) or too hot (overheat alarm/steam), consider thermostat behavior. Many thermostats open around ~120–160°F (49–71°C): stuck open can keep temps low and contribute to fouling, while stuck closed can cause overheating even with some tell‑tale flow.
How do you perform a meaningful compression check on a small twin-cylinder portable outboard, and what does “within 10% between cylinders” look like in psi in practice?
Warm the engine if possible, disable ignition per the service manual, remove both plugs, open the throttle (so it can breathe), and crank until the gauge peaks consistently. Typical numbers are often ~90–150 psi, but consistency is the key.
“Within 10%” means if one cylinder is 120 psi, the other should be about 108–132 psi. If you see 120 psi on one and 90 psi on the other, that’s a meaningful imbalance pointing to internal issues, not a fuel or plug problem.
For E10 fuel in portable tanks, how does ethanol phase separation occur near ~0.5% water by volume, and what field actions (drain, filter, dry, replace hoses) actually resolve it?
Ethanol absorbs moisture from humid air; once enough water is absorbed—often discussed around ~0.5% by volume depending on conditions—the fuel can separate into a gasoline layer and an ethanol-water layer. That bottom layer is trouble: it’s water-rich, low-octane, and corrosive.
Field actions that work are blunt: drain and dispose of contaminated fuel properly, dry the tank, replace compromised hoses/primer bulbs, and replace filters. Filtering won’t “fix” phase-separated fuel, and diluting it is unreliable; prevention through sealed storage and 30–90 day rotation is cheaper.
What is the correct 4-stroke storage/transport orientation to prevent oil migration into the airbox/cylinder, and what symptoms appear after storing on the wrong side?
The correct orientation is the one in your OEM manual’s storage diagram; different sump and breather layouts mean different “safe sides.” When in doubt, transport upright, and use an outboard stand/cart if handling weight is an issue (30–115 lb / 14–52 kg).
Stored on the wrong side, oil can migrate into the airbox or cylinder, causing hard starting, heavy smoke, oil in the air filter/airbox, and in severe cases a pull cord that won’t move smoothly (possible hydraulic lock). If it won’t crank freely, stop and investigate before you bend something expensive.
Conclusion: A Tender-Focused Maintenance System That Actually Works
A reliable tender starts with a tender-specific approach: an annual checklist that respects short cold runs, disciplined cooling care with 5–10 minute flushes, and proactive impeller replacement around 2–3 years or 200–300 hours. Add gearcase oil changes with bottom-fill technique, fuel discipline for E10 with 30–90 day rotation, and real corrosion control through anodes and rinsing.
Make it easy on yourself: log hours and parts, carry a small spares kit, and plan plugs at ~100 hours/annual. Use this voyage-distance checker to estimate your run time and fuel burn so your maintenance schedule reflects reality, not guesswork. Do those things and your outboard becomes boring—in the best possible way.
About the Author
Related Articles

Sailboat Ran Aground What to Do: Actions & Tow
Sailboat ran aground what to do? Follow these steps, try kedging, and know when to call for a tow—read the checklist now.
By Breezada Team

BVI Sailing Itinerary: 7 Days, Moorings & Permits
Plan the perfect BVI sailing itinerary in 7 days—best moorings, permits, and tips. Use this guide to map your route and book your stops now.
By Breezada Team
How to Reef a Sail: Slab vs Single-Line Systems
Learn how to reef a sail with slab vs single-line systems. Compare pros, cons, and steps—read now and reef with confidence.
By Breezada Team
Best Boat Heater: Diesel vs Propane vs Electric
Compare diesel, propane, and electric heat to find the best boat heater for liveaboards. See pros, cons, and choose your setup today.
By Breezada Team