Boat Diesel Heater Troubleshooting: No-Start & Soot (Webasto, Eberspacher/Espar, Planar/Autoterm)
Cold boats make bad decisions. When your diesel air heater won’t start, or it starts but soots up like a chimney, you need a method that’s measurable, repeatable, and doesn’t involve “just keep trying” until it locks out. This is diesel heater troubleshooting for a boat the way I do it afloat: start with safety, then confirm the start sequence, then work power → fuel → air/exhaust in that order.
Photo by Kaya Arro on Unsplash
Safety First: CO, Fire, and Electrical Isolation (ABYC/ISO)
CO risk on boats: detection, leakage paths, and alarms
Diesel heaters are “dry” combustion only in the brochure sense. In real lockers, CO shows up from tiny exhaust leaks at joints, clamps, cracked flex sections, or a sloppy through-hull/skin fitting, and it doesn’t take much to spoil your night. As a benchmark, common UL 2034-style alarm logic triggers within 60–240 minutes at 70 ppm, 10–50 minutes at 150 ppm, and 4–15 minutes at 400 ppm—numbers worth respecting when your cabin is buttoned up in winter.
Use ABYC A-24 thinking for CO detection: put alarms where people sleep and where air stagnates, not just near the heater. I like at least two alarms on anything bigger than a 30-footer, with one near the main berth and one near the saloon sole, because CO mixes but also pools oddly in real interiors. Test monthly, and replace sensors at the manufacturer’s end-of-life interval (often 5–7 years) even if the unit “still beeps.”
Hot exhaust and fire protection: clearances, insulation, routing
Treat the exhaust like a small, angry stovepipe. It’s common to see >200°C on the exhaust close to the heater, especially during start and full burn, and that’s hot enough to cook wiring insulation, soften fuel hose, and ruin your day. ISO 9094 fire protection principles apply here: keep separation from combustibles, protect against chafe, and contain hot surfaces with insulation wrap and heat shields where clearances are tight.
Exhaust runs should be supported every 30–45 cm, with no contact points that can saw through stainless over time. Any place the exhaust passes bulkheads deserves a proper heat barrier, not a scrap of plywood and optimism. If you see soot streaks near joints or the hull fitting, assume a leak until proven otherwise.
Electrical isolation and lockout behavior: avoiding damage
On the electrical side, follow ABYC E-11 fundamentals: correct overcurrent protection near the source, proper conductor sizing, and clean terminations. Undervoltage causes more “mystery” no-starts than bad parts, because glow phase draw is high and boats love voltage drop. Also note heater behavior: many units lock out after 2–5 failed starts, and repeated attempts can coke the burner, turning an easy fix into a teardown.
Let the heater complete its shutdown and cool-down cycle. Pulling power during post-purge is a good way to bake deposits onto the burner and stress electronics, unless it’s an actual emergency. For fuel system safety references while you’re in there, keep ABYC H-33, USCG 33 CFR 183, and ISO 7840 in mind for hose/material choices and routing.
Practical tip (pre-run checklist, 90 seconds): Test CO alarm, do a quick sniff at exhaust joints, look for soot streaks, confirm the through-hull is clear, and verify the heater can complete a normal shutdown without losing power.
Photo by Drew Taylor on Unsplash
How Diesel Air Heaters Start: What to Hear and Measure
Start-up sequence (fan, glow, dosing pump, flame detect, ramp)
Most Webasto Air Top, Eberspacher/Espar D2/D4-style, and Planar/Autoterm air heaters follow the same rhythm. You’ll get a pre-vent/purge with the fan, then the glow phase begins, then the dosing pump starts ticking, then ignition and stabilization, then the unit ramps to demanded output. If you don’t know what phase you’re failing in, you’re just swapping parts for entertainment.
Current draw is your first anchor to reality. A 2 kW class heater typically pulls about 8–12 A for 2–5 minutes during glow, then settles to roughly 0.7–1.5 A running. A 4 kW class unit is often 10–15 A for 2–5 minutes on start, then 1.2–2.5 A steady-state depending on fan speed and pump rate.
What “normal” sounds and timings look like on a boat
A healthy start sounds like: fan spools up, then after some seconds the pump begins a steady tick, then you’ll hear a change in combustion tone as it lights and stabilizes. Exhaust will warm noticeably within a couple of minutes; if it stays stone cold while the fan runs, you’re not burning fuel. If it belches white smoke for a minute and dies, you likely have ignition instability or poor fuel delivery.
Lockouts are common after repeated failed starts (again, often 2–5 attempts depending on controller and brand). Reset methods vary: some controllers need a specific button sequence; others require cycling power properly. Don’t keep hammering start, because each attempt can add raw fuel and soot to the chamber.
Tools that turn guessing into diagnosis
You can troubleshoot most no-start and sooting issues with a short kit. Bring a multimeter with min/max capture (so you catch the glow-phase sag), a DC clamp meter, spare fuses, and basic hand tools for clamps and panels. Add a short clear fuel line segment for bubble checks, and optionally a simple manometer if you suspect duct static pressure issues.
The key measurement is voltage at the heater terminals during glow, not at the battery posts when everything is calm. Many heaters will cut out around 10.5–11.0 V at the heater, even if your battery reads fine at rest. That one difference explains a lot of “it worked at the dock yesterday” stories.
Photo by Krzysztof Płocha on Unsplash
No-Start Troubleshooting in Order: Power, Fuel, Air/Exhaust
Step 1 — Power supply and voltage drop under glow load
Start with power because it’s fast, measurable, and it fails quietly. Put your meter directly on the heater’s +/− terminals, start the unit, and watch min voltage during glow when it’s pulling 10–12 A (or up to 15 A on larger units). If you dip below 10.5–11.0 V at the heater, many controllers will abort, sometimes with a vague “start error.”
Now compare that to the battery posts during the same glow window. If the battery stays at, say, 12.1 V while the heater sees 11.3 V, you’ve got 0.8 V of wiring/connection loss—not a heater problem. Rule of thumb: with that glow draw, even ~0.5 V drop can trigger undervoltage or marginal ignition, so aim to keep drop below that.
If the run is long, thin, or corroded, fix the infrastructure. Many boat installs need 10–12 AWG conductors for longer runs, a correct fuse near the source per ABYC E-11, and clean crimped terminals (not “twisted and taped”). Also check grounds: a “good” positive cable paired with a miserable return path will still starve the heater.
Step 2 — Fuel delivery: prime quality, air leaks, and pump behavior
Once voltage under load is solid, move to fuel. Common heater fuel lines are 2 mm ID nylon (Webasto/Eberspacher style) or ~4–5 mm ID rubber in some installs, and both will happily suck air through a bad barb or clamp without leaking diesel outward. Your goal is a bubble-free line, because micro-bubbles cause flame-outs and repeated white smoke starts.
Listen to the dosing pump. Typical command range is roughly 1.0–5.5 Hz (about 60–330 strokes/min) depending on heat output, and “ticks but no fuel movement” usually means air leak, empty pickup, blocked filter, or a cracked nylon line end. Also verify the pump’s installation orientation and mounting angle per the manufacturer; I’ve seen pumps mounted flat that sounded fine but delivered poorly when warm.
Prime properly instead of brute-force starting. If your controller has a prime mode, use it; if not, cycle carefully and stop if you’re getting repeated smoke with no stable burn. After 2 failed starts, pause and fix the root cause, because each attempt adds fuel and builds deposits.
Step 3 — Combustion air and exhaust: restriction and backpressure
If power and fuel are right, check combustion air and exhaust next. Most common duct sizes for combustion intake/exhaust are ~24 mm (2 kW) and ~28 mm (4–5 kW), and they don’t tolerate crushed hose, long runs, or too many tight bends. Backpressure and restricted intake cause hard starts, smoky starts, and sooting because the mixture goes wrong and the flame becomes unstable.
Inspect the through-hull exhaust outlet for blockage, salt crust, or a winter cover you forgot about. Look for low spots where condensate pools; water in the exhaust line can choke flow and create repeated start failures. If you’re troubleshooting at sea, temporarily disconnecting at the heater outlet (safely, with ventilation and fire caution) can help identify whether the restriction is downstream—but do this only if you understand the risks.
Finally, don’t ignore the cabin air side. If your hot-air ducting is crushed or outlets are shut, you can drive overheat faults and unstable combustion indirectly. A heater that’s cooking itself in a sealed locker rarely burns clean for long.
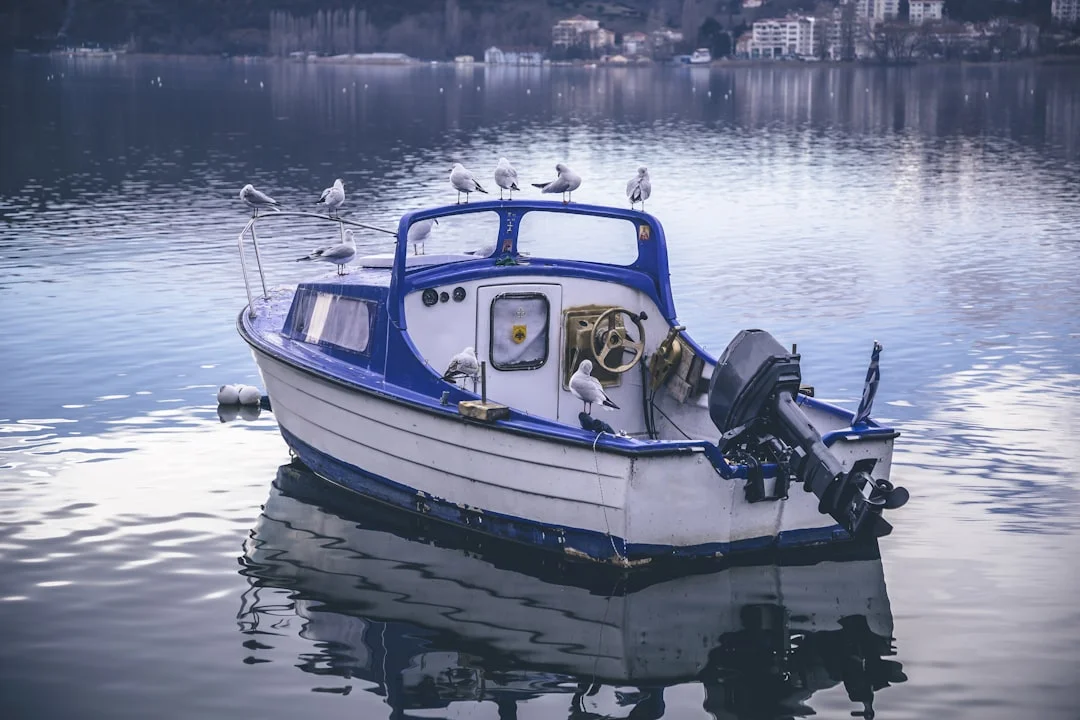
Photo by Anastasios Papadopoulos on Unsplash
Sooting, Coking, and Smoke Colors: Measurable Causes and Fixes
White/gray smoke vs black smoke: what each implies
White/gray smoke on start usually means the heater is injecting fuel but not getting stable ignition. That can be low voltage at glow, weak glow pin performance, wet/contaminated fuel, or combustion air restriction that prevents a clean light-off. If you see white smoke for 30–90 seconds followed by flame-out, don’t keep cycling; you’re washing the chamber with fuel and setting up a coke festival.
Black smoke and soot are a different animal: think overfueling relative to available air, restricted intake/exhaust, or heavy deposits in the burner area. Black soot on the hull near the exhaust fitting is also a clue that exhaust flow or burn quality is poor. Either way, smoke color is a symptom; your job is to connect it to a phase and a measurement.
Why low-power running and short-cycling coke burners
Coking happens when combustion temperature stays low and atomization/air mixing is poor, letting carbon build on the burner mesh/screen and around the glow area. Boats are great at creating this scenario: small cabins, heaters oversized for the space, and owners running the unit at minimum power for days. That’s how you end up with a heater that “runs” but smokes, smells, and slowly loses reliability.
The best prevention habit is simple and boring: after you’ve fixed the root cause, run the heater at high output for 15–30 minutes periodically. This raises chamber temperature and helps burn off soft deposits before they harden into a crust. If your heater always lives at low power, plan on shorter service intervals and fewer excuses.
Ducting static pressure can contribute too. Undersized ducting, too many reducers, or closed vents make the heater run hotter internally, which can lead to weird cycles and poor combustion stability. It’s not always an obvious connection, but I’ve seen “sooting problems” solved with a duct redesign.
De-coking and parts replacement: what actually restores combustion
If performance doesn’t recover after fixing voltage, fuel air leaks, and air/exhaust restrictions, then you’re into mechanical cleaning. A common service interval is inspecting and de-coking the burner and glow pin screen every ~1,000–2,000 operating hours, sooner if the unit has lived at minimum output. For liveaboards in cold climates, that can be every season, not every few years.
The parts that actually matter are usually the burner insert/screen/atomizer mesh, a complete gasket set, and sometimes the glow pin/glow plug itself. Glow pin replacement helps when the pin is weak or the screen is obstructed; it won’t fix an exhaust backpressure problem. Replace seals whenever you open the combustion side, because a reused gasket is a cheap way to reintroduce leaks and smell.
After service, do a careful run-up and check for smoke at joints, soot streaking, and any exhaust odor in the cabin. A clean start, stable exhaust note, and no visible smoke after warm-up are what you’re paying for. If it still soots after a proper service, go back to installation physics rather than ordering more parts.
Photo by Mariia Ilina on Unsplash
Maintenance Schedule for Boats: Annual Checks + Hour-Based Service
Annual inspection checklist (before cold season)
Once a year, before you actually need heat, open the locker and inspect like you mean it. Check exhaust clamps for corrosion, verify the insulation wrap is intact, and look for heat damage on nearby wiring or hoses. Any soot streaks near joints or the hull fitting get treated as an exhaust leak until proven otherwise.
Inspect the hot-air ducting too: common sizes are 60 mm for small units and 90 mm for medium units, and both get crushed by stored gear with impressive consistency. Make sure outlets aren’t blocked by cushions, and that at least one outlet remains open so the heater can shed heat. Confirm the combustion intake isn’t pulling from a locker full of solvents, paint, or diesel jugs—your heater isn’t a fume extractor.
Hour-based service items and symptoms that shorten intervals
Hour-based service is where reliability lives. If you run a lot at low output, or you short-cycle often, plan to inspect/de-coke the burner and glow screen closer to 1,000 hours than 2,000 hours. White smoke on start, repeated flame-outs, rising soot at the hull outlet, and louder combustion are all early warnings.
Don’t forget electrical maintenance. Clean and tighten supply and ground terminals yearly, and look for green corrosion wicking under insulation in damp lockers. A heater that’s right on the edge of undervoltage will run fine until the first cold night when battery voltage and cable resistance conspire against you.
Spare parts strategy for winter cruising and passages
For winter cruising, carry the spares that actually get you heat back within an hour. My short list is: glow pin/glow plug, burner screen/mesh kit, full gasket set, fuses, short lengths of correct fuel line and connectors, and proper clamps. If your CO alarm has replaceable sensors, carrying a spare sensor unit isn’t crazy on extended trips.
Costs are real, so budget accordingly. Typical service kits run $35–$150, glow pins $70–$180, and exhaust parts/insulation $60–$250 depending on what you disturb. A technician visit is commonly 2–4 hours at $150–$250/hr, so $300–$1,000 disappears quickly when access is awful.
Photo by Levi Teichrib on Unsplash
Installation Issues That Mimic “Bad Heater”: Ducts, Exhaust, Fuel Pickup
Hot-air duct design: outlet sizing, restrictions, and static pressure
A shocking number of repeat faults are airflow problems wearing a disguise. Hot-air ducting is typically 60 mm (2 kW) or 90 mm (4 kW), and every reducer, tight-radius bend, and crushed section adds static pressure. If you’ve got three outlets but two are always closed, you’re forcing the heater into hotter internal operation and sometimes overheat cycling, which can destabilize combustion and increase soot.
Do a duct audit with a tape measure and your hands. Count outlets, confirm diameters, and feel for temperature spread after 10 minutes at high output; one scorching trunk line and weak outlets often means restriction. Also confirm return air pathways within the cabin, because dead-ended compartments can trap heat and fool thermostats into rapid cycling.
Here’s a practical sizing sanity check for common boat setups:
| Heater size | Common hot-air duct size | Typical “gotcha” that causes trouble | Quick fix |
|---|---|---|---|
| 2 kW | 60 mm | 60→50 mm reducer + tight bend | Remove reducer, add a gentler sweep |
| 4 kW | 90 mm | Too few outlets, vents shut at night | Add outlet or keep one permanently open |
| 5 kW | 90 mm (sometimes larger trunks) | Oversized heater short-cycling | Add thermal load or run periodic high burn |
Combustion intake/exhaust routing: bends, length, condensate, thru-hull
Combustion intake/exhaust runs are usually ~24–28 mm ID and sensitive to routing. Every extra meter of exhaust, every tight bend, and every low spot that traps condensate increases backpressure, which can cause no-start, smoky starts, and steady sooting. If the exhaust outlet is where a following sea can wet it, you’re also inviting thermal shock and corrosion.
Exhaust surfaces near the heater can exceed 200°C, so insulation wrap and shielding are not optional where clearance is tight. Support the exhaust so it can’t fret against bulkheads, and keep it well clear of wiring looms and fuel hoses under ISO 9094 fire-protection logic. If you add a small muffler/silencer, mount it securely and plan for condensation management.
Don’t ignore combustion air intake placement. Pulling intake air from a dirty bilge, paint locker, or battery compartment is a recipe for corrosion and poor burn quality. In dusty environments, an intake silencer/filter in the $25–$120 range can extend service intervals.
Fuel pickup, anti-siphon, and hose standards (ABYC/USCG/ISO)
Fuel supply problems aren’t always the pump’s fault. A heater fed through a marginal tee, a clogged pickup screen, or an overzealous anti-siphon valve can starve intermittently, especially when the tank is low or seas are sloppy. Best practice is a dedicated standpipe/pickup where practical, following ABYC H-33 and USCG 33 CFR 183 concepts for safe routing and leak prevention.
If rubber fuel hose is used, it should be marine-rated—ISO 7840 is the common reference—rather than whatever was cheapest at an auto parts store. Keep filters accessible, clamp properly, and pressure-test/inspect for leaks after any disturbance. A heater that sucks air on the suction side can run “fine” at the dock and fail underway, which is the wrong kind of entertainment.
Cost-wise, common installation upgrades are usually cheaper than repeated service calls. A proper through-hull fitting is often $40–$180, a small muffler/silencer $80–$250, ducting/outlets $80–$300, and fuel line/connectors $20–$80. You can burn those numbers in labor fast if you keep blaming the heater.
Repair vs Replace: Costs, Parts, and Break-Even Scenarios
Common repair paths and what they actually solve
Most no-start and sooting cases resolve without replacement once you fix voltage drop, fuel air leaks, and obvious routing restrictions. After that, the most common “real” repairs are glow pin + screen/mesh service, metering pump replacement, and occasionally controller replacement. If you’ve got a heater with 1,500–3,000+ hours in a damp locker, expect corrosion and brittle plastic to factor into your decisions.
Labor and access drive the bill more than parts. A simple glow service on a bench is one thing; doing it upside down in a quarter-berth locker with sharp fiberglass edges is another. If you’re paying $150–$250/hr, a “cheap” part can still turn into an expensive afternoon.
When repeated lockouts point to deeper issues (or replacement)
Repeated lockouts after you’ve confirmed stable voltage at the heater (>11.0 V during glow) and bubble-free fuel usually point to deeper combustion issues or a bad install. If the combustion chamber is heavily coked and the housing is corroded, rebuilding may only buy you time. If OEM parts availability is poor in your cruising area, replacement becomes the more rational path.
The other replacement trigger is when the install itself needs major surgery anyway. If you must reroute exhaust, redo ducts, and rewire to ABYC E-11 standards, sometimes it’s smarter to start fresh with a new kit rather than bolt a worn unit back into a corrected system.
Choosing between Webasto/Eberspacher/Planar service approaches
Webasto and Eberspacher/Espar parts tend to be widely supported, but OEM pumps and controllers can be pricier. Planar/Autoterm parts can be less expensive for certain items (like pumps), but the right answer is whichever you can support where you cruise. If your winter plan includes remote harbors, carry the consumables and choose systems with service documentation you can actually use.
Here are realistic cost ranges that help you decide, without pretending every boat has perfect access:
| Repair/Option | Typical parts cost | Typical labor time | Typical total (parts + labor) | What it tends to solve |
|---|---|---|---|---|
| Diagnostic visit / fault tracing | $0–$50 (misc) | 2–4 hr | $300–$1,000 | Finds voltage drop, priming, restrictions, wiring faults |
| Glow pin + screen/mesh + gasket service | $100–$300 | 2–5 hr | $400–$1,500 | Hard start, white smoke, coking-related flame-outs |
| Metering (dosing) pump replacement | $180–$350 (OEM) / $90–$180 (Autoterm) | 1–3 hr | $350–$1,100 | No fuel delivery, inconsistent dosing, pump failure/noise |
| Controller/thermostat replacement | $120–$400 | 1–2 hr | $270–$900 | Weird lockouts, control faults, dead interface |
| Full heater replacement (unit only) | $1,200–$3,500 | 2–6 hr | $1,700–$5,000 | Corrosion, heavy wear, repeated failures with good install |
| New installation (heater + ducts + exhaust + pickup) | $1,200–$3,500+ | 8–20+ hr | $2,200–$7,000+ | Corrects poor layout, improves reliability and safety |
Passage Planning for Heat: Fuel Burn, Battery Budget, Runtime
Estimating fuel burn by heater size and duty cycle
For planning, use conservative consumption ranges and add margin. Typical burn rates are about 0.10–0.24 L/h for 2 kW, 0.20–0.50 L/h for 4 kW, and 0.24–0.60 L/h for 5 kW, depending on output and conditions. If you expect 8 hours of heat per day on a cold passage, a 4 kW unit at mid output might average 0.30 L/h, so 2.4 L/day, then add 20–30% because forecasts lie and wet crew gear multiplies drying cycles.
For multi-day legs, I do it as “planned hours × realistic L/h × margin,” and I write it in the log. If you’re unsure on distance and days underway, calculate the distance between ports first, because it feeds directly into how many nights you’ll likely run the heater.
Battery/charging plan for the glow phase and overnight running
The glow phase is the electrical punch in the nose: 8–15 A for 2–5 minutes. A weak battery bank, corroded wiring, or long thin conductors can dip the heater below 10.5–11.0 V at exactly the wrong moment. Running draw is modest (~0.7–2.5 A), but starts can be repeated if your thermostat cycles, which is why stable wiring matters.
If you’re anchoring in cold weather, plan around starts. It can be smarter to run a steadier, slightly higher output with fewer on/off cycles than to let the heater short-cycle itself into soot. And if you’re budgeting diesel for engine charging time anyway, you can estimate your fuel needs based on the voyage distance to make sure your heating plan and your charging plan don’t fight each other.
Route planning tie-in: distance, days underway, and heating margin
For a 3–5 day passage, multiply your expected heating hours per day by your chosen burn rate, then add margin for colder-than-forecast conditions. Example: 4 days × 10 hours/day × 0.30 L/h = 12 L, then add 30% = ~16 L. Do the same for amp-hours: if you average 1.8 A running for 10 hours, that’s 18 Ah/day, plus start bursts that might add another 2–6 Ah/day depending on cycling.
Finally, log runtime and faults. A heater that needs more start attempts than last month is telling you something, and it’s better to listen at the dock than offshore. If you’re building a departure timeline, it helps to check the nautical miles for your planned route so your “number of nights underway” (and heating margin) is based on reality. Heat is a safety system when you’re cold and wet, not a comfort accessory.
Frequently Asked Questions
During the glow phase, what voltage should I measure at the heater terminals on a 12 V system, and how do I calculate whether my wiring run is causing a ≥0.5 V drop at 10–12 A?
Measure at the heater +/− during glow and aim to stay above roughly 11.0 V, because many units cut out around 10.5–11.0 V at the heater terminals. To quantify drop, measure battery-post voltage and heater-terminal voltage at the same moment; the difference is your drop (e.g., 12.2 V at battery and 11.6 V at heater = 0.6 V drop). At 10–12 A, that’s often enough to cause start faults, so correct with shorter runs, 10–12 AWG on longer circuits, clean terminations, and proper overcurrent protection per ABYC E-11.
What dosing pump tick rate (Hz) range is typical across 2–5 kW heaters, and how can I distinguish “commanded ticks but no fuel” from a blocked pickup, air leak, or incorrect pump orientation?
A typical command range is about 1.0–5.5 Hz (60–330 strokes/min) depending on output. If you hear ticks but fuel doesn’t advance in a clear line segment, suspect suction-side air leaks at barbs/clamps, cracked 2 mm ID nylon line ends, an empty pickup/standpipe, or a blocked filter. Also verify pump orientation and mounting angle per the heater manual; a wrongly mounted pump can tick happily while delivering inconsistently, especially after warm-up.
How do exhaust run length, number of bends, and low spots that trap condensate increase backpressure enough to cause no-start or heavy sooting on 24–28 mm systems?
On 24–28 mm combustion exhaust, small restrictions matter because the blower has limited pressure capability. Each tight bend and extra meter adds resistance, and low spots collect condensate that effectively reduces diameter and creates intermittent blockage. The result is unstable airflow, poor mixture, smoky starts, flame-outs, and sooting because combustion can’t stabilize; correcting routing, reducing bends, and eliminating condensate traps often fixes “bad heater” symptoms.
If I see repeated white smoke on start followed by flame-out, which measurements best confirm ignition instability versus overfueling (e.g., glow-current draw, pump ticks, combustion air restriction)?
Start by measuring voltage at the heater during glow; if it sags toward 10.5–11.0 V, glow performance can be weak even when the battery seems fine. Then confirm the pump is ticking in a normal range and that fuel is actually moving without bubbles; white smoke with no stable burn often means fuel is present but ignition is marginal. Finally, inspect combustion intake/exhaust for restriction (crushed hose, blocked through-hull, condensate low spot), because restricted air can mimic ignition failure by preventing a clean light-off.
When replacing a glow pin and burner screen/mesh, what seals/gaskets must be renewed to prevent intake/exhaust leakage into the boat, and what post-service leak checks should I perform?
Replace the combustion-side gaskets and seals that you disturb during teardown—typically the burner gasket(s), housing seals, and any O-rings specified in the service kit—because reused seals are a common source of exhaust leakage and odor. After reassembly, run the heater through a full start, stabilization, and shutdown, then inspect for soot streaks at joints, sniff cautiously around the heater and exhaust connections, and verify the CO alarms operate and are in-date (ABYC A-24 mindset). If anything smells “exhausty,” stop and re-check joints and clamps before you sleep aboard.
About the Author
Related Articles
Docking a Catamaran: Maneuvers, Springs & Crew
Master docking a catamaran with close-quarters maneuvers, spring lines, and crew roles. Learn the steps and dock with confidence—read now.
By Breezada Team
Best Stove for a Sailboat: Propane vs Diesel vs Induction
Compare propane, diesel, and induction stoves for cruising safety, cost, and power needs—use our guide to choose the best stove for your sailboat.
By Breezada Team
Single Handed Docking Sailboat: Line Methods & Drills
Learn single handed docking sailboat line-first methods, setup, and drills for crosswind/current. Practice safely—get the step-by-step plan now.
By Breezada Team
Sailboat Propane System Safety: Lockers & Tests
Learn sailboat propane system safety—locker rules, solenoids, and leak tests. Use this checklist to inspect your setup and upgrade safely.
By Breezada Team