Sailboat Bottom Paint Guide: Types, Costs, Prep
Bottom paint isn’t glamorous. It’s also the difference between a boat that tracks and tacks like it should—and one that feels like it’s dragging a wet carpet. This guide covers sailboat bottom paint types, realistic costs, how to estimate gallons, prep that actually holds up, film thickness targets (mils), and repaint intervals you can plan around.
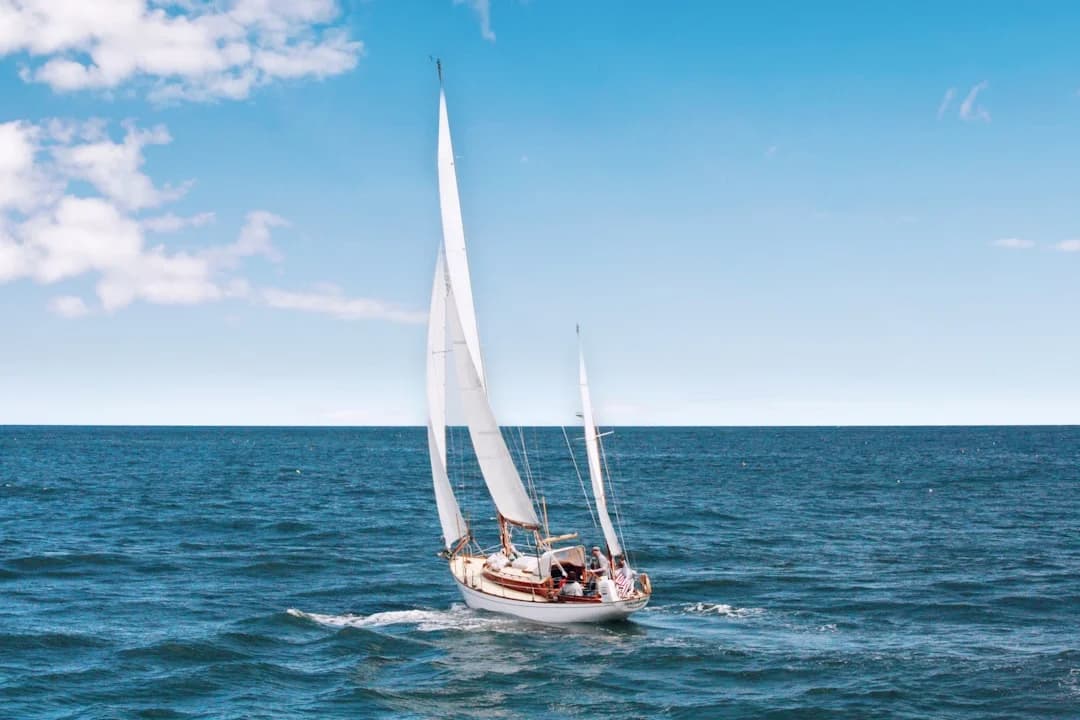
Photo by Shelby Cohron on Unsplash
Sailboat Bottom Paint Basics: What It Does and When You Need It
How fouling builds (slime → weed → barnacles)
Marine growth fouling starts as a slick biofilm within days, especially in warm water. Give it a couple weeks and you’re into grass and weed; give it longer and barnacles show up with their little concrete hats. That progression matters because slime alone can knock speed down and drive fuel burn up, while hard growth adds vibration and can accelerate corrosion on underwater metals.
If you haul a boat and let the slime dry, you’ll learn a truth that boatyards have known forever: dried slime bonds like it’s paying rent. Plan to pressure-wash within 1–2 hours of haul-out, even if you’re tired and hungry. The longer you wait, the more scraping and sanding you’ll be buying later.
How antifouling works: biocide release vs self-polishing
Antifouling paint for sailboats works mainly two ways. Hard/modified-epoxy paints rely on a controlled biocide leaching rate; the film stays put while the chemistry does the work, until it doesn’t. Ablative (self-polishing) paints slowly wear away underway, exposing fresh biocide and keeping the surface from turning into a museum exhibit.
Here’s the trap: a hard paint can look intact after the biocide is depleted. You’ll see a solid, even film and assume you’re fine—right up until the growth starts clinging like it owns the place. Performance is judged by growth and cleaning effort, not how pretty the color looks hauled out.
Cases where you can skip bottom paint (and when you can’t)
If you keep the boat in a slip most of the season, bottom paint is not optional in most waters. If you’re lift-kept or truly trailer/dry-sailed and the hull dries between uses, you can sometimes skip antifouling and use wax or a slick coating—provided you’re disciplined about keeping her out of the water between sails.
Service life is regional and honest miles matter. In temperate waters, ablatives often run 12–24 months; in warm, nutrient-rich areas many owners plan around ~12 months. Prep quality and film thickness drive results more than brand loyalty, and copper restrictions in some regions are pushing more owners toward non-copper formulas.
Practical tip (the one that saves weekends): Plan your haul so the wash happens immediately, then do your inspection and masking that day. A missed wash window can add 2–6 hours of nasty scraping later.
Types of Sailboat Bottom Paint: Ablative vs Hard vs Hybrid
Ablative (self-polishing): best for cruisers and variable use
Ablatives are the working sailor’s friend because they tolerate irregular use and tend not to build up into a geological layer over time. They wear as you sail, which keeps fresh biocide at the surface and reduces the need for aggressive sanding each season. In practice, a good ablative in temperate water often makes 12–24 months realistic if your film thickness is right and you aren’t scrubbing it off with a brick.
Ablatives don’t love heavy-handed cleaning. If a diver scrubs hard every 2–4 weeks, you can literally erase your protection. For cruising boats that sail regularly and get gentle wipes, ablative is usually the least drama per dollar.
Hard/modified epoxy: best for racing and frequent scrubbing
Hard paints are tougher, tolerate more aggressive brushing, and can be burnished for racing. They’re a good fit where the boat is cleaned often, where speed matters, or where you want a durable film for repeated in-water scrubs. But once the biocide is gone, the paint can sit there looking fine while the bottom turns into a reef.
Hard paints can also create long-term build-up, especially after 4–8 seasons of “just one more coat.” That’s when you start budgeting for sanding, peeling, or a full strip—none of which are known for improving anyone’s mood.
Hybrid, slime-focused, and foul-release coatings (silicone/PTFE)
Hybrids aim for controlled polishing with tougher binders—handy when your complaint is “slime city but no barnacles.” Some regions are more slime-dominant than shell-dominant, and a slime-focused formula can be the difference between a quick wipe and a diver spending 90 minutes cursing your hull.
Foul-release coatings (silicone/PTFE) are a different animal: very slick, low surface energy, and often non-biocidal. They can work well on fast boats that move often, but they’re expensive, prep-sensitive, and not thrilled by abrasion or beaching. They also tend to punish sloppy application more than traditional paints.
Copper vs non-copper antifouling and aluminum compatibility
Copper bottom paint commonly contains about 40–76% cuprous oxide by weight, depending on formulation. Higher copper often correlates with longer performance, but copper restrictions are emerging in some regions, which is pushing more sailors toward non-copper antifouling paint (often Econea/other biocides). Expect pricing around $260–$400/gal for many copper-free options, versus $170–$280/gal for hard paints and $250–$350/gal for premium multi-season ablatives.
Compatibility can bite you hard. Avoid copper paints on aluminum hulls, saildrives, and outdrives unless you’re following a manufacturer-approved barrier/primer system; galvanic corrosion isn’t a theory project. Use aluminum-safe antifouling and the primer system specified, and keep ABYC E-11 bonding continuity in mind so you don’t “paint-insulate” your own corrosion protection.
Quick decision bullets (real-world version):
- Water: salt (more aggressive fouling) vs fresh (often slime-focused)
- Temperature/nutrients: warm water shortens planning horizon to ~12 months
- Use: sails weekly vs sits idle 6–8 weeks at a time
- Cleaning: gentle wipes vs aggressive scrubbing every 2–4 weeks
Bottom Paint Cost Breakdown: DIY vs Yard, Real Numbers
Materials, consumables, and PPE that people forget
Bottom paint cost is rarely just paint. Rollers, solvent wash, masking, sanding discs, strainers, mixing paddles, gloves, and a pile of rags add up fast, typically $40–$150 in consumables. Add solvent wash/dewaxer at $20–$60, and PPE (half-mask respirator + P100 filters + goggles + suit + gloves) at $60–$180.
Dust control is where DIY budgets get honest. A basic dustless sanding/HEPA setup can run $150–$600, and many yards now require vacuum sanding and ground tarps to meet stormwater permits. Even if US EPA RRP lead rules aren’t written for your boat, yards often adopt similar containment practices because fines are expensive and runoff doesn’t care what you were painting.
Haul-out, lay days, and why scheduling drives the bill
For a 30–40 ft sailboat, haul-out + pressure wash + blocks + relaunch often lands around $600–$1,800 depending on region and yard. Then you pay for time: lay days typically $20–$80/day, and delays stack up quickly if you miss a recoat window or get weathered out. A two-day job that becomes five days can quietly add $60–$240 in storage fees alone.
If you’re planning routes and seasonal timing, this is where checking the nautical miles for your planned route helps. If your summer is built around a 600–1,200 nm loop, it’s smart to schedule haul-out before or after, not mid-cruise when you’re tired and the yard is booked solid.
When pro labor is cheaper than ‘DIY + delays’
Professional labor for a 30–40 ft boat (prep + 2 coats) is often $1,500–$4,500 plus materials. Heavy prep—unknown paint, peeling layers, blisters—pushes totals into $4,000–$10,000+ quickly. That’s when “I’ll just DIY it” can turn into “I live at the yard now,” with lay days, weather delays, and tool purchases quietly eating the savings.
Here’s the comparison sailors actually need when budgeting:
| Line item (30–40 ft typical) | DIY (typical) | Professional (typical) | Notes |
|---|---|---|---|
| Antifouling paint (2–3 gal common) | $450–$1,050 | $450–$1,050 | Depends on type: $170–$400/gal |
| Haul + wash + block + relaunch | $600–$1,800 | $600–$1,800 | Yard fee either way |
| Lay days (2–6 days) | $40–$480 | $40–$480 | Scheduling matters more than you think |
| Consumables (rollers/tape/plastic) | $40–$150 | Included/variable | DIY forgets this line |
| Solvent wash/dewaxer | $20–$60 | Included/variable | Follow product TDS |
| PPE (P100 respirator etc.) | $60–$180 | Included | OSHA 29 CFR 1910 baseline practices |
| Dustless sanding / HEPA containment | $150–$600 | Included/variable | Many yards require it |
| Labor (prep + 2 coats) | Your time | $1,500–$4,500 | Heavy prep drives big increases |
How Much Bottom Paint to Buy: Coverage and Examples by Size
Step 1: Estimate underwater surface area (rule-of-thumb formula)
Buying paint by boat length alone is how you end up making a frantic chandlery run in wet socks. A better method is underwater surface area using a rule-of-thumb that works surprisingly well for monohulls:
Underwater area ≈ LOA × (beam + draft) × 0.85
That 0.85 factor keeps the estimate realistic for hull shape, but it’s still an estimate. Keels, rudders, and a beefy canoe body can push you higher, and flat underbodies can push you lower.
Step 2: Convert area to gallons using coverage and waste factors
Most bottom paints cover about 350–450 sq ft per US gallon per coat. I budget with 400 sq ft/gal unless a product data sheet says otherwise, then add 10–20% for keel/rudder extra work and roller waste. That’s before you account for stripe coats at the waterline and leading edges, which are where paint goes to die first.
A practical coat plan is: 2 full coats on the hull, plus an extra stripe coat on leading edges of keel/rudder, bow, and waterline. That means those zones effectively see 2–3 coats total.
Worked examples: 25, 30, 35, and 40 ft sailboats
Below are realistic planning numbers using the formula and 400 sq ft/gal coverage. Beam and draft vary wildly by design, so treat this as “buying guidance,” not scripture.
| Boat size (example) | Assumed beam (ft) | Assumed draft (ft) | Estimated underwater area (sq ft) | Gallons per coat @ 400 sq ft/gal | Typical buy for 2 coats + stripe |
|---|---|---|---|---|---|
| 25 ft | 8.5 | 4.0 | 25×(12.5)×0.85 ≈ 266 | 0.67 | 2 gal (gives waste + stripes) |
| 30 ft | 10.0 | 5.0 | 30×(15)×0.85 ≈ 383 | 0.96 | 2–3 gal |
| 35 ft | 11.5 | 5.5 | 35×(17)×0.85 ≈ 506 | 1.27 | 3–4 gal |
| 40 ft | 13.0 | 6.5 | 40×(19.5)×0.85 ≈ 663 | 1.66 | 4–5 gal |
The outline example checks out: 34 ft LOA, 11.5 ft beam, 5.5 ft draft → ~491 sq ft underwater area. At 400 sq ft/gal, that’s ~1.23 gal per coat, and you round up because you will spill some, and because the keel always wants more than you planned.
Route-planning tie-in: estimate seasonal repaint timing by miles sailed
Ablatives polish off faster with more miles and higher average speed. If your season is 800–1,500 nm of coastal cruising, you may be right on the edge between “fine for next spring” and “needs a refresh.” Use a route-distance tool for totaling nautical miles between ports when sketching routes to total your seasonal miles; it’s a practical way to predict whether you’ll be hauling at 12 months or stretching to 18–24.
It also helps with planning a mid-season touch-up haul if you’re doing a high-mileage summer. A quick haul and one stripe-coat session can be cheaper than fighting growth for the last six weeks of the season.
Bottom Paint Prep That Determines Adhesion: Wash, Sand, Mask
Cleaning and dewaxing: what to do right after haul-out
The first hour after haul is when you either win or lose time later. Pressure-wash promptly—again, within 1–2 hours is ideal—because slime dries and bonds, then turns into sanding dust you don’t want in your lungs. Scrape barnacles while they’re still soft; after a day they get stubborn and you’ll start inventing new words.
After wash and dry, follow your paint’s TDS on solvent wiping. Dewaxing is common on topsides; on bottoms it’s more situational, but contamination at the waterline is a classic adhesion killer. If you do solvent wipe, use clean rags and change them often; smearing dissolved crud around is not “prep.”
Sanding strategy by goal: feathering, scuffing, fairing
Sanding grit should match the job. For peeling edges and rough transitions, 80-grit is your blunt instrument; it feathers edges and removes weak film. For scuff-sanding between coats or prepping intact antifouling, 100–120 grit is a common range, but verify the product sheet because some paints want a specific profile.
Save 180–220 grit for above-waterline fairing and finishing work, not for antifouling adhesion. Too fine below the waterline can reduce mechanical tooth, and you’ll find out later when the waterline starts lifting like a bad sticker.
Masking and hardware: through-hulls, transducers, and bootstripes
Mask the bootstripe/waterline typically 1–2 inches above the static waterline to account for loading and heel. If you paint exactly to the old line and then cruise with full tanks and a dinghy on davits, you’ll get the “scummy smile” above the paint. Boats are honest that way.
Be disciplined around hardware. ABYC H-27 is a good reminder that through-hulls and seacocks must remain serviceable; don’t paint over handles, inspection points, or labels. For sensors, follow the manufacturer: don’t paint paddlewheel speed sensors, and be careful with transducer faces because excessive thickness can affect performance.
Safety and containment: dustless sanding, PPE, and yard rules
Old antifouling dust is not something you want in your body. At minimum, use a NIOSH-approved half-mask with P100 filters, eye protection, gloves, and a suit you don’t mind throwing away. Many yards require vacuum sanding and containment; they’re thinking about stormwater permits and OSHA-like shipyard practices (29 CFR 1915), not your personal convenience.
Also watch ignition sources. Solvents and fumes around gasoline spaces are a bad combination; ISO 8846 ignition protection is the principle to respect even on small jobs. Use ventilation and keep non-ignition-protected tools away from fumes, especially if you’re anywhere near fuel fills or vents.
Barrier Coats and Primers: Blister Prevention and Compatibility
When an epoxy barrier coat is worth it (and when it isn’t)
An epoxy barrier coat is insurance against osmotic blisters, not a magic spell. Blisters form when moisture migrates through gelcoat and reacts with soluble components, building pressure over time. If your hull is older, lives in the water year-round, or already shows blister history, a barrier coat is often worth the cost and downtime.
If the boat is mostly dry-sailed, or you already have a sound barrier system with stable condition over several seasons, adding more epoxy might not buy you much. I’d rather see money spent on fixing poor prep, improving film thickness, and addressing hardware issues that actually sink boats.
Target mils and coat counts: planning for total DFT
Barrier systems are about thickness and continuity. A common target is ~10–12 mils total DFT, which typically takes 4–6 coats depending on the product and your application thickness per coat. Barrier coat epoxy often runs $120–$220 per gallon kit, and coverage depends on the mil build you’re chasing.
Staging matters: you want coats within the epoxy recoat window so they chemically bond, reducing sanding between coats. Miss the window and you may need to wash, de-blush, and sand—none of which are fun on a tight haul-out schedule.
Primers/tie-coats for switching paint systems and metals
Switching bottom paint systems is where tie-coats earn their keep. If the existing paint is unknown, a small test patch and a solvent rub (per manufacturer guidance) can indicate whether you’re dealing with hard vs soft/ablative. When in doubt, many paint makers specify a dedicated tie-coat primer to bridge compatibility, and that’s usually cheaper than a full strip.
Metals need their own logic. Aluminum appendages generally want an aluminum-safe primer and aluminum-safe antifouling; copper-based systems without the right barrier stack can create galvanic problems fast. Tie this back to ABYC E-11: don’t accidentally insulate bonding connections or anode contact surfaces with paint, then wonder why corrosion got enthusiastic.
While fiberglass isn’t steel, coatings-industry prep concepts still apply. ISO 8501/8502/8503 are steel standards, but the ideas—cleanliness, soluble salts, surface profile—translate well as best practice parallels when you’re trying to make coatings stick underwater.
Application: Film Thickness, Recoat/Launch Windows, High-Wear Zones
Mixing, copper settling, and roller technique
Copper settles. If you don’t mix thoroughly—then keep mixing periodically—you’ll apply solvent and binder early and copper-rich sludge later. That’s a great way to get patchy performance, especially along the keel where you’re working slower and the can sits longer.
Use solvent-resistant rollers, typically 3/8"–1/2" nap (confirm per TDS), and a brush for cut-ins around stands and fittings. Roll on and leave it alone; over-rolling pulls paint back off the peaks and leaves thin spots that fail early.
Hitting target WFT/DFT with a wet-film gauge
Most antifoulings want about 2–3 mils DFT per coat. Because solvents flash off, you usually need ~4–6 mils WFT to land there, depending on solids content—verify the product sheet. A cheap wet-film gauge is one of the best tools you can buy because it replaces guesswork with numbers.
Check WFT every 10–15 minutes until you learn your roller load and pace. If you’re consistently low, slow down, reload more often, and stop trying to stretch the gallon. Thin coats are why “this paint is terrible” gets said about perfectly good products.
Recoat windows and launch windows: avoiding missed schedules
Recoat windows are commonly ~3–24 hours, depending on product and temperature. Many paints allow recoating at “thumbprint tacky,” which is a practical test when you’re working outdoors. Launch windows vary widely too—often 24 hours to 60 days—and this is where haul-out scheduling becomes a real project management exercise.
Plan around dew and temperature swings. If the dew point is within about 5°F (3°C) of the surface temperature, you’re flirting with moisture on the film, especially near sunset. That’s a classic setup for waterline peeling next month.
| Checkpoint | Typical target / rule | Why it matters |
|---|---|---|
| Temp | 50–85°F (10–29°C) common | Affects cure and recoat timing |
| Humidity | Often ≤85% RH | High RH increases condensation risk |
| Dew point spread | Keep ≥5°F (3°C) | Avoid moisture contamination |
| WFT | ~4–6 mils (verify TDS) | Needed to reach target DFT |
| Recoat time | ~3–24 hours typical | Miss it and you may need sanding |
| Launch window | ~24 hours to 60 days | Scheduling drives lay days |
Stripe coats: keel/rudder leading edges, bow, and waterline
If you do nothing else “extra,” do stripe coats. Put an additional coat on the keel and rudder leading edges, the bow, and the waterline—these are high-flow, high-abrasion areas. Plan those zones for 2–3 coats total, even if the rest of the hull only gets two.
I also like a little extra paint around the keel-hull joint because it sees turbulence and often gets nicked during groundings and travel-lift days. No judgment—boats go places and sometimes the bottom gets closer than planned.
How Often to Repaint and How to Maintain Between Haul-Outs
Repaint intervals by water temperature, nutrients, and use
“How often to repaint bottom paint” is really three questions: water, storage, and maintenance. In temperate saltwater, ablatives often go 12–24 months with good film build and reasonable cleaning. In warm, nutrient-rich waters, many sailors plan on ~12 months, sometimes less if the boat sits idle for long periods.
Freshwater can be lighter on barnacles but heavy on slime. That can favor a slime-targeted hybrid or a non-copper system, even if your buddy swears copper is the only answer. The boat doesn’t care what your buddy thinks; it cares about local biology.
Cleaning methods: diver wipes vs aggressive scrubbing
Cleaning frequency interacts with paint type. Hard paints tolerate more aggressive scrubbing, so a diver brushing every 3–6 weeks can work without stripping the film. Ablatives want a gentler touch; repeated aggressive scrubs can remove the working layer and shorten life fast.
If you’re tracking seasonal mileage, combine your cleaning plan with route planning. Estimate your fuel needs based on the voyage distance and total the distances between cruising legs to estimate whether your use pattern is high-polish or low-polish for ablatives. High miles can actually help some ablatives perform by keeping the surface renewing—up to the point where you polish it away.
Failure-mode troubleshooting: symptom → cause → fix
Most failures are boring: contamination, missed windows, wrong system match, or thin film. Here’s a matrix that matches what I see most often.
| Symptom | Likely cause | Practical fix |
|---|---|---|
| Peeling at waterline | Dew/condensation, contamination, poor scuff | Re-prep band with 80–120 grit, solvent wipe per TDS, repaint in better conditions |
| Flaking on keel leading edge | Impact + insufficient stripe coats | Add 1–2 stripe coats; consider tougher hybrid/hard paint there |
| Heavy slime but few barnacles | Wrong biocide for region or low copper/non-slime formula | Switch to slime-focused hybrid or appropriate non-copper biocide |
| Barnacles despite “good-looking” hard paint | Biocide depleted though film remains | Recoat; don’t trust appearance—judge by growth and cleaning effort |
| Patchy burn-through | Thin film/low WFT, over-rolling | Use wet-film gauge, hit 4–6 mils WFT, slow down |
System checks while hauled: through-hulls, anodes, and sensors
Haul-out is when you can actually inspect the parts that keep seawater outside. ABYC H-27 is the mindset: check seacock operation, hose clamps, and access. Don’t paint moving parts or bury labels under antifouling; you’ll regret it when you’re upside down in a locker with a flashlight.
Check anodes and bonding continuity with ABYC E-11 in mind. Keep anode contact surfaces clean and electrically continuous; paint is an insulator and it’s very good at being in the wrong place. For sensors, follow the manufacturer’s paint guidance and keep paddlewheels and sensitive transducer faces clear or appropriately coated with compatible, thin layers.
Frequently Asked Questions
How do I measure and hit a 4–6 mil wet-film thickness on antifouling with a wet-film gauge, and how does that translate to a 2–3 mil dry-film target after solvent flash-off?
Use a stepped wet-film gauge immediately after rolling a small area (within 30–60 seconds). Press it into the wet paint and read the highest tooth that gets coated; adjust your roller load until you consistently see ~4–6 mils WFT (verify your product TDS). After solvents evaporate, most antifoulings land around ~2–3 mils DFT per coat, depending on solids content, which is why thin-looking “coverage” often fails early.
If I don’t know what bottom paint is currently on my hull, what solvent-rub or test-patch protocol can I use to decide between a tie-coat primer vs full removal before switching from hard to ablative (or vice versa)?
Start with a small, controlled test area. Do a solvent rub per the paint manufacturer’s guidance (often a strong solvent on a rag) and see if color transfers or the surface softens—softening suggests an ablative or softer matrix. Then apply a test patch of the new system (or the specified tie-coat primer) and check adhesion after cure with a crosshatch/tape pull; if it fails, don’t argue with physics—use the recommended tie-coat or plan removal.
What’s the correct masking and coating approach for mixed underwater appendages (bronze through-hulls, stainless shafts, aluminum saildrive/outdrive) to avoid galvanic issues and copper-on-aluminum incompatibility?
Mask and keep seacocks serviceable per ABYC H-27, and avoid insulating bonding points per ABYC E-11. Bronze through-hulls typically tolerate standard antifouling on the exterior, but keep threads, handles, and service areas clean. For aluminum saildrives/outdrives, do not apply copper-based antifouling unless you’re using a manufacturer-approved barrier/primer system; use aluminum-safe primers and aluminum-safe antifouling to prevent galvanic corrosion.
How many epoxy barrier-coat applications are typically required to reach 10–12 mils total DFT, and how should I stage coats to stay inside the epoxy recoat window without amine-blush adhesion loss?
Most systems target ~10–12 mils total DFT, which commonly takes 4–6 coats depending on product and technique. Stage coats to stay inside the epoxy’s recoat window so you get chemical bonding; if you exceed it, wash off any amine blush (water and Scotch-Brite is common), dry thoroughly, and sand to restore tooth before continuing. Temperature changes can shorten or extend recoat times, so plan days, not just coats.
Why do some hard modified-epoxy antifoulings stop working while the paint film still looks intact, and what inspection cues (growth pattern, cleaning resistance) confirm biocide depletion?
Hard paints can remain physically present after the biocide has leached out, so the film looks fine while performance is gone. The cues are practical: faster slime buildup, barnacles attaching in clusters, and a sudden increase in cleaning effort—especially if the same water and maintenance routine used to work. If a diver reports needing significantly more pressure to clean, or growth returns in days instead of weeks, assume depletion and recoat rather than trusting the hauled-out appearance.
If you want the shortest decision flow that still works: choose paint type based on water and cleaning style, budget the full project including haul/lay days, buy paint based on underwater area and a 2-coat-plus-stripes plan, prep like adhesion matters (because it does), apply to verified mil targets, then set repaint timing based on fouling pressure and how you actually use the boat.
About the Author
Related Articles
Diesel Heater Troubleshooting Boat: No-Start & Soot Fixes
Fix diesel heater no-start and sooting on your boat. Step-by-step checks for power, fuel, air/exhaust and maintenance—read the guide now.
By Breezada Team
Docking a Catamaran: Maneuvers, Springs & Crew
Master docking a catamaran with close-quarters maneuvers, spring lines, and crew roles. Learn the steps and dock with confidence—read now.
By Breezada Team

Best Stove for a Sailboat: Propane vs Diesel vs Induction
Compare propane, diesel, and induction stoves for cruising safety, cost, and power needs—use our guide to choose the best stove for your sailboat.
By Breezada Team
Single Handed Docking Sailboat: Line Methods & Drills
Learn single handed docking sailboat line-first methods, setup, and drills for crosswind/current. Practice safely—get the step-by-step plan now.
By Breezada Team